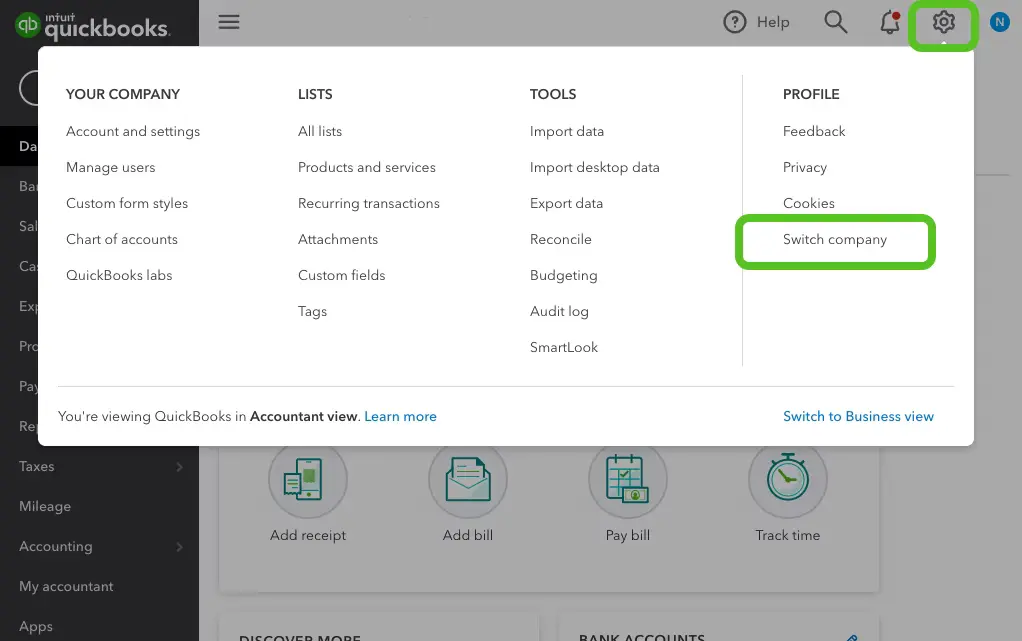
QuickBooks lets you have multiple companies under the same QuickBooks online account. However, each of the company files is its own paid subscription but can be accessed easily with the same sign-in info. This simply lets you manage and switch between the companies more efficiently and without any hassle. However, merging two companies in QuickBooks online is not possible. But it lets you consolidate and compare QuickBooks companies easily. This article will help you create or add another company file to QuickBooks online. Let us check out the steps involved in the procedure later in this segment. However, for any queries related to QuickBooks online or QuickBooks desktop, you can give us a call at +1-888-510-9198, and connect with our technical support professionals.
Read This: How to Fix QuickBooks Online Error 101 – Banking Connection Issue (Error 101)?
Move existing company files to the same account
In case you have various companies under separate accounts in QuickBooks online, you can move them all into one account by performing a simple set of steps.
Send an invite
You can send an invite to the email address, you wish to access all your companies with. Note that only the company admin can send invites and also ensure that you already have the Intuit account with this email.
- Sign in to one of your QuickBooks online companies that can be accessed with the email you do not use now.
- Further, Invite the new email to the company file. In case you see a user limit message, then you will have to add a license.
- Now, select a user type and if you want the new email to manage other users and the company info, then you will have to choose Company Admin.
- Navigate to the inbox for the new email and choose the link you might have got for the invite.
You will now be able to sign in to the company file using the new email.
Also Check This Out: Backup your QuickBooks company file – Easy Steps
Add a new company to QuickBooks Online
For this, you need to visit the QuickBooks pricing page and choose the subscription option you want. This further opens one of two experiences. Let us evaluate:
- In case you are signed in to QuickBooks, you will be asked to confirm the account you wish to sign in with. However, if the account displayed is one you want to use for the new company file, then simply choose Yes, that’s correct.
- If you haven’t signed in recently, then you will be asked to create an Intuit account. Don’t fill this out unless you want to connect your new company file to a new account. Or else, look for adding a company to an existing account section and choose the sign-in link. You can sign in with the user ID password you use for QuickBooks.
Later on, carry out the onscreen prompts to create a new company file.
Also Read: How to Fix Qbwin.Log: Lvl_error – Verify Online Account Information or Invalid Customer Id Number?
Switching between two company files

When you sign in, QuickBooks asks which company file you want to open. In order to switch between companies, you can choose the settings tab and further select switch company.
Manage Multiple companies in QuickBooks Online
When you quickly switch between multiple companies you have set up, they are still separate. Here are a couple of things that can be done to manage all data in your company files.
Users
Note that, users you set up for one company aren’t automatically granted access to the other. In case you want to give them access, then you can simply invite them.
Online Banking
In case you connect a bank or credit card account to one company, then it isn’t added or visible from the second one. This requires you to connect it separately for each company.
Lists
You can simply move your lists (vendors, customers, inventory, or chart of accounts) to the new company, so you do not have to start from scratch. Note that, your companies are kept separate for a reason and any changes you make in the future in one company won’t be updated in the other’s list.
You might find this useful: Create an invoice in QuickBooks Online
Conclusion!
Hopefully, the set of steps above might help you create or add a company file to QuickBooks online. However, if you aren’t sure about performing the process manually, you can simply reach out to our technical support team at +1-888-510-9198, and they will provide you with instant support and guidance related to all sorts of QuickBooks queries.
FAQs Related to Create Another QuickBooks Company in QBO?
You can add another company file in QuickBooks online using the steps below:
1. Select Buy Now or Free 30-day trial.
2. Select again from the same buttons under the subscription you want to avail.
3. On the Sign-up page, click the Add another company hyperlink.
4. Enter the login credentials you always use and select Add new company.
Log in as an admin to the company file you need to import. Go to the Company menu, then select Export Company File to QuickBooks Online. Select Get Started. Click Select Destination, then sign in to your QuickBooks Online account.
It is possible to have multiple companies under the same QuickBooks online account. Every company file is its own paid subscription, but you can access them with the same credentials.
On the login page, select the Subscribe here link next to Already have an Intuit account? With the same credentials you have for your current company. If you want to have two separate sets of credentials, enter a new user ID. Follow the on-screen instructions to create a new company file.
Other Related Articles
How to Transfer QuickBooks Company Files to QuickBooks Online
QuickBooks File Doctor – Fix your Damaged Company File or Network?
How to Rectify QuickBooks Unable to Backup Company File Error?


