Mistakenly turned-on sales tax, and now unable to turn it off in QuickBooks Online? Well, here is a quick guide for you. Automated sales tax is an amazing feature in QuickBooks. However, if you mistakenly turn on sales tax, but don’t want it to affect your overall invoices or do not charge sales tax, then you have an option to turn it off. In simple words, if you have the setting turned on in your QuickBooks online account, you will have to turn it off before using the new invoices experience. This will further help you in setting up your account for hassle-free use later on.
To help you out with the process to turn off sales tax in QuickBooks online, we have curated this piece of writing sharing how to turn off sales tax in QuickBooks online? For more details, stick around to this piece of writing till the end, or you can further get in touch with our technical support team at +1-888-510-9198, and let them help you out with your QuickBooks online sales tax queries and more.
Well, the ability to disable sales tax is available to all customers on both classic and automated sales tax from September 13, 2023. However, this is possible only if you haven’t created a transaction with sales tax in the past. In case you have any, you will have to delete these first. Removing the tick from the taxable box on the invoice will simply not work. You will have to manually remove sales tax transactions. And this can be done using a couple of steps enumerated below:
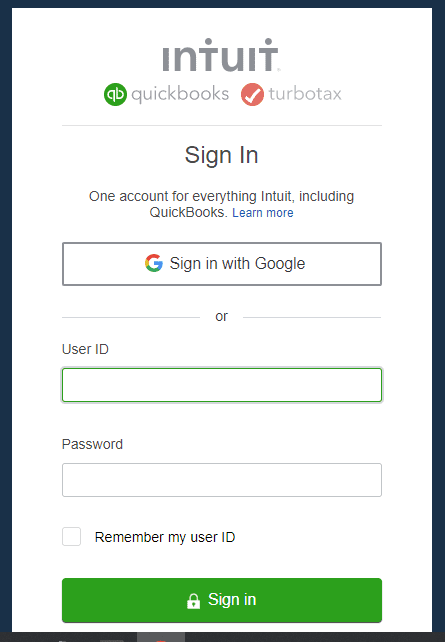
You will first have to sign in to your QuickBooks online account.
Heading forward, navigate to the reports tab.
Once you reach there, look for and open the sales tax liability report.
Now, set the report period to all dates. All agencies and tax items are displayed in the report.
Followed by selecting the taxable amount, in order to open a report with all transactions having global sales tax on them.
To continue, carry out the steps below:
Note down the details of the transactions.
Further, you need to delete the transactions. Note that the transactions deleted can be viewed in the Audit log.
Once done with that, turn off the sales tax feature.
And further refer to the sections for manual or automated sales tax.
Towards the end, re-enter the deleted transactions.
Turn off Sales Tax in QuickBooks Online (Automated Sales Tax experience)
Now that you have removed transactions having the sales tax, it is time to turn off the sales tax. The below steps are related to turning off sales tax in the automated sales tax experience. Let us have a look:
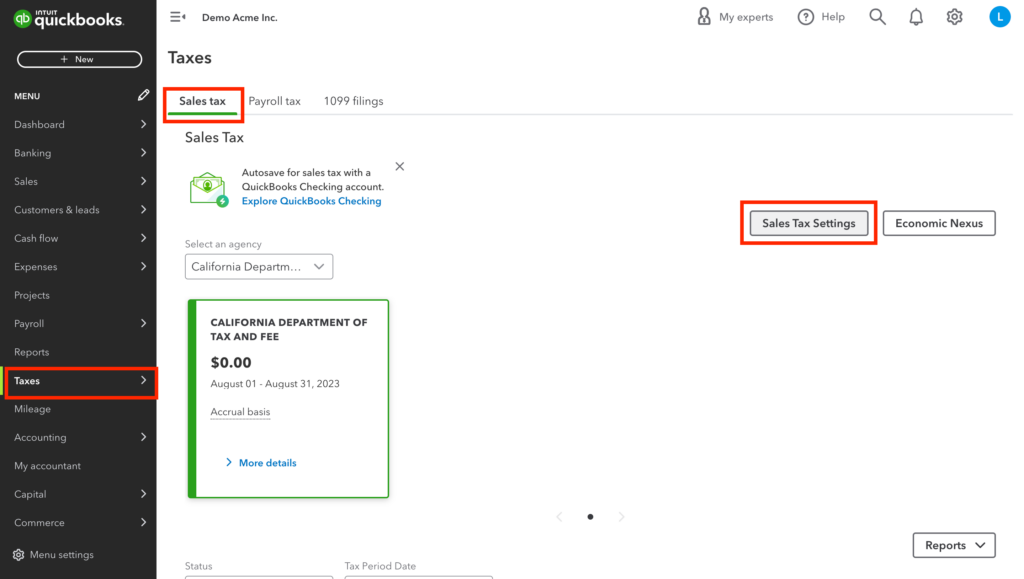
Initially, head to the taxes tab and further choose sales tax.
Once done with that, opt for sales tax settings
Followed by selecting turn off sales tax.
You now have to choose yes to confirm.
Turn off Sales Tax in Manual Sales Tax Experience
If you want to turn off sales tax in manual sales tax experience, then the steps might differ from the automated ones. The steps involved in this procedure are:
Navigate to the taxes tab and further opt for sales tax.
You now will see an option to go to the new sales tax experience, where you will have to choose do it later tab.
Once done with that, choose edit sales tax settings under related taxes.
After that, you will see a tab asking Do you charge sales tax? where you need to opt for No option, in case you don’t charge sales tax.
Delete Sales Tax Rates and Agencies in QuickBooks Online
Deleting sales tax rates or tax agencies in QuickBooks online isn’t possible. However, you can deactivate the tax rate or rename the tax agency, in case you no longer need or use them. It should be noted that, if you are unable to spot the settings below, it indicates that you are using Auto sales tax feature. Let us explore the steps to deactivate the tax rate.
Steps to Deactivate a tax rate in QuickBooks Online
Before you perform the steps below, note that you cannot reactivate a tax rate. Thus, if you deactivate this one, you will have to create a new one in future.
For deactivating a tax rate, you will first have to navigate to taxes.
Now, choose sales tax
Followed by heading to the related tasks section in the sales tax center.
Once done with that, choose add/edit tax rates and agencies.
Here, you need to choose a tax rate name, and opt for deactivate option.
The last step is to choose the continue tab on the dialog box.
Steps for renaming a tax agency
This process requires you to first head to the taxes tab.
Once done with that, choose sales tax.
Followed by heading to the agency name table in the sales tax center.
Also, choose rename for the agency name you want to edit
The next step is to make changes you want and choose save.
Alternate Solution (unable to turn off sales tax in QBO)
Another effective option is to manually edit the invoices and select a 0% tax rate to remove the automated taxes. In case this rate isn’t available, then create a custom rate and make use of it to calculate the sales tax when creating the invoices. Let us have a look at the steps below:
Steps To add the rate:
You need to first move to the taxes menu and further choose sales tax settings
Once done with that, click on add rate from the custom rates section.
Further click on single or combined and enter the name of the custom rate.
You will then have to choose the agency you file payments to and enter the rate.
The next step is to press save.
Steps to use the rate on invoices:
For this, you need to first open the invoices you want to edit one by one.
After that, on the select tax rate section, click on the drop-down and select 0%.
Enter in the required information.
Followed by clicking on save and close.
Note that this function works perfectly when you create an invoice directly in QuickBooks online.
Turning off sales tax in QuickBooks online can be a crucial feature for many businesses. It is believed that the above discussed steps might be of some help in successfully turning off the sales tax in QBO. However, if you are stuck at any point in time, or if you need any sort of technical assistance in carrying out the procedure, then in that scenario, we recommend you to connect with our technical support team at +1-888-510-9198, and let our certified QuickBooks professionals help you with all your queries.
To turn off sales tax in QuickBooks online, you simply need to perform the steps below: 1. Head to taxes tab and choose sales tax 2. Once done with that, choose sales tax settings 3. Choose turn off sales tax 4. And now, choose yes to confirm
How do I turn off VAT in QuickBooks online?
Note that, once you set up VAT in QuickBooks online, it can’t be turned off. However, you can set the default VAT to No VAT and stop VAT from showing in future transactions.
How do I remove GST from QuickBooks?
To delete GST adjustment, you need to perform the below steps: 1. Head to the settings tab first and then choose chart of accounts. 2. Once done with that find the income or expense account you used to add an adjustment. 3. You will now have to choose run report 4. Followed by selecting the adjustment you need to delete and further choose delete tab. 5. Click on confirm to end the procedure.
QuickBooks error 195 can be an undesired result of misconfigured operating system files. It is a direct impact of damage to program files and Windows registry files. You can also come across similar issues in case of outdated or corrupted Windows registry files. Errors in QuickBooks can be a bit troublesome, especially when those errors freeze QuickBooks. These errors can be a bit difficult to manage, and the same goes with the QB error code 195.
However, the QuickBooks error code 195 can be eliminated by using the repair tool, as it would help in repairing any damaged files for QuickBooks desktop. Not only that, you would have to rebuild and verify the accounting data. There are a bunch of other solutions that you can implement to get rid of this particular error from QuickBooks, which we will try to elaborate on later in this piece of writing. Thus, make sure that you stick around till the end. Moreover, you can also get on a call with our technical professionals at +1-888-510-9198 for any sort of QuickBooks support service.
Every error is triggered by some or the other factor and same goes with the QuickBooks error code 195. It generally occurs when a user tries to verify and rebuild data in QuickBooks company file. This error can also be triggered due to a handful of factors which include the following:
Another possible trigger can be if the Windows registry keys related to the QuickBooks software are corrupted.
You can also experience this issue if there is any sort of virus or malware attack
Expect the same error if the software is shut abruptly due to power failure.
Effective Procedure to tackle QuickBooks error 195
You can try to perform the following procedures to get rid of the QuickBooks error 195. Let us explore each of the procedures one by one:
Procedure 1: Using the Verify and Rebuild Utility
At times the files can be corrupted leading to such an error. In that scenario, performing a verify and rebuild data procedure can eliminate the corruption and fix such error. The steps involved in this process are as follows:
Start off by simply running QuickBooks
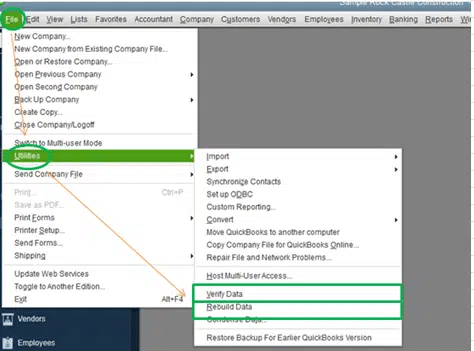
Furthermore, you need to click on the file and utilities tab
Once done with that, select the verify data option
Moreover, click on the ok tab to begin the scan process
In case the tool diagnoses any issue, then it will show up an error message that would state that the data failed the integrity check and if the message shows up, head to the rebuild the file tab.
Now, head to the utilities tab and click on the verify data option
Furthermore, in case there is any issue diagnosed upon data verification, then use the rebuild data option again and get the error fixed.
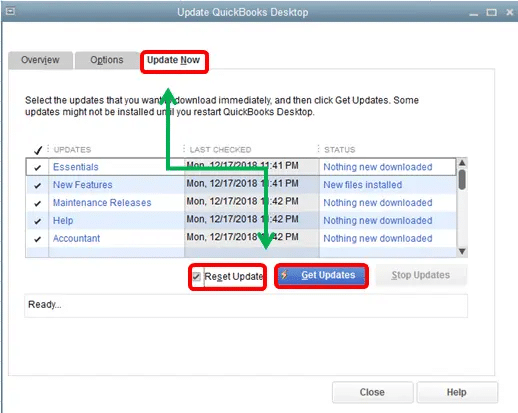
Procedure 2: Updating QuickBooks to latest release
Outdated QuickBooks software can lead to bunch of technical snags and one of them is QuickBooks error code 195. Thus, performing the steps to update the software to the latest release is something we suggest. The steps involved in this procedure are as follows:
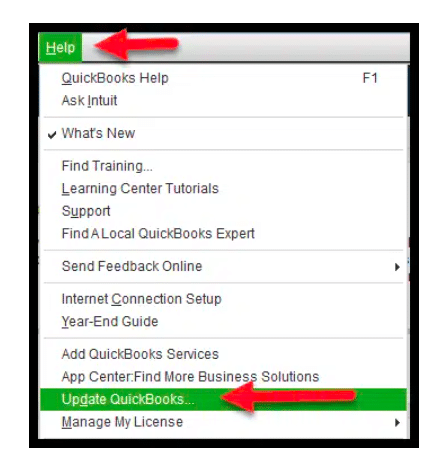
Begin the process by running QuickBooks as Admin
Later on, you need to proceed to the help section within QuickBooks
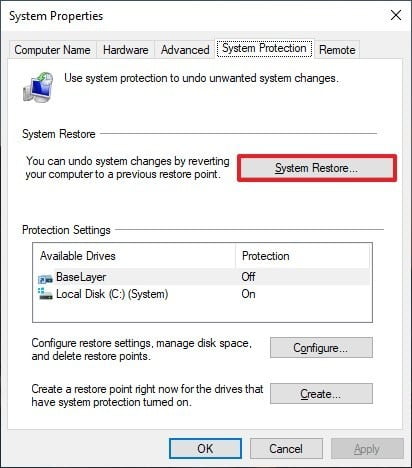
In case none of the above procedures help you in relieving the stress of this error, then in that case perform the steps to restore your system.
Begin the process by clicking on the start menu
Followed by searching for the restore tab
You are then supposed to right-click the system restore icon and select run as admin
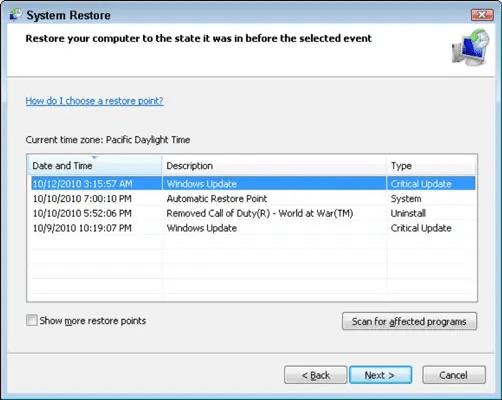
When the system restore window opens, select a suitable restore point and select the most recent restore point
Furthermore, click on the next tab and perform the onscreen directions to restore the system to the previous state successfully
Towards the end, make sure to restart the system and open the software again. By the end this error would be eliminated and you can make use of the software as usual.
At times, certain errors in QuickBooks can be a bit too tricky to handle without the guidance of professionals. Thus, in that scenario getting professional guidance is essential to avoid any sort of mishaps or further mess. Similarly, if you are unable to deal with the QuickBooks error code 195, feel free to seek professional assistance. You can give us a call at +1-888-510-9198 and our QuickBooks support professionals will ensure that all your queries are answered immediately.
Frequently Asked Questions- QuickBooks Error 195
What is error code 195 in QuickBooks desktop?
The QuickBooks error code 195 is a technical error that can be experienced due to misconfigured operating system files. This error can be easily eliminated by performing steps related to verify and rebuild data.
How do I repair a QuickBooks backup file?
In order to repair a backup file in QuickBooks, you can try performing the below set of steps:
1. You need to first head to the file menu 2. Then hover over the utilities tab and choose rebuild data 3. Once done with that, click on ok tab 4. Let the tool repair your file 5. Head to the file menu 6. And let the tool check your file for the data issue
How do I fix an overflow error in QuickBooks?
To fix such errors, you need to export your lists to the desktop. This involves the following steps:
1. The very first step is to export the lists to the desktop 2. After that, minimize the QuickBooks software 3. Once done with that, right click the export file and select open with Microsoft excel 4. Now, find all transactions with overflow value 5. And also, switch back to QuickBooks and correct the data for the field in the account, name, or item that contains it.
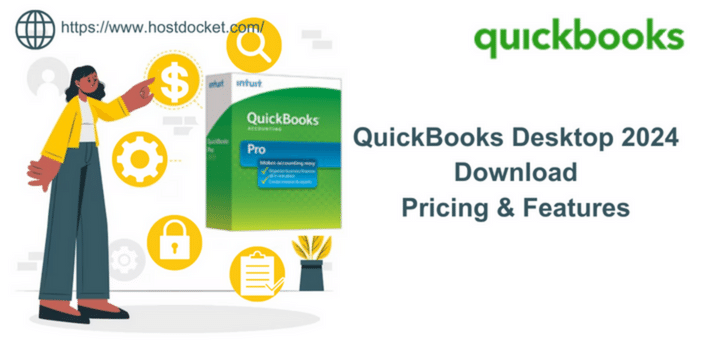
As the year 2024 is around the corner, it is time for a new QuickBooks upgrade. Each year, Intuit rolls in with a fresh upgrade loaded with features and functionalities. And QuickBooks desktop 2024 is here to assist your business in achieving its goals faster. Be prepared to experience better data security, more productivity, and a better view of inventory levels. You can experience quick and smooth daily accounting accomplishments with all new QuickBooks 2024. It is compatible with all sizes of businesses, whether you are small scaled or large scale, or a medium sized business. QB 2024 support services will enable you to streamline your financial records, automate your daily tasks, and further make the right decisions for your business. If you haven’t checked out what’s new in QuickBooks desktop 2024, here is a quick overview for you.
This article is curated in a way to let you explore what QuickBooks 2024 has to offer you. Let us dive in and unleash the features and functionalities you can avail of. On the contrary, you can speak to our technical support team at +1-888-510-9198, in case of any queries.
QuickBooks 2024 version will witness changes in all editions – Pro, Premier, Premier Plus, Accountant, and Enterprise Product Lines. Just like previous software, the latest upgrade is compatible with Google Chrome and is expected to work better with Windows 7 and higher versions. You can install the upgrade either using automatic install or manual. It completely depends upon your preferences. Furthermore, it is possible to perform any modifications by simply configuring the settings. The newest version brings tons of features to the table, like automated calculations, merging reports in one dashboard, inflows and outflows tracking on one dashboard and much more.
Download QuickBooks 2024 for better efficiency, more security, and of course some amazing features and functionalities. Not just that, with the latest QuickBooks version 2024, you can easily record transactions at a low cost without having to open a computer or connect it to a network.
QuickBooks Desktop 2024 Release Date
Well, not many users are versed with the sudden release of QuickBooks 2024. QuickBooks Desktop 2024 was released on 3rd October, 2023, which not many users are aware of. You can expect this new version of QuickBooks to boost your business growth. It further promotes advanced security along with an efficient work system and a user-friendly experience for all its users.
As always, QuickBooks Desktop 2024 has rolled in with some interesting features that not just make your daily activities easier, but also will assist you to grow your business.
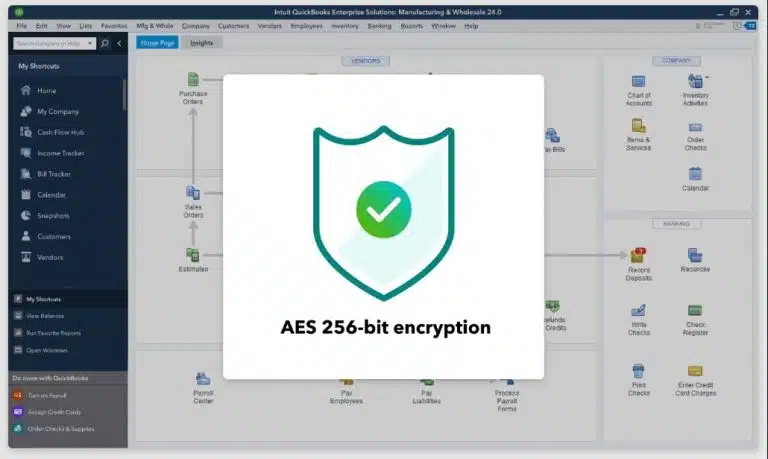
Security Enhancements – With the 2024 version of QuickBooks comes in the best-in-class security protocols that will protect your data. QuickBooks Desktop 2024 and Enterprise 24.0 now have 256-bit encryption to keep your data secure.
Customer Prepayments – This feature is available only in enterprise version. You can track customer prepayments i.e., customer deposits on sales orders. And further apply credit when the sales order becomes an invoice.
Item Category enhancements – This feature is again for enterprise version only. You can use enhanced category management to manage your items and inventory. Further, it would let you set pricing rules by categories for enhanced productivity.
Inventory reports enhancements – The enterprise users can avail of this particular feature of inventory reports enhancements. They can get important sales and inventory reports for the business at the category level. And further can track inventory of products developed in batches/lots with a new report on inventory stock status by lot numbers.
Item list search enhancements – Now use enhanced search to perform advanced search and find your items faster.
QuickBooks Desktop 2024 Pricing
It should be noted that QuickBooks is a paid software and to access QuickBooks, you need to buy its license. Here is some pricing information related to QuickBooks Desktop 2024:
QuickBooks Desktop Pro Plus/ Mac Plus is now available at $649 yearly.
QuickBooks Desktop Premier Plus can be purchased for $949.
You can get QuickBooks Enterprise with the starting price of $1830 per year.
QuickBooks Desktop 2024 is ready to download and can easily be downloaded with a click of a button on the table below. However, in order to activate and start using the software you need to key in the QuickBooks Desktop 2024 license number and the product key. The license number and product key for the QuickBooks Desktop 2024 (Pro, Premier and Enterprise) can be obtained by making a purchase with the official Intuit website.
Once you are ready with the License and Product key for QuickBooks Desktop 2024 all you need to do is click the desired version of QuickBooks from the below list and the download will start as soon as you click the download button. Once the download is complete, open the downloaded file and proceed for the QuickBooks Installation. Enter the license information when prompted during the installation. As soon as you enter the license info and proceed further QuickBooks Desktop 2024 will be activated and you can start using it.
QuickBooks Desktop 2024 is here already, but is your system ready for it? Well, here is what your computer needs for the best experience in QuickBooks Desktop 2024. Check out the details below about the operating system, hardware, software, and other requirements to run QuickBooks Desktop 2024.
QuickBooks Pro or Premier 2024 and Enterprise 24.0
Well, before proceeding ahead, make sure to check your computer’s specs. And here is how you check your system info.
Operating Systems
Still using Windows Server 2012?
Note that Microsoft will no longer provide security updates or support for PCs running windows standard and essentials server 2012 and Server 2012 R2 after 10th of October, 2023. Thus, QuickBooks 2024 won’t support Windows Server 2012 and can’t be installed on it.
Windows 11, 64-bit, natively installed
Windows 10, all 64-bit editions, natively installed
Windows Server 2022, Standard and Essentials
Windows Server 2019, Standard and Essentials
Windows Server 2016, Standard and Essentials
A quick note: Linux and Windows 10 S mode isn’t supported. Also, you will have to use windows natively and not through an emulator or virtual environment to make use of QuickBooks.
Database Servers
Windows (natively installed)
Windows Server 2022, Standard and Essentials
Windows Server 2019, Standard and Essentials
Windows Server 2016, Standard and Essentials
Browser Requirements
QuickBooks Desktop 2024 needs internet access and Google Chrome to work without any glitches.
Hardware and Operating System Requirements
Talking about the hardware and operating system requirements, QuickBooks desktop 2024 needs a 64-bit operating system and won’t run on 32-bit. Here are the basic hardware and OS requirements for QuickBooks desktop 2024.
2.5 GB of disk space (addition needed for data files) Additional Software: Microsoft .NET 4.8 Runtime- 60 MB, provided with the installation files. Intuit Data Protect in QuickBooks Connected Services offerings: Needs at least 4 GB RAM Twice the size of the largest file set to back up and in addition to that 100MB or twice the size to restore. The space is only required from the work folder LocalApplicationData + Intuit\Intuit Data Protect. Also Note: You can store your QuickBooks data file on a solid-state drive for the best performances.
Windows
North American version of windows regional settings are supported when set to English Admin rights needed for the server system when hosting multi-user access. Natively installed and doesn’t need to run in a virtual environment or emulation software.
Optical Drive
A 4X DVD-ROM drive needed for physical CD installations
Screen Resolution
Display optimized for 1280 x 1024 resolution or higher with around 2 extended monitorsIdeally optimized for default DPI setting for a given computer.
Other Hardware Devices
In case you make use of the warehouse manager in QuickBooks desktop mobile, here is the supported devices you can use:
Zebra TC20/TC25/TC51 Mobile Computer is suggested (Android 6.0 & above)
Zebra MC40 Mobile Computer (Android 6.0 and above)
QuickBooks Desktop Enterprise 24.0 further supports:
Honeywell Voyager 1602g Pocket Barcode Scanner
Socket Mobile CHS 7CI
Symbol CS3070
Software Compatibility
QuickBooks integrates plenty of other apps. Here is a list of the common apps you can use. However, additional RA< can enhance the use of these features.
Microsoft Office:
Office 2021
Office 2019
Office 2016 (including Outlook 2016) both on 32 and 64-bit
Email estimates, invoices, and other forms with Microsoft Outlook 2016-2021, Microsoft Outlook with Microsoft 365, Gmail, Yahoo mail, Outlook.com, and other SMTP-supporting email clients.
Preparing letters needs Microsoft Word 2021, 2019, 2016, or Microsoft 365 (includes 64-bit)
Exporting reports requires Microsoft Excel 2021, 2019, 2016, or Microsoft 365 (includes 64-bit)
Contact synchronization with Microsoft Outlook needs Outlook 2021, 2019 (32 and 64-bit), or 2016.
Quicken 2023, 2022, 2021, 2020, 2019, 2018, 2017, and 2016
QuickBooks Desktop for Mac 2024, 2023, 2022, and 2021
Adobe Acrobat Reader: Business Planner, Payroll, and viewing forms need Adobe Acrobat Reader 9.0 or later.
Payroll and other online features and services need Internet access with at least a 56 Kbps connection speed (1 Mbps recommended).
Anti-malware and antivirus software compatibility
QuickBooks Desktop Pro 2024, Premier 2024, and Enterprise 24.0 are tested with the following antimalware and antivirus programs. However, you might require to adjust some settings in these programs to get the best performance.
Antivirus Software
McAfee
Avast
Bitdefender
Norton
Kaspersky
Trend Micro Security
Webroot
Cylance (Internet/Regression Only)
ESET
Panda Dome
Sophos
Avira
Symantec
F-Secure
Microsoft Windows Defender
Anti malware software
Bitdefender
AVG
Malwarebytes
Spybot
Emsisoft
McAfee
Avast
Webroot
ZoneAlarm
Kaspersky
F-Secure
It should be noted that QuickBooks will work with systems running Redundant Array of Inexpensive Disks (RAID), but it’s not suggested as it can cause QuickBooks to operate slowly.
QuickBooks Desktop 2024 needs internet security protocol TLS 1.2 for the connected services to work without any hassle.
If you are planning to get QuickBooks Mac Plus 2024, here are the basic system requirements for you:
Minimum Mac OS X v12.0 (Monterey).
iOS 12.0 or later for iPhone related features.
Supports either Intel or Apple CPU hardware.
Internet connection is a must.
Multi-user Server: Intel Core 2 Duo or higher processor to run a server.
2 GB RAM (4 GB RAM suggested).
250 MB of available storage.
Macintosh-compatible printer if you plan to print invoices, checks, deposit slips, lists, purchase orders, mailing labels, reports, or graphs.
Use Intuit Checks to print checks.
Quick list of integration/compatibility requirements
Export Report Data- Apple Numbers v12.0 or later, or Microsoft Excel 2016 or later, including Microsoft 365
E-mail as PDF – Apple Mail, Microsoft Outlook 2016 or later, including Microsoft 365.
File Conversion – QuickBooks Mac 2024 supports:
One-way conversion to QuickBooks online.
One-way conversion from QuickBooks desktop for windows 2021 and 2023.
Conversion to and from QuickBooks for windows 2024.
What do I do if my system doesn’t meet the minimum requirements?
In case your system doesn’t meet the above discussed system requirements, then simply upgrade your system to meet all the requirements. In case upgrading your system isn’t the option, then you can switch to QuickBooks online.
Not many QuickBooks users know about this secretive launch of QuickBooks Desktop 2024. Now that you know what’s new in QuickBooks desktop 2024, it is the right time to upgrade. Download QuickBooks desktop 2024 right away with the help of the links listed above in this segment. However, in case of any queries, you can simply reach out to our technical support team at +1-888-510-9198, and our certified QuickBooks ProAdvisors will help you with immediate support and assistance.
FAQs Related to QB 2024
Will QuickBooks desktop be available in 2024?
QuickBooks Desktop is planning to stop selling several products to U.S. new subscribers after July 31, 2024.
How do I upgrade QuickBooks desktop to 2024?
QuickBooks Desktop 2024 edition can be installed using the steps below: 1. When you are ready, choose upgrade now. 2. After that, choose keep the old version on my computer if you want to keep your current QuickBooks. 3. Choose let’s go. 4. QuickBooks downloads, installs, and activates the new version for you. 5. Choose open QuickBooks.
Will QuickBooks desktop be discontinued?
After May 31, 2024, your QuickBooks Desktop 2021 software will be discontinued. This includes all 2021 versions of QuickBooks Desktop Pro, QuickBooks Desktop Premier, QuickBooks Desktop for Mac, and QuickBooks Enterprise Solutions v21.19
Does QuickBooks desktop have to be renewed every year?
To view your data after 1 year, you’ll have to renew your subscription. Note: As a QuickBooks Desktop user, you still own your data, regardless of subscription status. You can open and edit company files at any time with a compatible license or active subscription.
Just like QuickBooks has eliminated the hassle of performing daily accounting and bookkeeping activities, QuickBooks Time eases the process to schedule login, schedule jobs, tracking time, and tracking projects. QuickBooks time is basically a cloud-based QuickBooks time tracking app that lets you track and manage the employee’s timesheet. It is by far one of tech finest tools for all types of businesses like SMEs, large scale business, etc. With the help of QuickBooks Time, you can create real time reports to reduce the cost of user. It further can be used on various devices and offers support.
However, at times, you might bump into an error that won’t let you login QuickBooks timesheets and this can definitely be annoying. There can be a handful of measures that can be taken to eliminate this particular glitch. To learn further about QuickBooks time login issues, stick around this piece of writing carefully. You can further reach out to our technical support team at +1-888-510-9198, in case you need any sort of assistance to eliminate the issues successfully.
Did you know QuickBooks Time is now QuickBooks Workforce?
QuickBooks Time login issue is an error that occurs when you try to login QuickBooks time. It might show up a message that states the services which you require are not available. You can experience the time login issue if you have logged in with another web browser already, or if you are not using chrome on incognito mode and also in case the cache and history files are affecting the login procedure.
To learn further about QuickBooks Time and its login issues, keep reading!
Perks of using QuickBooks Time
There are a bunch of perks associated with TSheets intuit, which are enumerated below. Let us have a look:
Helps in keeping track of the team.
Assists in capturing of all the costs.
It further helps in adding value for clients by breaking down the details of time spent at work.
You can further use QuickBooks time for improving the quotes to the clients bills correctly.
QuickBooks time further helps in handling and managing multiple jobs.
The GPS feature helps in tracking the record of team members.
Not just that, but the digital clock in QuickBooks helps the employees to clock in and clock out using the QuickBooks time kiosk, web dashboard, and mobile app.
Furthermore, the manager can easily get the live GPS tracking.
QuickBooks time lets the manager see the job activity feed of the employees easily.
Intuit timesheet lets you write the project notes of the employees and track mileage and expenses.
QuickBooks time is loaded with functionalities and one of its features is to help in creating the schedules and let the manager know the employee clock in and clock out from anywhere at any time using a computer, laptop, or a smartphone. To use QuickBooks time, you need to perform the following steps:
Initially, you need to download and install QuickBooks with the QuickBooks time add-on in order, if it is not already installed.
Once done with that, access the schedule calendar by opting for the option to manage and also click on schedule access.
You now have to double click on the cell in the schedule calendar.
And later on, click on the actions in the top left corner.
Now, you need to click on the add shift option in the action drop down menu.
Followed by selecting the start and end time of the shift.
Customize the shift by adding the detail of the employees like adding by color, description of job and an employee.
To assign the information of employees in calendar, click on publish.
Lastly, the employees assigned will get the notification of the shift assignment.
What are login issues with QuickBooks Time?
The following are the issues with QuickBooks Time:
You get a message that states services which you require are not available.
QuickBooks will not support working with Chrome.
It shows loading on the screen but fails to load.
When you try to sign in and choose my company, it redirects you to the same sign on the screen.
In case you logged in your account from another system.
The firewall and antivirus security restrict access.
Note: It should be noted that as part of Intuit, QuickBooks Time is upgraded to the same security standards that protect TurboTax, Mint, and QuickBooks. All users will eventually have an account for everything Intuit, and the QuickBooks account will go through an account security upgrade.
Now that you know the necessary information about QuickBooks Timesheets login and issues, it is time to unleash the quick fixes for the same. Let us evaluate the set of steps that can be performed to fix such error one by one:
Method 1: Sign in using a one-time code
In case you are unable to remember your password, you can ask for a code to your phone number or email that can help you to sign in successfully. This can be done using the steps below:
On Computer
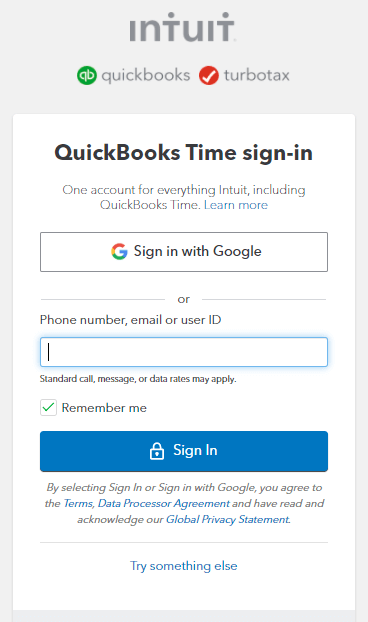
You need to move to QuickBooks Time Sign-in page.
Further, choose text a code to (phone number), or choose sign in a different way.
After that, choose name and then manage your intuit account.
The next step is to verify your account with your password or a one-time code, if asked.
Moving ahead, choose sign in and security.
Followed by opting for the user ID, email address, password, or phone section.
Make necessary changes.
When the process is complete, click on the save tab.
Method 3: TSheets intuit login from the official website
It is important to ensure that you are able to login to the right website, in order to avoid any sort of login issues. You are suggested to log in from the site tsheets.intuit.com, instead of logging in from tsheets.com. In case you are using mobile to login, make sure that you have an updated mobile app and you are logging into the latest version.
The username and password being used to login QuickBooks time should be correct. Without the correct username and password, Intuit cannot access the account and the user will not be able to QuickBooks TSheets login. Make sure you have the correct username and password for accounts.intuit.com.
Method 5: Login the account with private window
Note that the data is never saved by the private window. Open the browser menu to create short keys. The short keys that can be used are:
Open Google Chrome by press Ctrl + Shift + N
Open Microsoft Browser using Ctrl + shift + P
You can open Safari Browser by pressing Command + shift + N
Method 6: Login with another web browser
QuickBooks is compatible with other browsers like Firefox, Safari, Internet Explorer, etc. In case you are having an issue with one, try using any of these browsers. After switching the browser, you can check if the issue continues.
As we mentioned earlier, at times the browser’s cache can create hindrance in easy QB Time login. The steps to delete browser’s cache or history are:
For Google Chrome:
Open Chrome and select customize and control icon.
Now, open settings to open and edit it.
Once done with that, head to and choose the privacy and security option.
You now have to choose the clear browser data option from the security category drop down.
Now, choose the advance tab from the particular browser data screen.
Followed by opening the list in the advance tab and clicking on the right boxes i.e., delete the data and delete the cookies, which is deleted to different sites, images and files.
In Safari
You need to first open the browser and click on setting tab
Once done with that click on history
After you click on history, you will see a pop-up menu appearing on the screen
The next step is to choose the time duration from which you want to delete the cache record.
For Microsoft Edge
Initially click on the settings and more.
Once done with that, click on settings from the list of options.
You now have to choose privacy, search and services options.
The next step is to navigate to under browsing data and choose what you want to clear.
Now, from the drop-down menu of time range, choose the range from which you want to delete.
You now need to choose the type of data which you want to clear.
And lastly click on clear now tab.
Method 8: Uninstall and Reinstall QuickBooks
A mere uninstall and reinstall can fix the issue to a certain extent. Thus, try performing the steps below to uninstall and reinstall QuickBooks and get rid of the error.
Uninstall QuickBooks
Firstly, open the control panel and click on the start tab.
Now, search for the control panel to open it.
Then, choose programs and features to uninstall a program.
Now that you know what it takes to eliminate the QB time login issue, it is the right time to implement these steps and try fixing the error permanently. However, if you somehow land into the same issue related to tsheets.com login again or if you are unable to rectify the error successfully even after performing the steps above, then in that scenario, do connect with our technical support team at +1-888-510-9198, and we will ensure to provide you with immediate support and assistance. Our certified ProAdvisors will ensure to answer all your queries and help you fix all sort of issues related to QuickBooks.
Well, as a user, you need to ensure that you are making use of the right credentials like the username and password. Incorrect password or username can restrict the access to your account and show up login failed error in QuickBooks Time.
How do I fix Intuit QuickBooks Online login problems?
In case you are trying to sign through a web browser, then clear your cache and cookies to get rid of any pre-filled password. Further, you can also clear any password managers with any stored passwords for the site.
How do I unlock a time entry in QuickBooks?
For this, you can unlock time with the help of the steps below: 1. In QuickBooks Time, head to the QuickBooks dropdown menu and choose unlock exported time. 2. Once done with that, select a start date and an end date. 3. You now have to choose all employees to select which employees you want to unlock time for. 4. After that, review the timesheets, and choose unlock timesheets. 5. The last step is to choose confirm unlock in the notice that displays.
How do I access QuickBooks timesheets?
To view the timesheets, you need to perform the steps below: 1. To view your own timesheets, select my at the top right. 2. To view your own and team members’ timesheets, select all. 3. To view one member’s timesheet, choose all and in the employee search box, enter the name.
Certain errors in QuickBooks get easily resolved by a mere reinstallation. Whereas, there are errors that require further rectification and to help you tackle such errors, Intuit offers the clean installation tool. You can reinstall QuickBooks Desktop for Windows using clean install utility. It is a great tool designed in a way to remove residual files and folder when uninstalling and reinstalling the application. It further cleanses your system and ensures easy installation. If you are looking for the process to download, install, and run QuickBooks clean install tool, then here is a comprehensive guide for you. Keep scrolling to unleash further about QuickBooks clean install tool or QuickBooks Uninstall Tool, and get a fresh copy of QuickBooks installed on your system.
Having said that, just in case you are in need of any sort of professional guidance related to the clean install tool or have any QuickBooks related query, then in that case do not think much in dialing our toll-free customer support number i.e., +1-888-510-9198, and get assistance from certified ProAdvisors immediately. Now that you know whom to reach out to in case of any queries, let us continue with this piece of writing and unveil some quick facts about QuickBooks clean install tool.
The procedure to download the clean install tool is quick and easy, however, before performing the steps, it is better to get an overview about the tool to ensure that the results turn out more fruitful. Well, talking about QuickBooks clean install tool, it is used to rebuild damaged QuickBooks desktop functions, where a mere reinstallation won’t fix the issue. In order to rectify the issue with clean install tool, you will have to rename the desktop to QuickBooks desktop for windows and the installation file, and further reinstall the program. The entire process is termed as clean install or clean uninstall of QuickBooks, which generally clears the cache memory occupying the space. In general, clean install helps in fixing issues that prevent you from opening the company file, shows up display and template problems, and a bunch of other install issues.
Note that, a clean install tool cannot harm your accounting files like your company file or any other data you have.
Also note that, before performing the uninstall process, we suggest you to have a QuickBooks desktop download file or installation CD with the license number. Moreover, a preventive measure is to back up the data file. Furthermore, you will have to log in windows admin to perform the steps and ascertain that the systems you are working on are available for restart.
When to use QuickBooks Clean Install Tool?
You now know what QuickBooks clean install tool is, but a question which is still unanswered is when to use QuickBooks clean install tool. Well, there are certain situations, when you can make use of this tool to clean install QuickBooks Desktop and successfully rectify the issue. Let us check out different situations when you can use QuickBooks clean install tool to reinstall QuickBooks for Windows.
Corrupted Installation – When you install QuickBooks or install updates for the same, you might end up in corrupted installation leading to crashes or other issues. This is when you need to use QB clean install tool and remove the corrupted files.
Software Conflicts– At times when there are compatibility issues with other software and drivers, you can run clean install utility and try resolving the conflicts.
Performance problems– Certain performance issues in QuickBooks like sluggish software processing, etc. can be addressed by reinstalling the software with clean install tool, as it removes the unnecessary files and configurations.
Data file issues – A few data file issues can also be rectified by using clean install tool. However, it is important to restore a backup of the company file to maintain data integrity.
Crucial points to keep in mind before using Clean Install tool to reinstall QuickBooks for windows
Before you start with the procedure to use the clean install tool, keep a check on the below pointers to avoid any sort of further issues:
Backup your company file
You company file stores the most crucial data, and you cannot afford to lose it. Thus, we recommend you to create a backup of your company file before performing the steps for clean installation. The steps to back up your company file are as follows:
Start the process by entering the flash drive into your system for backup.
Open QuickBooks and head to the file menu.
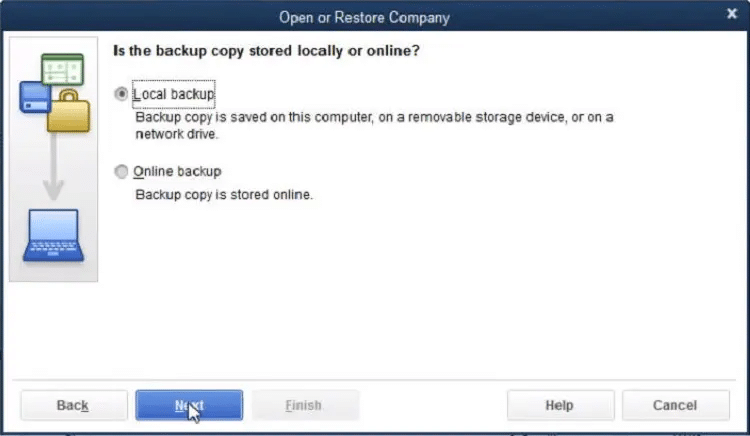
Click on backup company option to create a local backup.
Pick an option amongst local backup and online backup, as per your preference.
However, it is safe to save files on flash drive as it is a quick way to transfer files back.
After that, click on next tab and perform onscreen prompts to complete backup process.
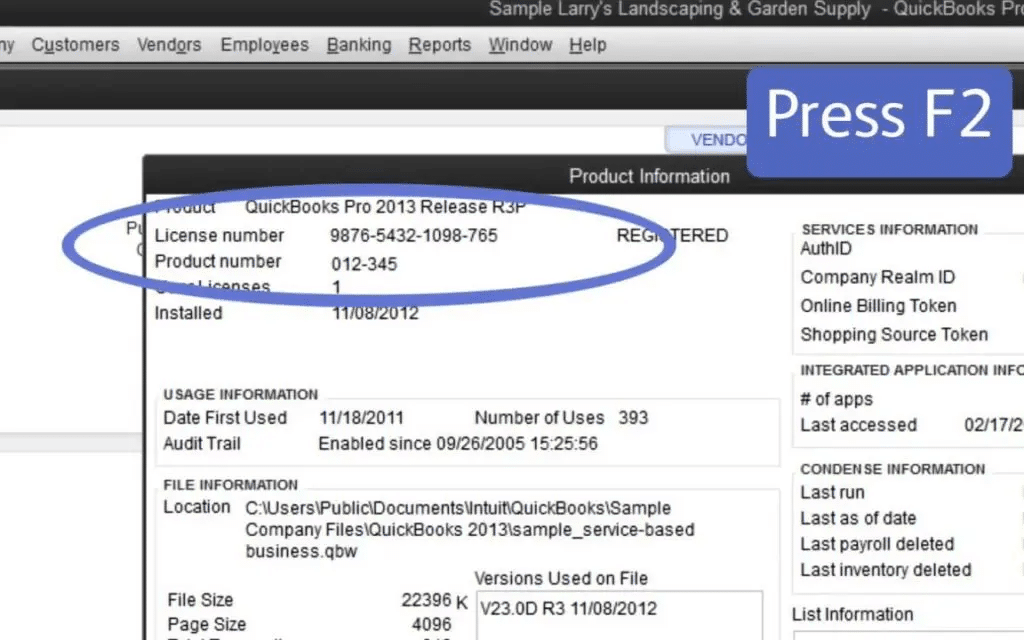
Keeping product and license number in check
After the product and license number gets uninstalled from the system, you need to have the product and license number with you to access the software. You can click on F2 key or Ctrl + 1 to launch product information window.
Steps to install and use clean install tool in QuickBooks
Now that you know all the necessary information about the clean install tool in QuickBooks, let us explore the steps involved in installing and using clean install tool. Let us evaluate the steps one by one:
Step 1: Uninstall QuickBooks Desktop
Uninstallation of QuickBooks is very first step in the clean install process. You need to perform the below steps to uninstall QuickBooks successfully:
Start with clicking on the Win + R tabs to launch the run command.
You now have to enter control panel in the search bar and click on ok tab respectively.
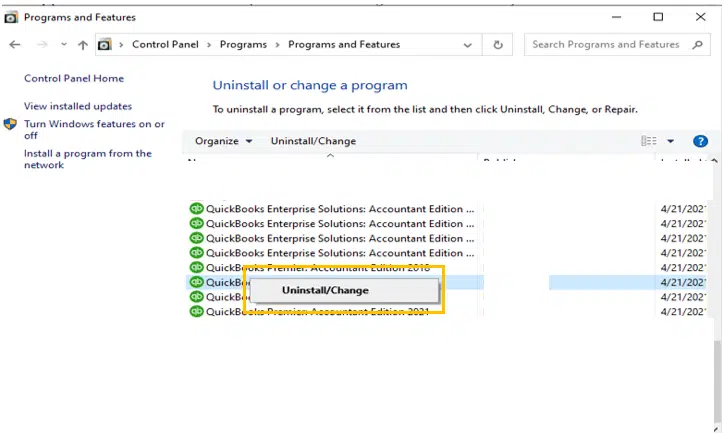
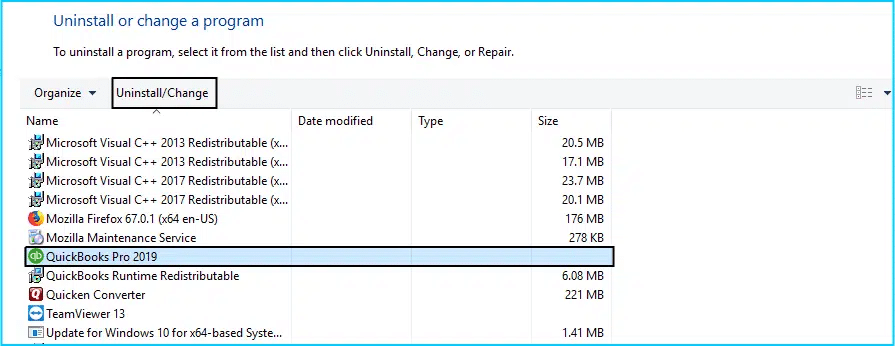
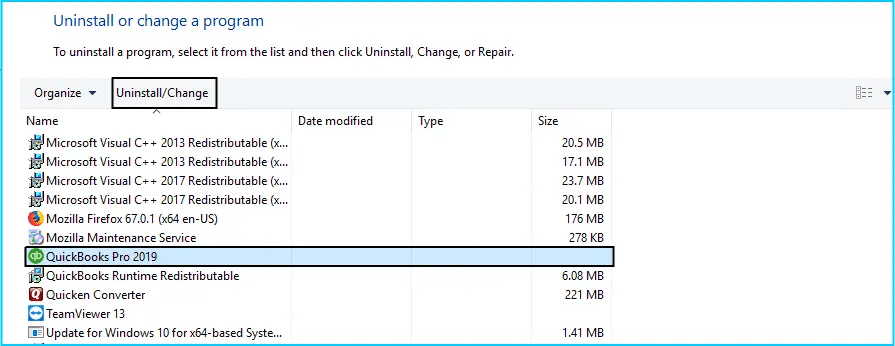
The next step in the process is to move to the programs and features tab and go for uninstall a program option.
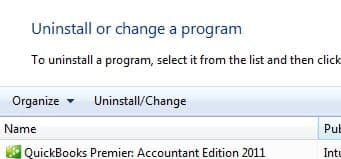
Now, from the list of installed programs, pick QuickBooks desktop and hit uninstall tab.
Once done with that, perform the onscreen prompts to complete the uninstall process.
Step 2: Use clean install tool for windows
Now comes the second step, where you need to use the clean install tool for windows. Let us explore the steps for downloading and using this tool to clean install QuickBooks Desktop for windows.
You need to first download QuickBooks tool hub from the official Intuit website.
Further, move to the file location where you have saved it and double click on the same to initiate the install process.
Once done with that, you need to install the program by performing the onscreen prompts.
And click on I accept to complete the install process and open tool hub from the desktop.
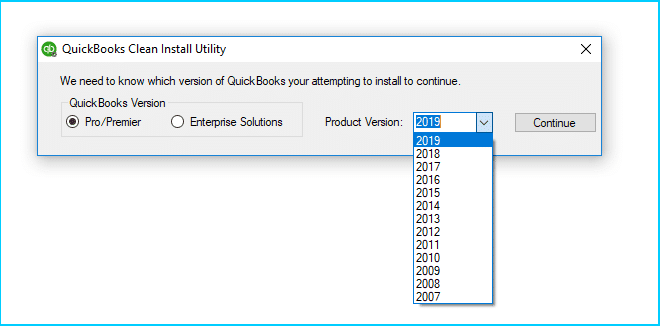
You now need to click on clean install tool after selecting installation issues tab.
You will then see a warning message appearing on the screen stating Please Install your copy of QuickBooks to default location.
Now, click on ok tab to complete the step.
Just in case you are unable to access QuickBooks when renaming the folders, perform the steps below:
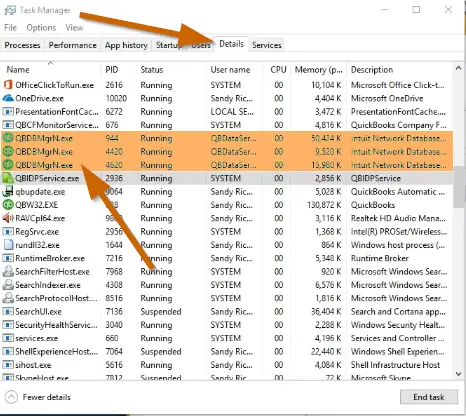
Launch windows taskbar and further move to the task manager.
You now have to pick the processes tab and click on the image name column header.
Once done with that, go for exe, qbdbmgrn.exe, qbw32.exe. QBCFmonitorservice.exe and also click on end.
Further click on yes when you see a warning message appearing on the screen.
Step 3: Re-install QuickBooks on your PC
This step requires you to reinstall QuickBooks Desktop for Windows using clean install utility. And further, note the license and product details. You now have to continue with the steps ahead to complete the reinstall process:
Initially insert CD of QuickBooks and perform onscreen steps.
Further, it will ask you for product and license number.
You now have to enter the credentials just as they were mentioned in the system earlier.
Carry out the onscreen prompts to complete the process.
Once done with that click on the next tab.
And further, head to the type of installation and click on the next tab along with that choose the install tab.
Towards the end, you will be able to run QuickBooks.
Note that QuickBooks clean install tool is not compatible with QuickBooks 2020. Thus, you need to continue with the manual steps below to complete the process:
At first, launch the start menu, search for the file explorer, and open it.
You now have to look for and open the folder having the company file.
Errors that can’t be eliminated by reinstallation of QuickBooks, can be easily dealt by using the QuickBooks clean install tool or the QuickBooks Uninstall Tool. We have tried to cover all the information related to the clean install tool in this segment above. However, if you are still having any doubts, or if any of your queries remain unanswered, feel free to reach out to our technical support team at +1-888-510-9198, and we will try to provide you with instant support and assistance.
FAQs Related to QuickBooks Clean Install Tool
How to reinstall QuickBooks Desktop for Windows using clean install?
Follow the below steps to re-install QuickBooks using clean install too:
Step 1: Firstly, Uninstall your QuickBooks Desktop. Step 2: Now rename your installation folders of a QuickBooks Step 3: At the end reinstall or download the QuickBooks Desktop.
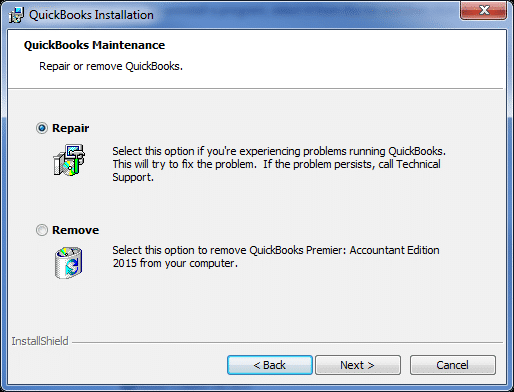
How do I completely remove QuickBooks utility?
For this, you need to perform the steps below:
1. Open the Windows start menu 2. Search for the control panel and open it 3. Choose programs and features 4. Uninstall a program 5. Select your version of QuickBooks 6. Choose uninstall and remove 7. Hit next and click on finish when required.
What does it mean to clean up QuickBooks?
Cleaning up company data utility usually repairs transactions and lists damage in the company file. You might be required to run the utility to fix issues like missing data after an update is applied, running verify data ends with a data damage message, opening the program list taking longer to open than usual, etc.