Are you experiencing an unexpected error when migrating QuickBooks? Well, need not panic, as this can be addressed easily. At times, when trying to move essential files across different systems, one might land into error “QuickBooks migration failed unexpectedly“. This particular error has the potential to drag you into an abrupt migration failure delaying the entire process. You can spot this error right after you run the Move_QuickBooks.bat file to complete the migration process.
As the data migration manual procedure is a bit time-consuming, making use of the tool is something that experts recommend. As a result of this issue, the tool stops working.
When this particular error occurs, it shows up on the screen stating: “QuickBooks migration failed unexpectedly”. As this error risks the data being transferred, it is essential to address it as soon as possible. Thus, to help you culminate such an error, here is a quick guide sharing the causes, as well as the fixes to the QuickBooks migration failed unexpectedly error. Thus, stay tuned to this segment or further you can get in touch with our technical support professionals at +1-888-510-9198, and let our technical support team help you in dealing with the error.
Before we head forward, it is essential to understand a term that was mentioned earlier i.e,, QuickBooks Migration Tool. Well, upgrading the system requires migrating the software as well, and when done manually this can take a lot of time and energy. Thus, to ease down the process, the QuickBooks Migration tool was introduced. This tool is designed in a way to automatically move all the data to the new system and activate QuickBooks on it. The manual process not only takes a lot of time but also poses a threat to the crucial data. However, the QuickBooks Migration tool takes care of all these factors.
What files can’t be migrated using the QuickBooks Migration Tool?
Even though the QuickBooks Migration tool saves a lot of time and eliminates the migration hassle, there are certain files and data that can’t be transferred using this tool. Some of the common file types that can’t be migrated using this tool are:
What triggers Error “QuickBooks Migration Failed Unexpectedly”?
The occurrence of every error is justified by some factors. Here is a quick view at the factors that trigger QuickBooks Migration Failed Unexpectedly Error. Let us have a look:
You should be prepared for such an error if you try to transfer any of the above-listed files that aren’t supported by the tool.
Another possible reason could be that the files related to the Migration tool got damaged somehow.
You can further come across the error if your system doesn’t meet the minimum system requirements to run the Migration tool.
Outdated QuickBooks or Windows versions also trigger this particular error in QuickBooks.
System Requirements to Avoid “QuickBooks Migration Failed Unexpectedly”
As we mentioned above, your system should meet the basic requirements to avoid compatibility issues with the Migration tool. Here is a gist of basic system requirements that you should ensure before using the QB Migration tool.
Operating System Requirement
Windows 11, 64-bit, natively installed
Windows 10, all 64-bit editions, natively installed
Windows Server 2022, Standard and Essentials
Windows Server 2019, Standard and Essentials
Windows Server 2016, Standard and Essentials
Windows Server 2012 R2, Standard and Essentials
Windows Server 2012, Standard and Essentials
Note that, as Microsoft has discontinued support for Windows 8.1 after the 10th of January, 2023, it is recommended to not install QuickBooks on Windows 8.1 or earlier to avoid any sort of issues.
Database Server Requirement
Windows Server 2022, Standard and Essentials
Windows Server 2019, Standard and Essentials
Windows Server 2016, Standard and Essentials
Windows Server 2012 R2, Standard and Essentials
Windows Server 2012, Standard and Essentials
In case you have planned to use QuickBooks in multi-user mode by hosting the company file or QuickBooks Hosting, these are the server systems that you can have.
Browser Requirement
QuickBooks Desktop 2023 doesn’t require any additional browser to let QuickBooks connect to the internet. The software now has its browser integrated with the application and an active internet connection is all that is required to sync license data online every 14 days.
System Hardware and Operating System
Processor
2.4 GHz minimum for running QuickBooks optimally
RAM (Workstation)
The display needs to be set to 1280 x 1024 or higher with up to 2 extended monitors. Also, the default DPI settings on the system are ideal.
RAM (Server)
8 GB minimum and 16 GB recommended
Disk Space
You need 2.5 GB of additional disk space for data files, in case you have any additional software: 60 MB for Microsoft .NET 4.8 runtime that you get with the installation files.
Windows
The North American version of Windows is required. Along with that, the regional settings are supported when set to English. Another point to note is to have admin rights on the server system when hosting multi-user access. Also, natively installed windows are required.
Optical Drive
A 4X DVD ROM drive is a must for physical CD installations
Screen Resolution
The display needs to be set to 1280 x 1024 or higher with up to 2 extended monitors. Also the default DPI settings on the system are ideal.
Effective Solutions to Fix QuickBooks Migration Failed Unexpectedly Error
Now that you have unleashed the required information about the error and the Migration tool. It is time to understand the steps involved in rectification of the error. Let us explore each of the methods one by one to learn further about fixing this error permanently:
Solution 1: Update the Operating System
As discussed above, an outdated operating system can trigger such an error in QuickBooks. Thus, it is a must to update the operating system and also ensure there are no compatibility issues with the Migration tool.
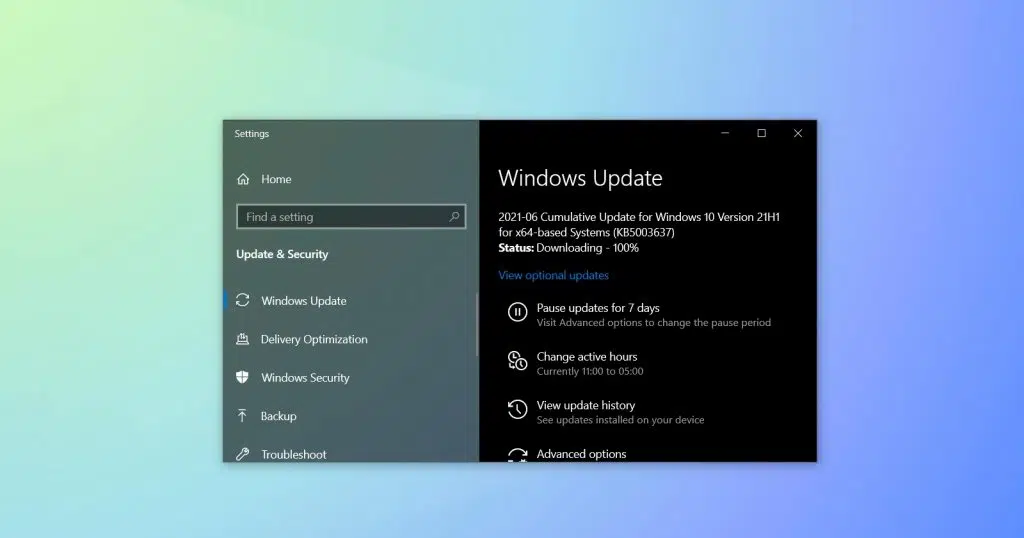
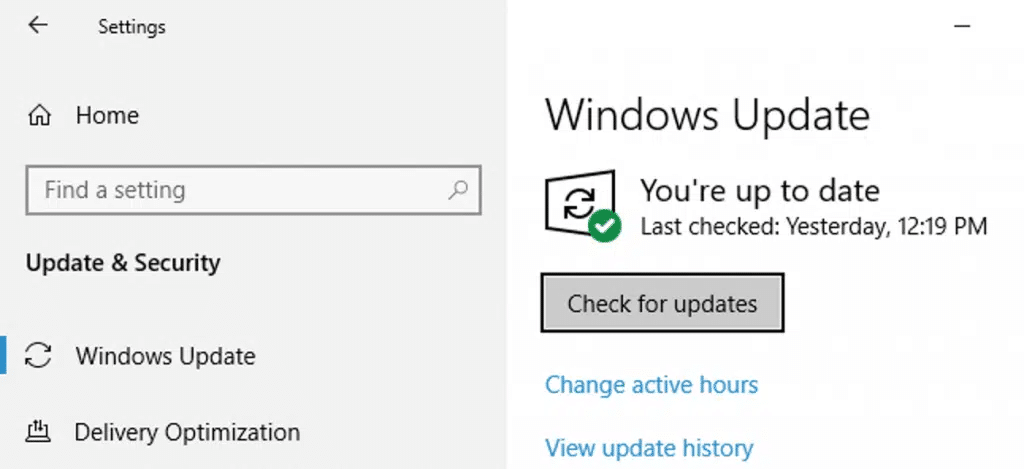
Begin by clicking on the Start tab on the taskbar.
Further, enter Update and click on the Windows Update Icon.
You now have to Go for the Check for Updates tab.
And in case there are any updates available, make sure to download them.
Once done with that, Reboot the system and allow for automatic installation of the updates
After that try using the QuickBooks Migration tool after that and check if the error is rectified or not.
Solution 2: Running QuickBooks Migration tool in compatibility mode
You might come across the QuickBooks migration failed unexpectedly error due to compatibility issues. Thus, running the tool in compatibility mode is something we recommend.
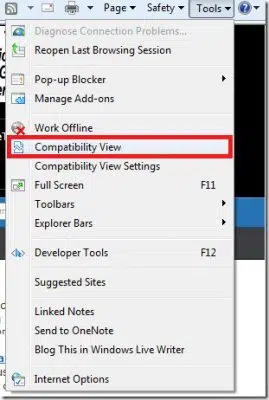
Initially, right-click the exe file of the Migration tool and then click on the Properties tab.
You are then required to navigate to the Compatibility tab and mark the option to Run This Program in Compatibility Mode.
Towards the end, try to migrate your QuickBooks data to check if the error still persists.
Solution 3: Update QuickBooks to the latest release
Using outdated QuickBooks can also hurt the migration process the same way as using outdated Windows. Thus, we suggest you update QuickBooks to the latest release. The steps that can be performed here are:
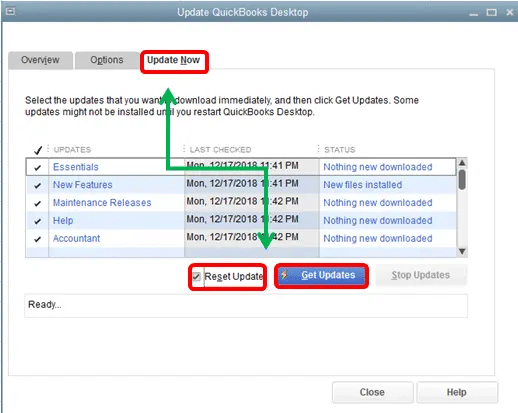
Run QuickBooks Desktop
Click on the help tab and go for the option stating Update QuickBooks Desktop
You are then required to select the Update Now tab and further click on the Get Updates tab.
Fix technical issues when updating QuickBooks Update
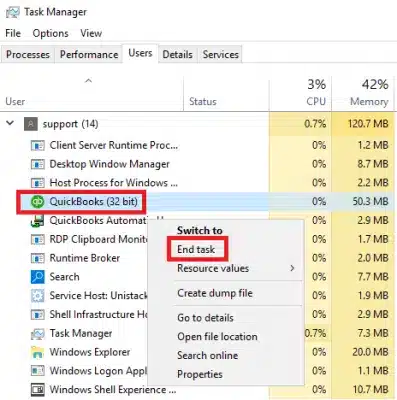
When trying to update QuickBooks, if you are interrupted by any sort of technical glitch, then we suggest you to end all the background processes from the task manager and then reboot QuickBooks, and update the software again. This can be done using the below steps.
You need to first press Ctrl + Alt + Delete tabs together and select the option Open task manager
After that, search for the files related to QuickBooks such as QBW32.exe, QBCFMonitorService.exe, QBupdate.exe, etc. and further click on End Processes.
Immediately sealing errors related to the crucial data becomes essential to avoid any sort of data loss. We hope that this segment might have helped you in successfully eliminating the error from its root cause. However, if there are any queries or if you are stuck at some point in time, feel free to get in touch with our technical support professionals at +1-888-510-9198, and we will provide you with answers to all your queries.
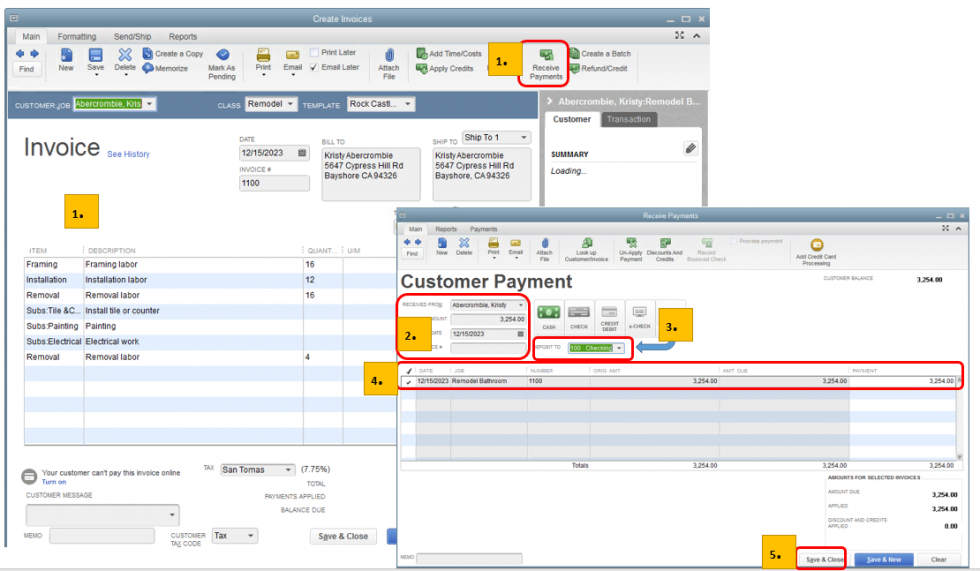
Spotted Duplicate transactions in QuickBooks and can’t figure out how to delete them? Well, eliminating duplicate transactions from the bank feeds in QuickBooks is quite possible. You can easily remove the duplicate transactions directly from the bank feed. The process of deleting transactions depends upon the mode you are using. To help you out in deleting duplicate transactions in QuickBooks, here we are with this piece of writing sharing the complete set of steps involved in deleting duplicate transactions in QuickBooks.
However, if you have any doubts or queries, you can get in touch with our technical support professionals at +1-888-510-9198 and they will provide you with immediate support and guidance.
What leads to duplicate transactions in QuickBooks?
Here are a few reasons why you can experience duplicate transactions in QuickBooks.
At times when importing lists and transactions into the company file, duplicate transactions can be seen.
Also, QuickBooks rebuild data utility can also trigger double entry. Especially when the user tries to recover the unrecoverable transactions.
If you have missed out on some of the details, then duplicate entries can be seen.
Another possible reason could be if you added a few of the transactions manually, and the automatic feature is also turned on, then a double entry issue can be experienced.
How to check duplicate transactions in QuickBooks Desktop?
Even though there isn’t a specific method to look for duplicate transactions, using filters and sorting can help in identifying duplicate transactions. Here is how you can do this:
Delete Duplicate transactions in QuickBooks in side by side mode
If you are using side-by-side mode, then the downloaded transactions are available on the left of the screen.
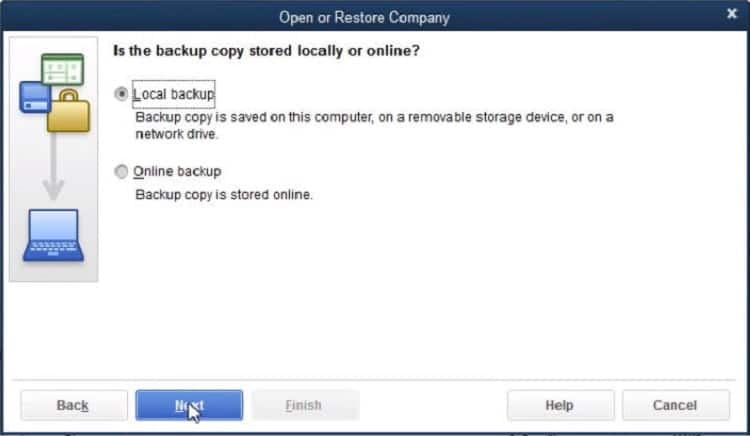
At first, visit the banking menu.
After that, choose the bank feeds and then select the bank feeds center.
Select the account with the transactions you wish to remove in the items reviewed section.
The next step is to select the items to delete.
The last step here is to choose the deleted transaction and click on yes to confirm.
Just in case you have already matched the statement, then you can choose the select all downloaded transactions older than option and then set the date to the last statement’s end date. Now, opt for delete selected. You might be required to switch to the register mode, in order to delete everything.
Delete duplicate transactions in QuickBooks in register mode
In register mode, you will see the register on the top part of the screen and the downloaded transactions will be seen at the bottom. If you have confirmed the fact that QuickBooks is correct and you want to delete the transactions that do not tally, then the entire statement will have to be deleted. The steps involved here are:
You need to initially visit the banking menu.
After that, select the bank feeds and the bank feeds center.
You now have to choose the statement from the items received from the financial institution. Select the view option.
Now, match the appropriate transactions and select Done to match them.
Once done with that, select Yes tab in the not finished matching screen. This will return you to the online banking center.
After that, spot and choose the same statement from the items received from the financial institutions section.
The last step is to choose delete.
Removing the statement will prevent any unwanted transactions from displaying the next time the statement will be downloaded. In case you do not remove the matched statement then the transactions that weren’t matched will continue to appear on the screen.
Delete duplicate transactions or personal expenses from bank feeds
If you want to keep a personal expense out of the business finances or if you have duplicate bank transactions, then the below steps are involved in excluding transactions:
Initially, you are supposed to choose the transactions from the left menu.
Furthermore, you need to put a checkmark on the transactions you want to exclude.
The last step is to visit the batch actions drop-down and then choose the exclude selected option.
If you want to see the ones that are excluded, then you simply need to opt for the excluded tab.
Just in case you want to see the ones that are excluded, then select the excluded tab. However, it should be noted that the transactions won’t appear in any associated account registers or reports, as they are not tracked or reported as part of the business finances. In case you have accidentally excluded the transaction, then you can simply include it by performing the steps below:
Here, you will have to choose the transactions tab from the left menu.
Once done with that, move to the excluded tab.
After that, checkmark the transactions to be included.
And later on, move to the batch actions drop-down and choose undo.
Here are a few points that you need to keep a check on:
If personal expenses are excluded:
Just in case the user excludes a transaction, the bank register won’t reconcile due to the bank balance, and the QuickBooks balance will show a difference. If you do not reconcile the bank statements with QuickBooks online, then there is not an issue.
Alternatively, when the user reconciles the bank registers, he/she needs to track the personal expenses by adding the user himself as a supplier and assigning the transactions to an owner’s equity account.
If duplicate transactions are excluded:
In case you excluded a downloaded transaction, then in that case the balance will tally, and the user will be able to reconcile.
To Conclude!
While you reach the end of this article, it is believed that you might be successfully able to delete duplicate transactions in QuickBooks. However, if you have any queries or if you require any sort of technical assistance for carrying any task in QuickBooks, then in that case, give us a call at +1-888-510-9198, and we will provide you with immediate support and guidance. For any further guidance, feel free to connect with our technical support team.
FAQs Related to Delete Duplicate Transactions in QuickBooks
What causes duplicate transactions in QuickBooks?
Duplicate transactions usually show up when you try to import transactions from some external 3rd party program to the company file.
What are ways to find duplicate transactions in QuickBooks?
To find out any duplicate transactions, you need to follow the steps below:
Head to the bookkeeping menu and navigate to the transactions option.
Once done with that, click on the expenses tab and choose the number of columns to sort out transactions.
Did you know that QuickBooks desktop with hosting provides protection anywhere, anytime, and on any device having access to the data? When your team works with the same info at the same time, you get protection for your data, no matter whether they are using a Mac, PC, or tablet regardless of their location. Intuit hosting makes it quite easy to access the company file without any geographical restrictions. But what goes behind QuickBooks desktop hosting or how to host a QuickBooks desktop company file? Well, to help you out with this query, here we are. This piece of writing will brief you on how you can access QuickBooks desktop remotely by simply making use of an internet browser or remote connection from your home or office.
Thus, to get a better understanding of QuickBooks desktop hosting, stick around and scroll through the segment carefully. Moreover, if you are new to QuickBooks and are seeking professional guidance, then in that case, do not think much in ringing us up at +1-888-510-9198, and our QuickBooks support team is here to answer all your queries.
Talking about hosting, is generally a term used for cloud. In simple words, it means that your QuickBooks software and data are stored or hosted on an enterprise-level web server at a secure facility. This further lets you access them over a secure internet connection from anywhere or any device instead of using a local network.
How Safe is My Hosted QuickBooks Data?
Intuit offers hosting services through Rightworks, which is one of the leading providers of enterprise-level hosting. They further have IT professionals monitoring the system and handling the updates and upgrades regularly. The files and transmissions are protected through enterprise-class antivirus technology, firewalls, encryption, and multi-layer access controls.
Benefits of selecting QuickBooks Desktop with hosting over QuickBooks Desktop (local access only)
Anywhere, anytime access to applications and data
With apps and data hosted, one can simply connect anytime from anywhere. An internet connection is required with a simple client program. You can launch the remote access app and log in with the user ID and password. This will make your QuickBooks data ready to use. Note that, there is virtually nothing new to learn as the software looks and works just like it does on the system.
Data Security
QuickBooks desktop is usually hosted in top-of-the-line data centers that generally provide excellent enterprise-class scalability and are reliable as well. It further includes full-time security personnel, closed circuit video surveillance, continuous and redundant power systems with backup generators, fully redundant network systems having multiple backbone access, advanced network firewalls, and hazard avoidance and alert systems.
This will further let you access critical business info from computers anywhere. QuickBooks Desktop with hosting can help in keeping your business in check.
Data Protection and Backup
Intuit protects the data with encrypted transmission, firewalls, multi-layer access controls, and encrypted backups. The data is also auto-scanned with enterprise-class antivirus technology. Moreover, the hosted data is backed up nightly and keeps backups for 90 days. This simply means that in case you accidentally delete a file, then it will be easy to recover it.
Well, the need for hosted servers and virtual private networks i.e., VPNs in the office is eliminated with the hosted version. Instead, it secures the data by storing it in a protected data center, enhancing data security.
With the apps being in Rightworks data centers, the need to install and maintain them on the system is eliminated. You can simply access it using a client program.
Do I need my own network to host QuickBooks Company File?
There is no separate network required to access the data. All you need is an active internet connection.
Will it take too long to learn how to host QuickBooks Company File?
If you have basic knowledge of QuickBooks, then you do not need any specific training. QuickBooks Desktop with hosting is similar in terms of look and feel. However, if you are new to QuickBooks, then you can increase your learning pace by accessing support site, everything enterprise, including training videos for full-service plan members, etc.
Is the speed similar to that of running QuickBooks Desktop on PC?
A good quality, fast internet connection might be required. Though the experience might vary, it has been noted that the speed and functionality are boosted after switching. In case you are increasing the number of users, then a hosted version will let you do so, without hampering the performance.
Difference between QuickBooks online and QuickBooks desktop with hosting
QuickBooks Online: Well, QBO is a browser-based version that is designed for early-stage businesses that do not require advanced features and functionality.
QuickBooks Desktop Enterprise with Hosting: This particular type of QuickBooks is accessed using a remote access app or via Internet Explorer and further offers additional advanced functionality for growing small and mid-sized businesses. It is designed in a way to easily perform more complex tasks and further operate from different locations.
How do Microsoft Word and Excel work with QuickBooks desktop with hosting?
Microsoft Word and Excel work similarly with QuickBooks desktop hosting as they usually do with the desktop version. If you make use of Excel and Word, then you can simply export QuickBooks desktop reports to Excel. You can further export estimates, invoices, and statements to Word.
The user also gets the option to easily access the hosted versions of these tools over the internet. Not only that, you can also lease Microsoft Office directly from Rightworks for an additional fee. The Enterprise hosting service will cover the entire hosting for those apps at no additional charge and further lets you access them over the same connection.
When it comes to email, you can make use of QuickBooks email services, add Outlook to the Rightworks account, or configure QuickBooks to use Webmail.
The Rightworks users are required to tally with the QuickBooks user count. Moreover, every user is required to have separate login info. To understand it better, here is an example: In case your QuickBooks Desktop subscription lets up to 5 users, then you can have up to 5 hosting users.
How do I add users to Rightworks?
Just in case you previously had the right number of QuickBooks users and simply need to create Rightworks users, then you can simply add them using the Rightworks My Account Portal.
After you have added additional QuickBooks users, then simply add the same number of Rightworks users.
QuickBooks Desktop Hosting comparatively has additional benefits. Hopefully, this article right here might have helped you successfully host a QuickBooks desktop company file. However, if you have any queries or if you require any sort of technical assistance, then in that case, feel free to reach out to us at +1-888-510-9198, and we will provide you with immediate support and guidance for all sorts of QuickBooks queries.
QuickBooks accounting software is loaded with various features and functionalities, one such feature is that it lets you reconcile your payroll liabilities. When we talk about payroll reconciliation, it is basically the process of comparing your payroll register with the amount you plan to pay your employees. The aim of reconciling in QuickBooks is to confirm that the numbers match. Coming to payroll liabilities in QuickBooks, it can simply be categorized into two basic categories i.e., employer expenses, and employee liability. These two are then classified into sub-categories namely federal income tax, state income tax, social security withholding, and Medicare withholding. It is crucial to reconcile payroll liabilities in QuickBooks. To help you with this process, here we are with this segment sharing the complete information on how you can reconcile payroll liabilities.
For more details, stick around to this piece of writing carefully, or you can further get in touch with our technical support professionals at +1-888-510-9198, and we will provide you with instant support and guidance.
Essential steps for reconciling payroll liabilities in QuickBooks
You can try performing the steps below, in order to successfully reconcile payroll liabilities. The steps involved in the procedure are as follows:
Step 1: Create liability accounts
You need to simply start by making a list of the liability accounts.
The list of payroll liability accounts you need to reconcile includes:
Federal income tax withholding payable
Statement income tax withholding payable
FICA tax payable
401K or retirement benefit premiums payable
Health insurance payable
Step 2: Create transaction labels
You are now supposed to create transaction labels to separate employee and employer payroll liability transactions.
Now, you will have to turn on tagging from the settings tab and further click on QuickBooks.
Now, look for the tags feature and turn it on by clicking on the done tab when receiving the confirmation.
Further, create a new tag group.
For which you can head to the settings tab and go for tags.
Select new and then tag the group.
You will have to name the new tag group payroll liabilities and click on save.
Step 3: Create payroll liability sheets
You will have to simply set up payroll liability reconciliation sheets.
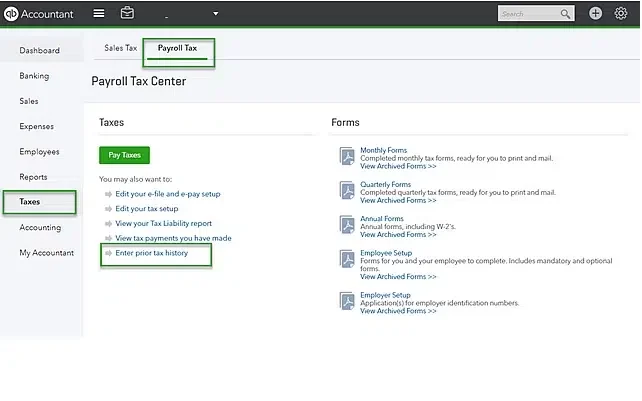
Step 4: Printing Reports
Under this step, you are supposed to print reports from your QuickBooks payroll software and general ledger. You can either print these reports or send them via email, as per your convenience and requirement.
Step 5: Reviewing the transaction
Herein, you need to review each payroll liability transaction and further reconcile outstanding items.
This step is essential, as it rechecks any aberrations in the payroll transactions
Step 6: Fix reconciling items
This is the last and final step, where you are supposed to fix any payroll liability reconciling items, if present.
Toward the end of this segment, we hope that the information shared in above might be of some help in reconciling payroll liabilities in QuickBooks. However, in case you have any queries, or if you need any sort of QuickBooks payroll support and guidance, then in that scenario, do not hesitate in connecting with our technical support professionals at +1-888-510-9198, and let them help you with all your QuickBooks-related queries.
FAQs Related to Payroll Liabilities in QuickBooks
How do you reconcile a payroll liability account?
You can reconcile a payroll liability accounting using the steps below: 1. Check the payroll register. 2. The payroll register lists all the crucial details about an employee’s payroll during a pay period. 3. Furthermore, confirm the employee time cards. 4. Also, check pay rates. 5. Confirm paycheck deductions. 6. And then, record in the general ledger. 7. Submit payroll.
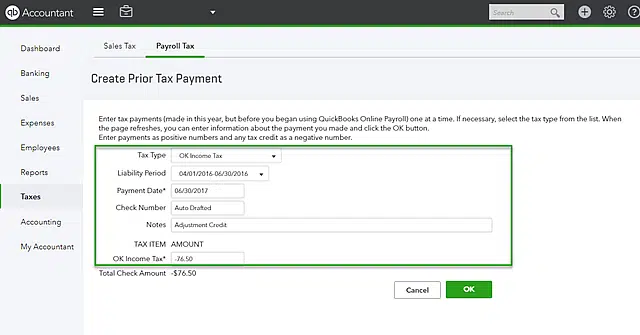
How to do a payroll liabilities adjustment in QuickBooks?
For adjusting payroll liabilities for the company file, the steps below can help: 1. From the reports menu, choose employees and payroll, then PD7A Report. 2. Now, choose the date range . 3. Furthermore, select the employees, and payroll liabilities. 4. Also, adjust payroll liabilities.
What are payroll liabilities in QuickBooks?
Payroll liabilities in QuickBooks include the wages of employees, payroll taxes, employee education, and service costs.
How do I zero out payroll liabilities in QuickBooks desktop?
For this, you need to perform the following steps: 1. Choose employees and also go for payroll center. 2. Furthermore, you need to choose payroll liabilities tab. 3. Also, choose change payment method from other activities drop-down list. 4. Now, in the QuickBooks payroll setup window, choose benefit and also other payments.
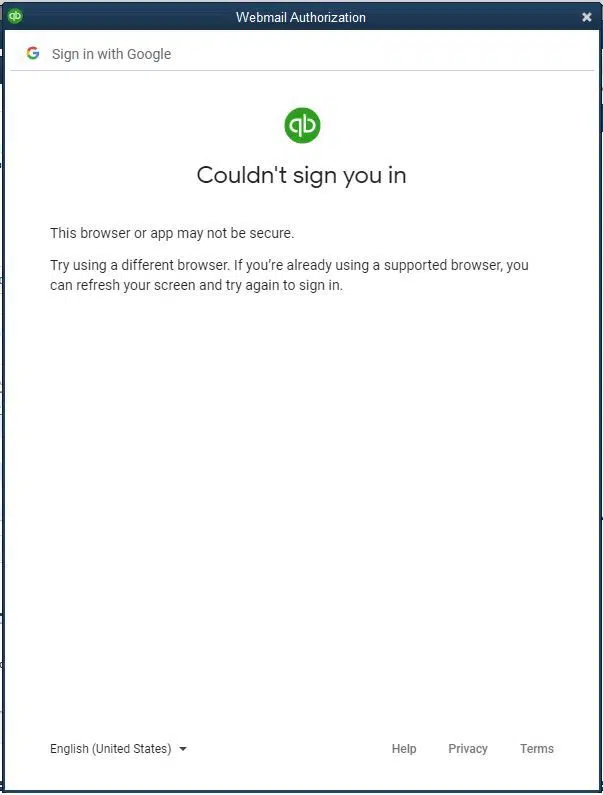
Trying to sign in Gmail through QuickBooks Desktop, but came across an unexpected error stating: QuickBooks Gmail not working? Well, if that is the case, then here is what you need to do. Often when there is an update from QuickBooks for added security, such sort of errors are experienced. You can further come across such errors when the credentials are incorrect or the Gmail settings are misconfigured. You can try reconnecting your account to eliminate any sort of email errors. The message that appears on the screen mentions that the security of the mail is under threat. However, it simply reflects that the app had tried to sign in to the Gmail account.
To learn further about QuickBooks Gmail not working issue, you simply need to go through this piece of writing carefully or can further connect with our technical support team at +1-888-510-9198 and we will provide you with answers to all your queries immediately.
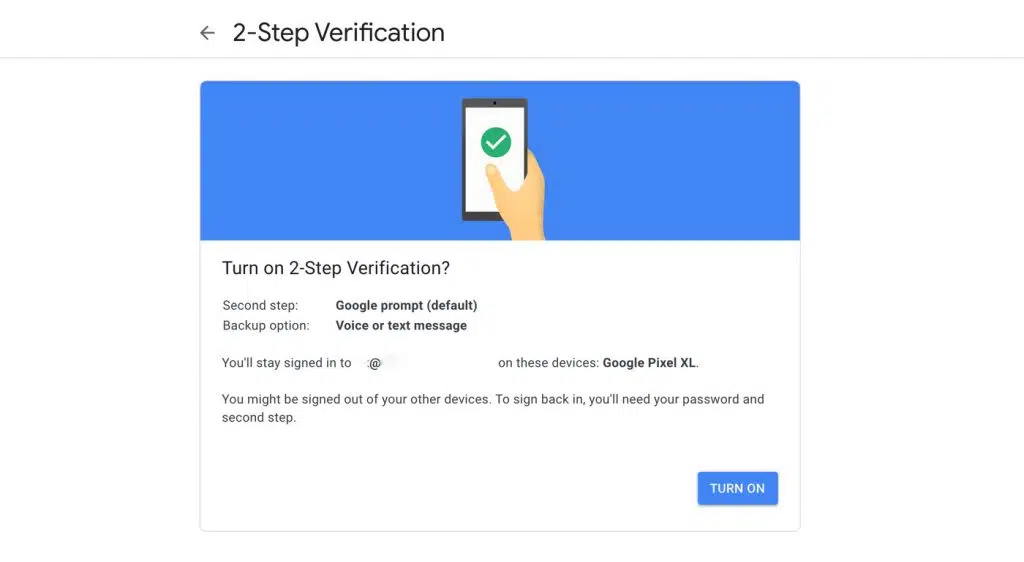
Solution 3: Change the enhanced security setting in QuickBooks
If in case you have configured Gmail to use enhanced security, then you will be simply asked to Authorize QuickBooks when sending a transaction or report.
At first, click on the allow tab to use Gmail in QuickBooks.
After that, from any active report or transaction, choose email.
Now, hit the send tab.
You might receive a pop-up requesting that you check in to your account using your credentials.
In the window of webmail authorization, you need to enter the credentials and click on the Continue tab.
Towards the end, choose allow to complete the process.
In case you are unable to authorize QuickBooks, then simply reconnect the Gmail account to QuickBooks and clear the option to use enhanced security.
You can set up webmail in QuickBooks to connect to your Gmail account.
Later on, just head to the menu and click on the preferences tab.
After that, select send forms.
Move to the menu and select webmail.
Once done with that, add the webmail by clicking on the add tab.
From the drop-down list, you need to head to the provider to connect your Gmail address.
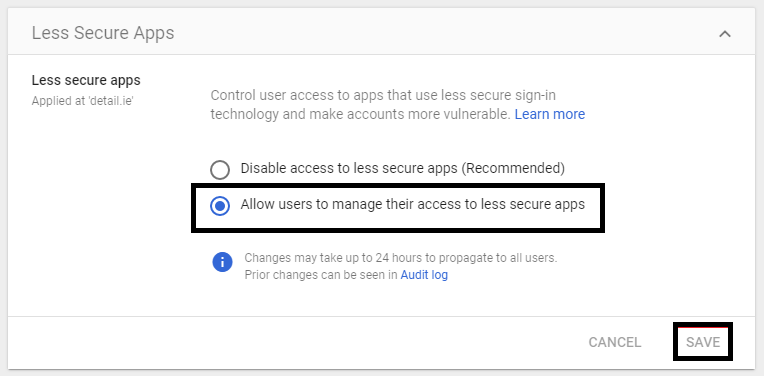
Go for the option Utilize enhanced security.
And then, hit the ok tab.
After you are prompted, sign in to your Intuit account by entering the credentials.
At times, your Gmail account might not be set up properly which can further trigger QuickBooks Gmail not working issue. You can carry out the steps below to set up your Gmail.
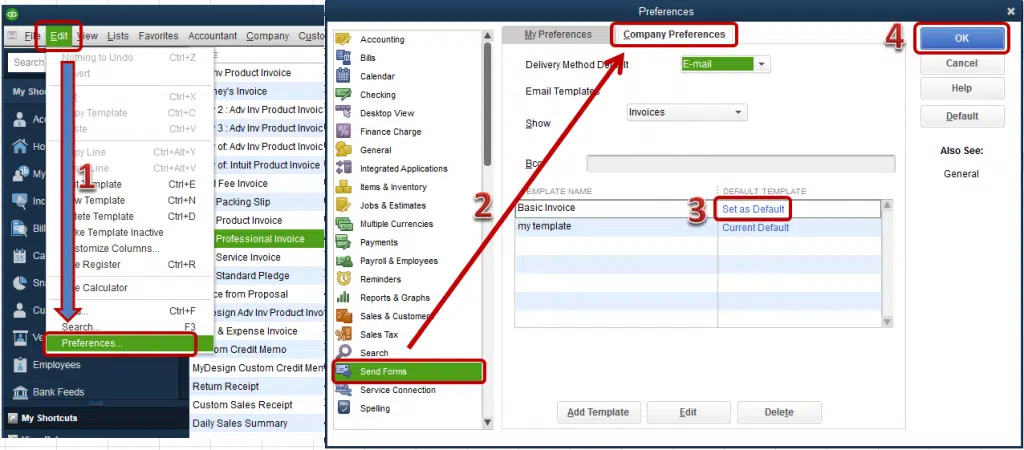
Navigate to the menu and choose the edit tab,
Head to the preferences option and select forms.
Now, click on the My Preferences tab.
Followed by heading to the webmail and clicking on the add button.
You will now see a dialog box, where you need to enter your Gmail id and select Gmail.
After that, the SMTP server information will be filled in automatically by QuickBooks.
Toward the end, click on ok tab and your email address will be added to your email ID.
Emailing QuickBooks invoices using Gmail is possible after connecting QuickBooks to the Google Account. You can manage all of your Customer emails in one place.
Steps to Integrate your Gmail Account with QuickBooks
Note that you can only connect one Gmail account at a time for the time being. In case you need to change your Gmail address, then you will simply have to unlink the one you are connected to at the current time. Further, you can link the one you want to use. The steps to integrate Gmail account with QuickBooks are as follows:
You need to simply create a new invoice or open one that is already open.
Further, once you have entered all the required fields, click on save and send to bring up the preview window.
You will then have to select the customer’s email from the drop-down menu.
Followed by, selecting Connect Google Account after adding Gmail address.
Now, head to the sign-in window enter the email address, and hit next.
After that enter the credentials.
Make sure to tick mark the should be chosen box.
This will let you send invoices successfully.
Steps to Unlink your Gmail Account
When you remove your current email address, QuickBooks will send invoices using the default email.
Performing the set of steps enumerated above might help in eliminating the QuickBooks Gmail not working issue or Gmail Couldn’t Sign you in From QuickBooks. However, if for some reason you land into the same error even after performing the set of steps discussed above, all you need is to reach out to our technical support team at +1-888-510-9198, and let them help you with your QuickBooks queries. Our QuickBooks support professionals have sound knowledge to deal with any sort of error experienced when working on QuickBooks. For more details, give us a call right away!
![QuickBooks Migration Failed Unexpectedly [SOLVED]](https://www.hostdocket.com/wp-content/uploads/2024/01/QuickBooks-Migration-Failed-Unexpectedly-.png)

![QuickBooks Gmail Not Working [SOLVED]](https://www.hostdocket.com/wp-content/uploads/2023/12/QuickBooks-Gmail-Not-Working-.png)