A Complete Guide for QuickBooks Online Price Rules
QuickBooks is an advanced accounting software, helping millions across the globe in meeting their business goals. It’s is a highly use friendly software and doesn’t require you to be an expert. However, a little knowledge of a few functions can be very helpful. If you wish to set your product price with QuickBooks Online, you will have a choice, based on factors, to establish an optional price on an invoice. This can be applied to a specific date range, client type, product type, service type, as well as to particular items and customers. To learn further about QuickBooks online price rules, make sure to stick around till the end, or you can further connect with us at +1-888-510-9198, and our certified QuickBooks ProAdvisors will ensure to answer all your queries.
Here we can explain two main aspects of price rules:
Two notable aspects of price rules
How to alter the price.
Indicating which customers/items the rule applies to.
1. How to Alter the Price?
You can ‘Edit/change‘ the sales price of a product or service. You can start by putting in the base price of a product while creating it.
A price rule will then change the base sales price upon being applied in a sales transaction. The base price/rate will be modified by a percent (up or down) by the rule. You can choose the field to alter that show up in the price rule window.
While selecting a percentage, you can explain if the rule will increase or decrease the base price/rate, simplify the type of rounding to use, and the portion to be used. In the process of selecting fixed amount, the base price/rate will be altered by the amount provided by you.
How useful is this feature?
This feature presents you a significant selection of rounding options:
No rounding
The next increment of (.05, .10, and so forth up to 1.00)
Price that end with a clear amount/value (.49, .79, .88, .89, .98, .99)
If you decide to select ‘Custom price‘ per item, the ‘Products and Services‘ button of the price rule will display the item records, and you can put in an exclusive price for every item that is visible, at the right.
The current sales price for an item will display in the Adjustable Price column if you create and set a new rule using this option.
Important: Please note that you will still have the option to override the calculated price for a specific item within this price rule if an adjusted price column for the items is available with you (no matter if you stipulate the percentage or fixed amount).
Please remember that if you are not entering an adjusted price for a product, the price that was calculated for any of such rules will at all times display the current sales price/rate found in the product/service item record. Thus, you will be required to enter an adjusted price if you wish to fix the price and don’t want to change it.
2. Indicating which customers/items the rule applies to?
The price rule will be, by default, applicable to all items in sales transactions and for all the customers. In case you wish to set a limited number the customers, and/or the product/service items the rule will applies to, you will be able to do it as per your choice. Furthermore, you can set up a time-sensitive price rule with the date of your choice (either or both the Start and End date). This feature is available to create something like a special holiday price.
Furthermore, the “Select customers” options enable you to select all customers, individual customers, or customers by type.
Select add customer in order to add the customer to the list. The display will change at the bottom of the price rule if you click on Select individually. It will not list all customers, but only the customers that the rule of price applies to.
“Select products or services” will enable you to select all products and services, items of a specific item type, or to select individually.
In Select individually, you have a display similar to what you had with customers. You can click the ‘Product or service‘ button and prepare your list.
Ans: Price rules enable you to control the products’ price. You will be able to offer discounts or increase the price of an item for a particular amount of time as per your wish.
How to turn on price rules?
Go to Gear.
Select Account and Settings.
Furthermore, choose the Sales tab.
Tap on pencil icon under Products and services.
Click “Turn on price rules – Beta” and Save.
How to create a price rule?
Go to Gear
Also, select All Lists and select “price rules”.
Select “new price rule” on the price rules page.
Que: How to create “X” type of rule (select specific items or customers, percentage, round down)?
Ans: Go to the ‘Price rule edit page‘. This section will enable you to choose the date range and the rule will be active. The qualified customer type, customers, product category, product type, and price adjustment will complete. We encourage the feature to increase or decrease the sales price by a percentage, fixed amount or a particular price. You can also choose to round the amount.
This section will enable you to choose the date range and the rule will be active. The qualified customer type, customers, product category, product type, and price adjustment can be done. We encourage the feature to increase or decrease the sales price by a percentage, fixed amount or a particular price. You can also choose to round the amount.
Que: How to create a Customer type?
Ans: You can add Customer type by clicking on ‘Customer Types‘ from Customers.
Que: How to assign customer type to some particular customers?
Ans: Choose the ‘Customer‘ and click on ‘Edit‘ and then additional info.
Que: How to assign a customer type to multiple customers at the same time?
Ans: Assigning a customer type to more than one customer at the same time is possible with QuickBooks Online. Select the ‘Customers‘, uncheck all the customers you wish to include in that customer type and tap on the batch actions drop down in order to select the ‘customer type‘. Click “apply”.
Que: How to run a report for price rules or customer type?
Ans: You can run a report for price rules or customer type. Customize the ‘Customer Contact List report‘ to add a ‘Customer Type‘ column.
Que: How to apply price rules to an invoice or transaction?
Ans: The price rule gets itself applied as you add items while creating an invoice. The price rule can also be overruled by clicking the rate and seeing all existing price rules.
Que: What if the selected customer/item combination is entitled for more than one price rule in a transaction?
Ans: In such a case, that item’s default sales rate will show up with an indicator beside the rate field. It will read ‘There are multiple price rules that apply to this product or customer”. To fix this, you can use the drop-down list in the rate field. Next, select the rule you wish to use or put in a different rate.
Que: Can we use QuickBooks Online price rules for services to charge different amounts based on the employee who did the work?
Ans: Yes, we can use price rules for that.
Que: Does QuickBooks Online take command to record the discount to COGS – Discounts?
Ans: QuickBooks Online Price rules feature is similar to QuickBooks Desktop price rules, as the price change is not available as a discount. This feature is pretty much similar to overriding the sale price.
Que: How to use price rules on inventory bundles?
Ans: Bundles do not have price of their own as they are just a grouping of items. Thus, you can’t add a bundle to a QuickBooks Online price rule. But, if you add the bundled items with a price rule, and add them to an invoice, it will display the price recommended by the price rule.
Que: How to use price rules on recurring sales transactions?
Ans: Recurring sales transactions keeps the same rate of the item as it was at the time when the recurring transaction was created. Thus, if you happened to use a price rule while generating the recurring transaction, it will keep on using that same rate until the rate is edited or changed on the recurring transaction. In case a price rule expires, or the rates are edited or changed, the recurring transaction that was set up with that particular item will not be affected.
This article should assist you understanding QuickBooks Online Price Rules. And we hope that above-mentioned FAQs have answers to all your doubts and queries related to QuickBooks online price rules. In case you have any more questions, you can contact our 24*7 QuickBooks Support team and, we will be glad to offer you a personalized solution. Also, you can contact us if you have any other QuickBooks related issue. Our toll-free number for QuickBooks help is +1-888-510-9198. Thanks for visit here in this blog.
Over the past few years QuickBooks has become one of the most trusted accounting software in the world. Right from small and medium businesses to accountants to even individuals are using this software as it comes with many perks. Packed with powerful features, this accounting program can handle bookkeeping, payroll, manage sales and finances and also helps with inventory. This software also helps in tracking payments and finances. Even after being the best accounting program, it does have problems. In this article, we are going to share the complete details about QuickBooks banking error 9999, to help you culminate such issue successfully. However, if you are seeking for any sort of professional guidance, you can reach out to our technical support team at +1-888-510-9198, and our certified ProAdvisors will answer all your queries.
Many a times, QuickBooks face error and of such common issue that users face is banking Error 9999. Error 9999 is a script error that can block your internet connection of your bank and QuickBooks Online. When this error happens the system hangs, responds slowly or just stops working. This situation can really affect the business operations.
QuickBooks banking error 102 happens when you try to update your bank information. The best thing is that when this issue comes up you can report the error by yourself or seek advice from QuickBooks online support professionals.
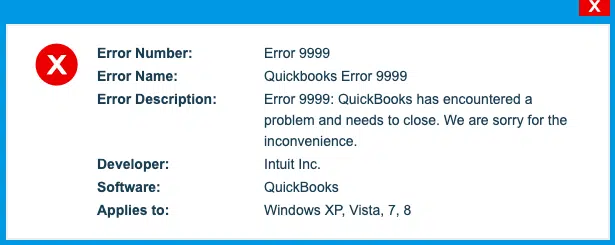
You might see the following error messages on your desktop screen:
Error Message: “Sorry, we can’t update your account. Please try updating again later. (9999)”
Or
Error code 9999 – Can’t update
To Report Regarding the Error 9999, you have following options
All about reporting regarding Banking error 9999.
On the banking transaction screen, you have to click on the “Report” Issue which is there on the error.
Provide your “Registered name” as well as “Email address” and then click on “Submit“.
There are a bunch of factors that trigger QuickBooks banking error 9999. Let us have a look:
The link between the bank and the Server is too slow, as a result of poor internet connection.
Or in case there is any antivirus or firewall application hindering the connection between the QuickBooks server and the bank’s website.
Excessive browser cache files can trigger such an error.
If the windows firewall is blocking the bank website
Moreover, some issues with the bank’s end can trigger such an error.
QuickBooks files mistakenly deleted can trigger such an error.
Fixing QuickBooks Banking Error 9999
There are a bunch of solutions that you can try to perform one by one to fix the banking error 9999 in QuickBooks. Let us explore each of the methods one by one:
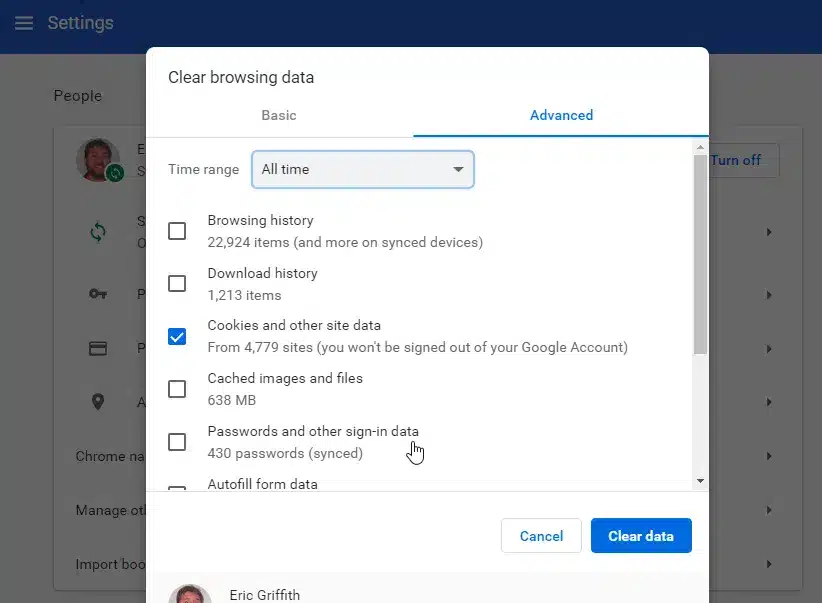
Method 1: Clear Browser’s Cache Files
For Google Chrome
You can launch Google Chrome and head to settings tab and click on clear browsing data.
Move to cached images and files option
Also, click on clear data tab
Furthermore, the cache files will be deleted
For Firefox
Enter About: preference#privacy in the address bar and click on enter tab
Further, select the clear recent history tab
Followed by clicking on clear now and select cache from the list
For Internet Explorer
Click on ctrl + shift + delete tab
You now have to head to the temporary internet files and website files from the delete browsing history page.
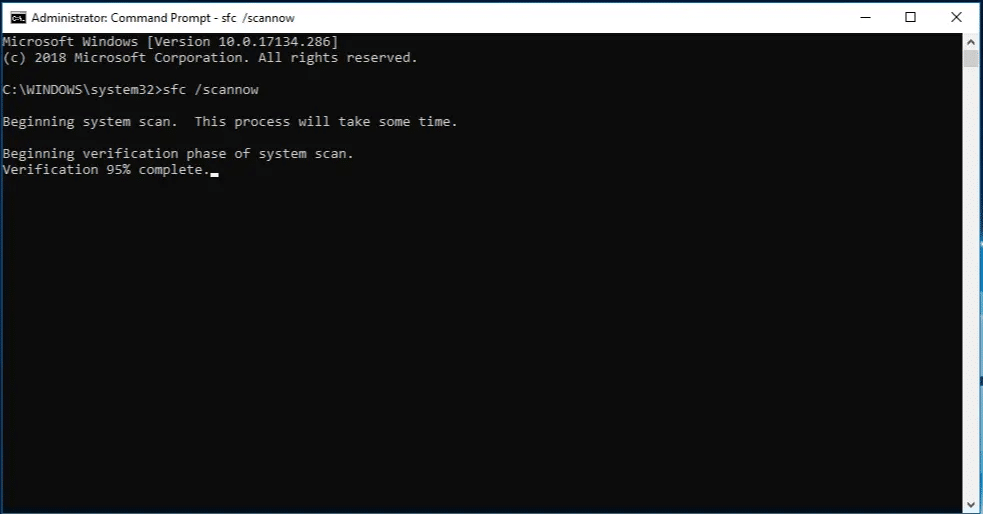
You can check your system files with windows system file checker. The command prompt window can be used using the below steps to complete the operation.
You need to first click on windows key
Now, in the search bar and enter command
Furthermore, select run as admin by right clicking the command prompt tab
Type the following command in the command prompt: SFC/Scannow
Click on enter tab.
You can restart the computer
And later on check if the issue is fixed or not
Method 3: Repair the registry files
Windows registry can be extremely essential for running various functions. It is crucial to fix any damaged windows registry files at the earliest. The steps below can help in fixing the registry files successfully:
The very first step is to select the start menu
After that enter command in the search box.
Press ctrl + shift and click on enter tab
If asked, click on yes
You now have to enter regedit
And further click on enter tab.
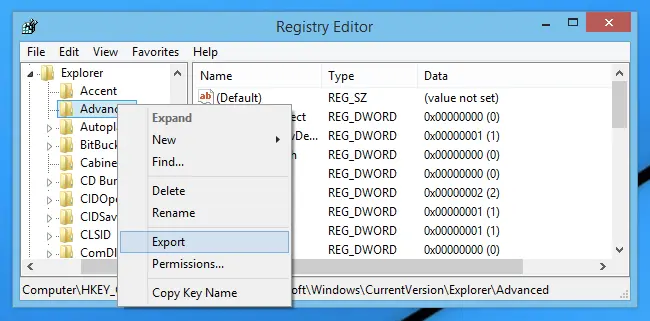
You will then have to right click teh key associated with the issue in teh registry editor
Also, proceed to the file menu.
Hit the export tab
The backup key should now be saved in the folder
Choose selected branch in the export range
And click on save tab
Ascertain that the .reg file extension is used to save the file
Make a backup of the registry entry and check if the issue is rectified.
By following these simple steps if still the issue doesn’t get resolved then worry not seek assistance from the QuickBooks Error Support Helpline Number at +1-888-510-9198. You will get an instant solution as well as some advice on how to avoid such errors in the near future.
FAQs related to QuickBooks banking error 9999
How do I fix QuickBooks Error 9999 in online banking?
You can perform the below steps to fix the online banking error 9999″ 1. The first step is to click on updates tab and run it three times to see the results 2. Clear cache 3. Disconnect and reconnect the feed 4. When you disconnect the feed there shouldn’t be any transaction listed in the list.
What is QuickBooks error 9999?
Error 9999 is a script error that causes interruption between the connection of your bank and QuickBooks Online (QBO). You can bring in your transactions through WebConnect.
How do I fix a bank error in QuickBooks?
You can sign in to QuickBooks online and head to bookkeeping and choose transactions and further select the bank transactions. Choose the blue blank square for the account you want to update. Go for edit tab in the bank account you want to update.
QuickBooks online has marked its presence in the accounting and bookkeeping market in the past few years. However, just like the other accounting software, QuickBooks is prone to certain error, and one such error that we are going to elaborate today is the QuickBooks banking error 103. Banking Error 103 and 310 are very common QuickBooks errors. The banking error 103 means that the login credentials that have been entered in the QuickBooks Online are not accepted by the financial institution’s website. While error 310 is when the login request is stopped till the users update the sign in information in QuickBooks Online so that the bank cannot lock the account access.
In case you are also experiencing similar error, then reading this segment right here will help. Just in case you require any sort of assistance, then in that case contacting our tech support team at +1-888-510-9198, and we will provide you with instant support services.
What is QuickBooks error 103?
Before we dig in deep, it is important to get a grip on to the QuickBooks error code 103 and 310. QuickBooks error 103 usually takes place when you sign-in to QuickBooks online and the details you mention doesn’t match with the one on the website of the financial institution. This particular error states that QuickBooks is no longer accepting your login request. It further indicates that the login process is paused as the user is updating their login details with QuickBooks online version which also restricts the bank to lockout the account access. To prevent the bank locking your access to the bank, then you need to update the login information in QuickBooks online.
Fixing QuickBooks Banking Errors 103 and 310 Like a Professional
Below are the solution steps for Banking error codes 103 and 310. Follow every steps in serial in order to resolve these errors in systematic way.
Solution 1:
First click on the Verify your Credentials link which is shown within the error message. In a different window will open for the bank’s website where users can re-enter their login credentials. Do not auto-fill the entries, instead manually type the username and password.
Then log out of the bank’s website.
After this come back to QuickBooks Online and again enter the same username as well as password in the same format needed in the bank.
Now Click on Update Sign-in Info.
Note: In case the users cannot see the link verify your Credentials, then try updating the account within QuickBooks Online.
On the upper right corner,
Click on the Update button.
Run at least three updates during the non-peak hours.
Users should make sure that they are connected to the correct URL of the bank account otherwise when they click on Verify your Credentials link the bank website might not come or they will not be able to successful log into their account. The users can also try to verify the bank connection by finding the bank’s login web page URL or the URL after they log into their bank accounts.
Try finding for the bank using the URL used outside of QuickBooks Online so as to login to the bank account and once you get it copy it.
In case users are not successful, they can find the banks using the URL after having logged into their account. However, few extensions like the slash (/) needs to be removed from the URL. This will help in finding the correct website.
Important: To solve error 310, users should verify if the username and the password that they are using are accepted by the bank website.
Follow these given steps:
From the left menu select Banking.
Click on the Pencil icon for the account.
Click on the Edit Sign-in info.
Then click on the hyperlink for the bank’s website which is at the top of the
After this a new window will open for bank’s website. Users should ensure that they are able to access their accounts via this site and they also have to confirm that they can find account details without any error.
Note: In case the login information is accepted then the account needs to be manually updated. If the problem still persists and the error 103 and 310 doesn’t get fixed seek help from customer care using the below mentioned information.
Name of the financial institution being used.
The bank name that is being selected during the set-up of the account.
The website link that is used to connect to the users bank outside of QuickBooks Online and once successfully logged in the URL of that.
The type of account being connected to like business, personal, cash, management etc.
The error code which is being displayed: 103 or 310.
Many of the banks need the users to sign-in with a special access instead of the common password. In that case, users should check it with their respective bank if they are using the right credential. In case the issue is not solved then seek help from customer care service providers.
For US only: Key Bank Customers
In case users get these errors, they have to log into the account from the bank’s site and ensure that the option to allow third party is selected.
(Self-Service Tab > Security Center)
Key Bank accounts may also have the following path to allow third-party access: login > User Profile > Third Party Access > select phone to authenticate (MFA)
These steps help you to connect and disconnect required number of bank accounts with QuickBooks. However, if you still have any problem or have any query, you can contact our QuickBooks online support team at +1-888-510-9198 to get the best solution of your problems. Our support lines remains active 24/7 to help you.
For the past decade QuickBooks have changed the way accounting activities are performed. Now it is no longer a time taking and complicated task, and all thanks to this new age accounting software. All across the globe small and medium businesses are now making use of QuickBooks for accounting as well as payroll. It has made business operations much smoother by streamlining financial management system. In this article we have discussed about the complete procedure of QuickBooks Payroll Setup Checklist in Intuit Desktop Payroll & Online Payroll.
Even though QuickBooks Payroll comes with many benefits it is a bit complicated. Today, this path breaking software is being used on desktops, laptops, and even cloud and it also offers various amazing features suitable for various devices, as well as operating systems. If you are planning to setup desktop or online payroll account, QuickBooks Payroll might require certain information. Here is the checklist for the information that you would require during the set-up of the software. Apart from this, if you have any other query regarding the software or face any error you can directly call to Intuit QuickBooks help community. Or you can give us a call in our 24/7 QuickBooks payroll support number i.e. +1-888-510-9198 and our Intuit certified ProAdvisors who have years of experience will be ever ready to help you in this.
Setting up payroll will be a smoother process if you can collect the following information first:
Category
Type of information needed
Company
The frequency that employees are paid (weekly, every other week, twice a month, or monthly)
The date you plan to start using Payroll
The first pay period that you’ll run within QP
Compensation, Benefits, Contributions and Deductions
Types of compensation (hourly wages, salaries, commissions, vacations)
Sick and vacation time policies
Insurance benefits (health, dental, vision)
Retirement benefits offered (RSP)
Additional deductions that the employee wants withheld (for example, child support, repayments of employee advances or loans, life insurance)
Additions (bonuses, travel reimbursements, employee advances or loans and tips)
Tax Information
Federal tax business number (BN)
CRA Payroll number
T4 transmitter number
RQ payroll information
Employees
Employee names, addresses, and Social Insurance Numbers from your employees’ T4 forms
Employee withholdings from the employee’s TD1 form
Employee wages/salaries, additions, deductions, and company contributions
Sick and vacation time hours and monies accrued
Year-to-Date History (YTD)
You’ll need to enter year-to-date payroll information ONLY if you’ve started using QP after January 1 of the calendar year AND if you’ve already run payroll using another system at least once since January 1. (If you start using QuickBooks Payroll after January 1 but have not yet run a payroll this calendar year, you will have no year-to-date information to enter.)
Year-to-date information for each employee is available on the employee’s most recent pay stub from the previous system.
Copies of payroll liability cheques from the beginning of this calendar year to the date you started using QP
Note: once you run a payroll in QuickBooks Online, you’ll no longer be able to add or edit year-to-date information. Be sure to add all employees and payroll data prior to running payroll
QuickBooks payroll requires certain information for setting up in the QuickBooks desktop or even in QuickBooks online payroll account. Once the user completes the set up process, after that it is very easy to spot all the information form the previous payroll provider, or from the records, accountant, federal and state agencies, etc.
QuickBooks users have a plenty of options for payroll on QuickBooks desktop or even in cloud, and the user needs to make a wise decision of selecting the most appropriate out of many.
No doubt, QuickBooks desktop payroll, as well as QuickBooks online payroll has a large customer base, and thus it is ensured by the developers to offer a wide range of options to suit the needs of every user. The varied options are very much confusing for the user, and that is why our team ensures to help the users in opting for the best option that suits their requirements.
The Desktop Payroll version is one of the best and is being used by many entrepreneurs all across the globe. Though it is used by many users, there are a few who like their data on the desktop as they don’t like changes. Many users resist change, but it can bring many perks.
Some option for Desktop that runs on the desktop versions:-
No QuickBooks payroll tax form filing.
QB payroll tax filing and good job costing and the ability for yourself.
QuickBooks Desktop Enter the Payroll hours and amount.
QB Desktop features of Enhanced.
QuickBooks desktop Payroll service is pretty easy to use and that’s why bookkeepers, accountants, business owners and even individuals can make use it. However, for the desktop version it charges per cheque, but for the online versions the direct deposit is free of cost. For any further information regarding the setup of the desktop version reach us out via our 24/7 toll-free .I.E. +1-888-510-9198.
QuickBooks Online is another version that is widely used and it is within the QuickBooks Online Payroll along with Intuit Online Payroll. You have to integrate into QuickBooks so that it runs from there. This is a very important step to do, so as to make sure that the tax rates as well as the previous payrolls are recorded properly. This is because it isn’t easy to change in the online version without an adjustment as it can be done in the Desktop version.
This one is a very good option for the QB Online Payroll users who have QuickBooks Online or who have not used QuickBooks ever in their life.
QuickBooksOnline Payroll
Just like the Intuit Online Payroll, QuickBooks Accountant version is a new age product that is packed with many amazing features and have brought significant changes in the organizations operations. The Intuit QuickBooks Online Payroll doesn’t charge direct deposit fees but it charges $2.00 per person every month if there is one client.
But what is great about it is that the monthly fee and per person charge drops when you get more than one clients. You make a great profit as the charge drops to $0.50 per employee and with more than one client.
A great thing is that clients have their own logins and passwords so that they can handle their own payroll. And once they set up the QuickBooks, Intuit Online Payroll, the need to worry about it doesn’t arise, except for the taxes. If you want to know more about Intuit Online Payroll you can consult with our Intuit Certified ProAdvisors.
We have been in the industry for a long time now, and this has helped us in learning a lot about the software. And that’s how we render quality, as well as quick support service to our customers. We are available 24/7 through our toll-free customer care number to listen and help out our clients. So, why wait, dial our QuickBooks support number+1-888-510-9198 and get an instant solution to any QB related problem.