Experiencing issues in QuickBooks is quite common but can be tiring at the same time. In today’s segment, we are going to discuss QuickBooks error c=184 its causes, and fixes. This particular error is also experienced when there is any sort of damage to the network file and the transaction log file. It further impacts the company file data and also can be seen when the reporting dates of the software do not tally due to 29 days in February.
Coming across this issue can be a little common due to some factors, which we will be discussing later in this segment. Learn more about the QuickBooks unexpected error C=184 same by reading this piece of writing or connect with our tech personnel at +1-888-510-9198 and ask them to carry out the necessary steps on your behalf.
What is QuickBooks Error C=184?
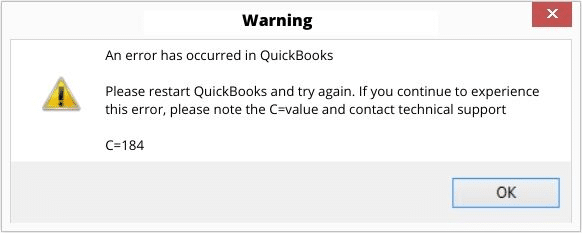
An error message stating: “An error has occurred in QuickBooks. Please restart QuickBooks and try again. If you continue to experience this error, please note the C= value and contact professionals” can appear on the screen when working on QuickBooks or if the files related to the QuickBooks software get damaged. This error can be a bit tricky to eliminate.
What instigates QuickBooks unexpected Error C=184?
The below set of steps can be performed to successfully eliminate the error in QuickBooks. Let us have a look:
A basic factor triggering this issue can be when reporting dates of QuickBooks desktop aren’t matching due to leap years.
Moreover, if QuickBooks isn’t installed in a proper manner.
In case the files including .Nd and .TLG files are damaged or corrupted.
Another method that can help the user in eliminating the error can be to run QuickBooks install diagnostic tool. The steps to be performed here are as follows:
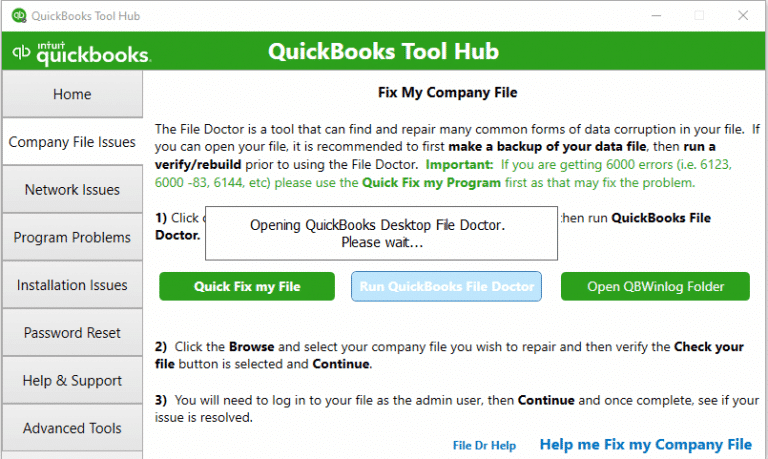
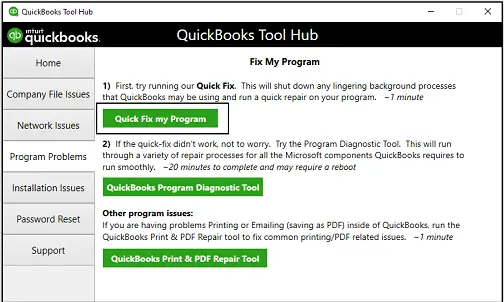
The very first step is to open tool hub program on your QuickBooks desktop.
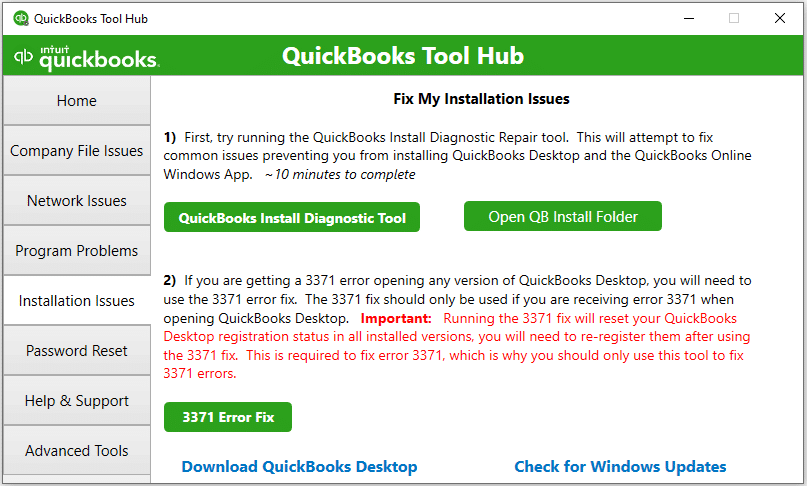
After that head to the Installation Issues tab and choose QuickBooks install diagnostic tool.
The next step is to save the file to the Local desktop or downloads folder.
Also, install the QBinstall tool on your system and accept and agree to the Intuit’s license agreement.
The last step is to reboot your system after running the install diagnostic tool to ensure all the components are properly updated.
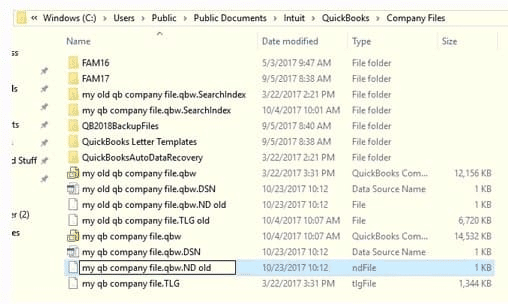
Process 4: Rename the .ND and . TLG files
Often the files like TLG and ND can create such an error in QuickBooks. In that case, the user simply needs to rename the files. The steps involved in that process are as follows:
The user needs to look for the folder in which your company files are located.
Now, look for the ‘.TLG’ and. ‘ND’ files.
The next step is to right-click on each of them and chooses the Rename option.
Also, add old at the end of the file names.
This will prevent QuickBooks software from accessing these files suspected of any errors.
The last step in the process is to launch the QuickBooks software and access your company file(s).
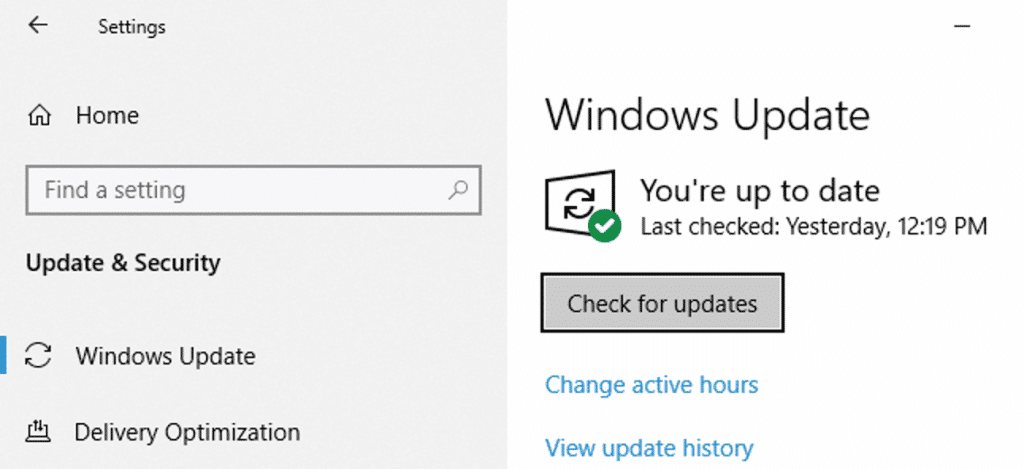
Process 5: Update your Windows
At times, a simple update can work, as an outdated version of windows can create issues. This shall also assist in resolving the Error C=184 in the QuickBooks software. The steps involved in this process are as follows:
The very first step is press start tab
And then enter update
After that click on the Check for updates option.
This shall show the list of all the available updates.
After that mark all the important updates and hit on the Download button.
Now, reboot your PC and allow the updates to get installed.
Lastly, launch the QuickBooks software and check if the error got fixed.
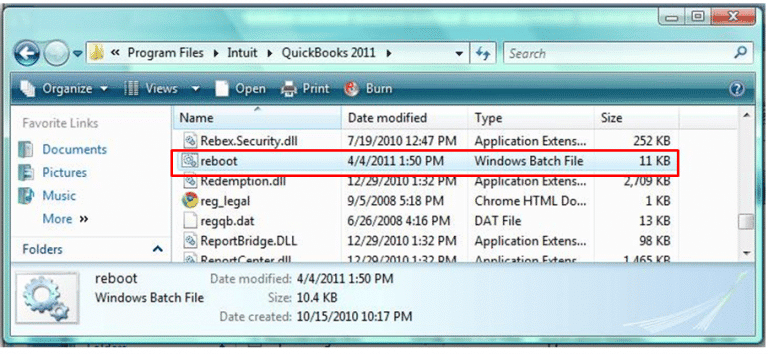
The last method is to run reboot.bat file. The steps involved in here are as follows:
The first step is to close the QuickBooks application on the system.
After that right-click QuickBooks.
Now, choose the Properties using the drop-down.
The next step is to choose the location to open the file.
Also, run Reboot.bat folder if you are inside the QuickBooks file.
The next step is to, press the Admin tab.
Also, run Reboot.bat
The CMD Window will appear, and the file components will process.
Lastly, restart the system
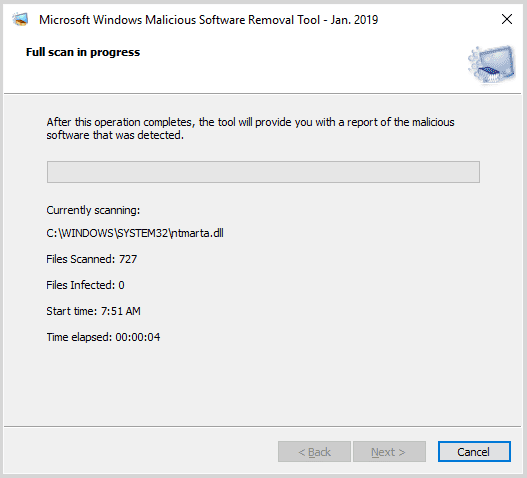
Process 7: Check for Viruses or Malware
Check your desktop for any sort of viruses or malware, as it is essential for maintaining the security and integrity of your QuickBooks data. You can perform the below steps to check your system for viruses or malware:
Install an antivirus software, in case you do not have already.
Furthermore, update the antivirus software.
You can further run a full system scan to check for viruses and malware.
And then, restart your computer after the scan is complete.
With this, we end the segment with the hope that the information stated above might be of some help in eliminating QuickBooks error code C=184. However, if you aren’t able to deal with the issue using the set of steps listed above, then in that case contacting our tech support team +1-888-510-9198 is recommended. We are a team of certified QuickBooks professionals who work round the clock in providing immediate support and assistance.
The error code c 184 in QuickBooks indicates that the .nd and .tlg files are damaged. And it can also be seen when opening the company files in QuickBooks.
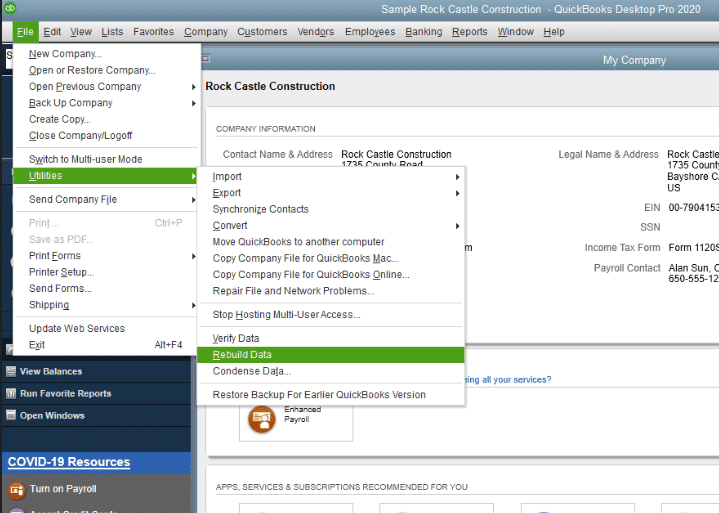
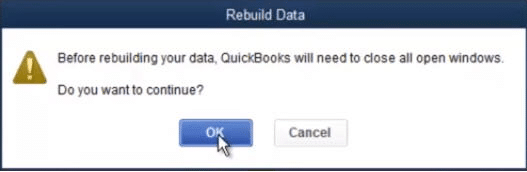
How do I fix a corrupted file in QuickBooks?
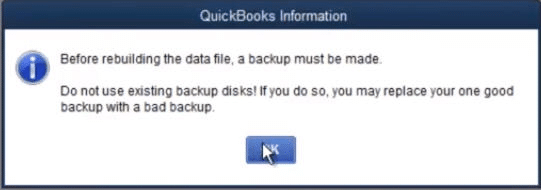
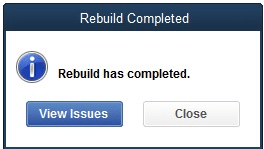
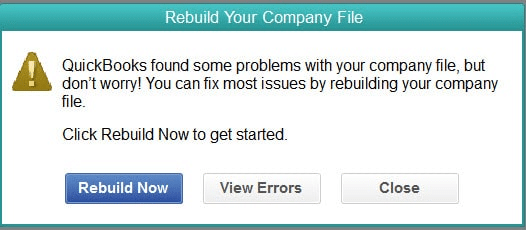
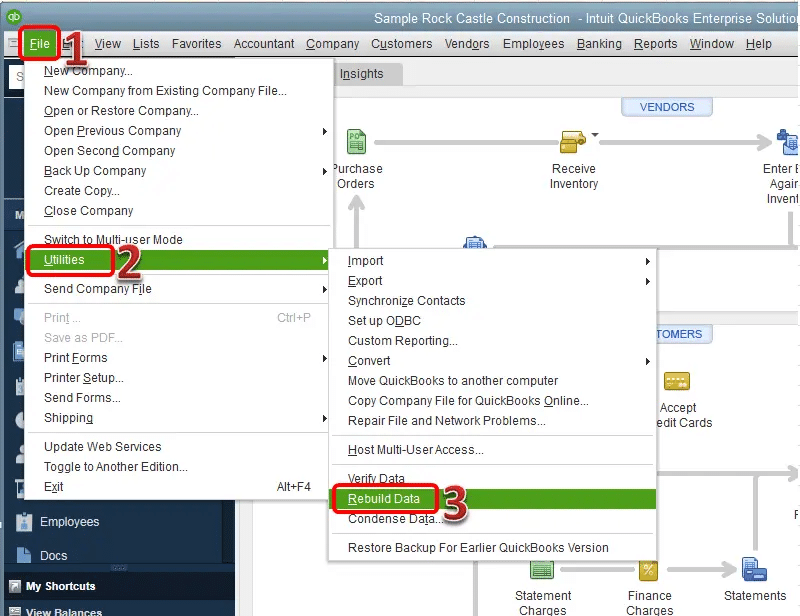
You can try fixing a corrupted file in QuickBooks using the steps below: 1. Open QuickBooks and file menu 2. After that, click on rebuild data 3. You are then required to click on ok if asked to. 4. This will ask you to create a backup and click on ok tab to save file locally. 5. After the backup is created, rebuild data utility will fix the data damages.
What is QuickBooks file doctor tool?
QuickBooks file doctor tool is a tool designed by Intuit to fix various company file related issues in QuickBooks. You can further try rectifying the network issues in QuickBooks using the file doctor tool from the Tool Hub.
Can updating QuickBooks fix Error C 184?
Outdated QuickBooks can trigger a bunch of errors in QuickBooks. Thus, it is suggested to update QuickBooks to the latest release and this might also help in getting rid of the QuickBooks error C 184.
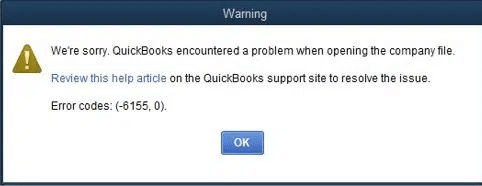
QuickBooks Error 6155, 0 belongs to QuickBooks 6000 series error. Such an error usually shows up when you try to open your QuickBooks company file to access the financial records. In case there is missing or damaged installation files, then it is most probable to experience this issue. As a result of this error, one might experience issues in opening their company while accessing the financial record of their company. There can be a handful of factors causing such an error.
In order to know more about this error its signs, its causes and also troubleshooting solutions to rectify this error read this article till the very end where we have covered almost every detail about this QuickBooks Error 6155,0 that will help you to resolve this error without causing much technical distress.
What is QuickBooks error 6155 0?
QuickBooks company file error 6155 0 as mentioned earlier belongs to the 6000 errors series and usually appears on the screen when you try to open a company file in QuickBooks. This error shows up on the screen with a warning message that states: ‘Error 6155, 0 an error occurred when QuickBooks tried to access the company file’. or We’re sorry. QuickBooks encountered a problem when opening the company file. The QuickBooks error code 6155 0 usually shows up if there is incomplete installation of QuickBooks Desktop and you are running the verify/rebuild data to fix the company file.
What are the factors that trigger QuickBooks Error 6155, 0?
It is very important for the users to know all the possible factors that are responsible for this error, as it makes error- resolution process easier and more effective. So, to help you with that, we have listed below all the possible causes that trigger this error and for that you need to keep your eyes on it. They are:
Corrupted or Incomplete installation of the QuickBooks Desktop Software on Windows.
Another reason that triggers this error could be a missing company file from within the QuickBooks installation directory.
Due to a Detrimental malware attack or virus attack your Company file may be infected.
Corruption and Data damage in QuickBooks Desktop Company file.
When you are possibly trying to access a read-only Company file.
Effective Procedures to Resolve QuickBooks Error Code 6155, 0
Here, we have listed the most considerate instructions that may help you to resolve this error effectively. To do so, follow the stepwise instructions given below:
At times, due to an outdated version of QuickBooks Desktop Application you might end up with this error code 6155, 0. So to fix this error code, update this software to the latest version by following these steps:
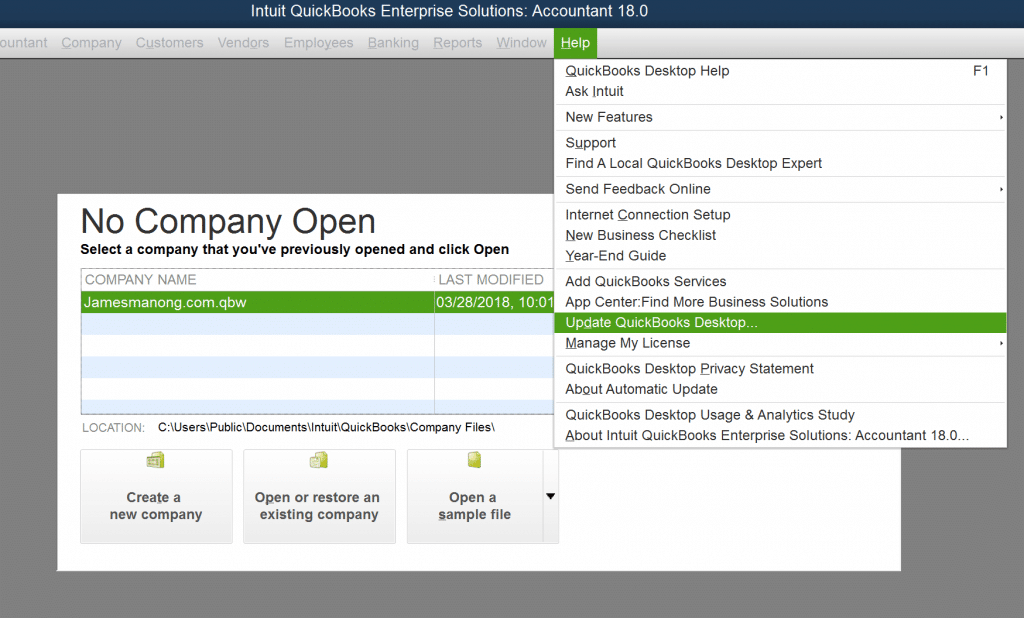
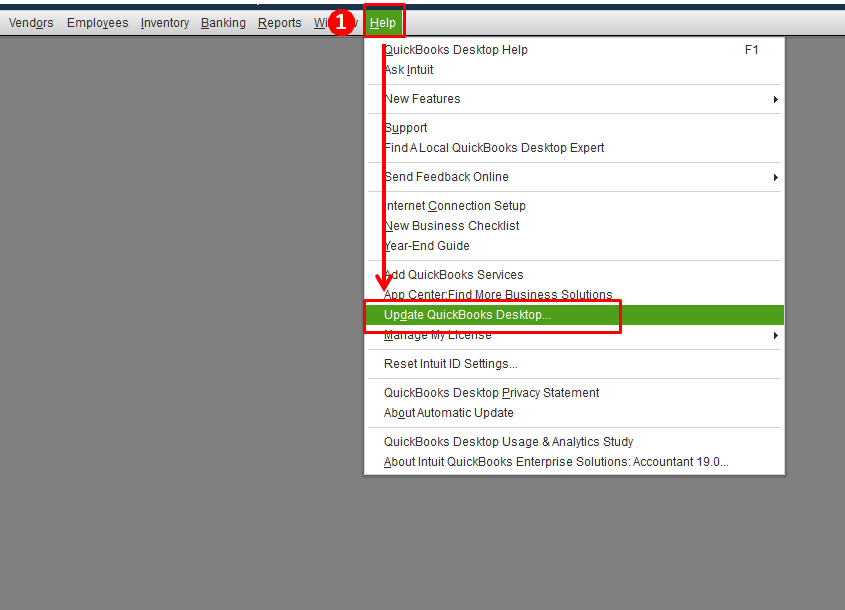
Go to QuickBooks Desktop application, click on Help from the main menu.
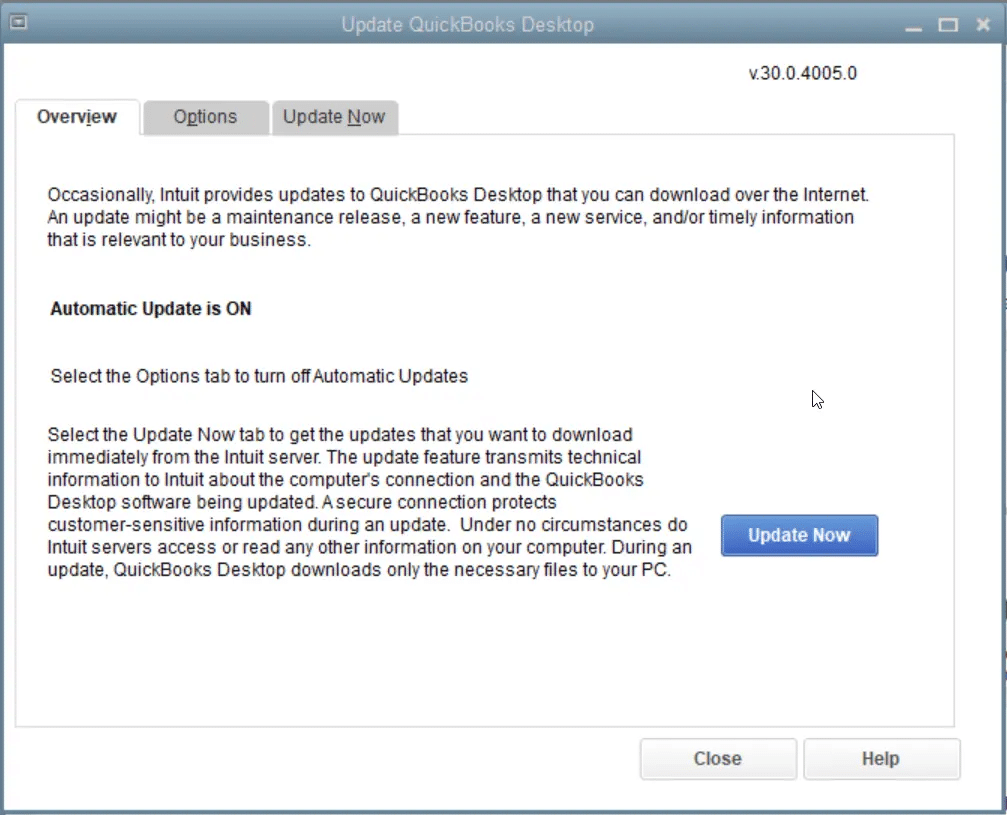
Then from the Help menu, Choose Update QuickBooks Desktop.
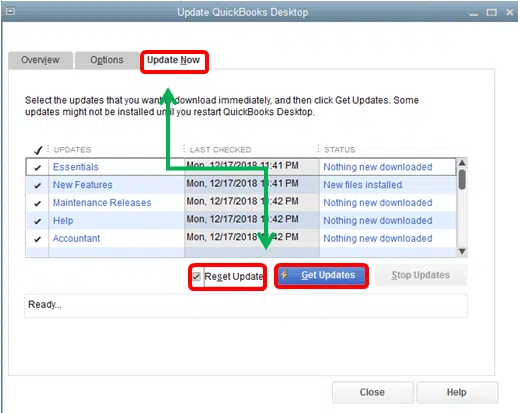
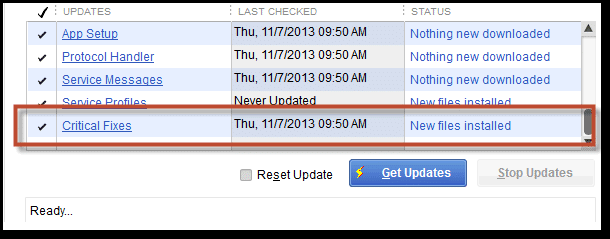
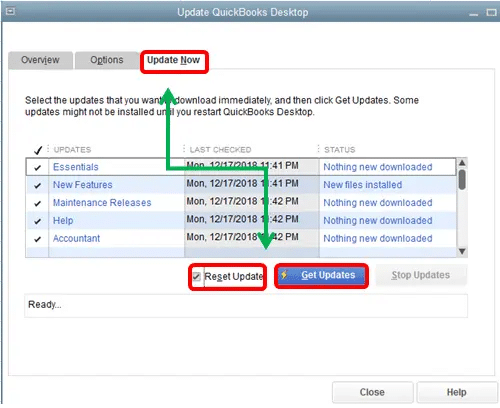
Now from ‘Update QuickBooks Desktop’ dialog box, click Update Now,
Select the Reset Update checkbox. Click on Get Updates.
Restart your QuickBooks application. Install the new release when prompted.
Check if you can open the .QBW file from the QuickBooks Desktop application without any error. But if the error 6155, 0 persists, move to the next solution.
Procedure 3: Try to change the attribute of the QuickBooks company file to not Read-Only.
First of all, confirm that the QuickBooks Company File you are trying to access is not Read-Only. As you can open a Read-Only QuickBooks company file, but will not be able to make changes to it. So, to overcome this problem, you need to change this attribute of the company file.
Precede to the QuickBooks installation directory, then right-click the company file you want to edit.
Now from the drop-down list choose Properties and then unmark the box against Read-Only
Hit the Apply button and then OK to finish the task
Again, try to open the company file and check if the QuickBooks error is fixed. If not fixed, try the next set of steps.
Procedure 4: Use QuickBooks Clean Install Tool to Reinstall the Software.
QuickBooks clean install tool is a tool that can repair a corrupt or incomplete installation of the program so that you can easily access or view your QuickBooks Company file without any difficulty.
Download the QuickBooks Clean Install Tool and save it to a location where you may easily find it
Then, Open QuickBooks_Clean_Install_Utility.exe.
Next, agree to the license terms and choose the QuickBooks Desktop version you are currently using.
Click the OK button.
Now, when you get the message- “QuickBooks is now ready for Clean Install,” install it to the default directory.
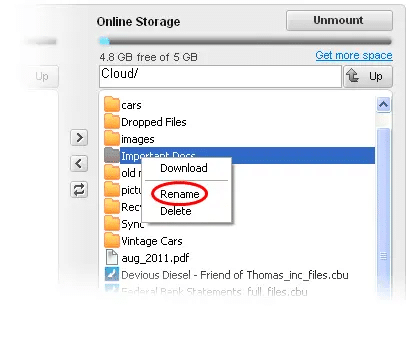
Procedure 5: Changing the .Nd and .Tlg file names
At times, the files related to QuickBooks like the nd and tlg files can trigger certain errors in QuickBooks. Thus, it is suggested to try changing the file names by adding .OLD at the end of the filename. The steps involved in this procedure are as follows:
Start the process by heading to the location where QuickBooks company file is stored.
Further, search for the files having extensions .ND and .TLG files.
Right-click the files and click on the rename option.
Procedure 6: Download and run quick fix my program
Running quick fix my program can fix the issue up to certain extent. The steps involved in this procedure are as follows:
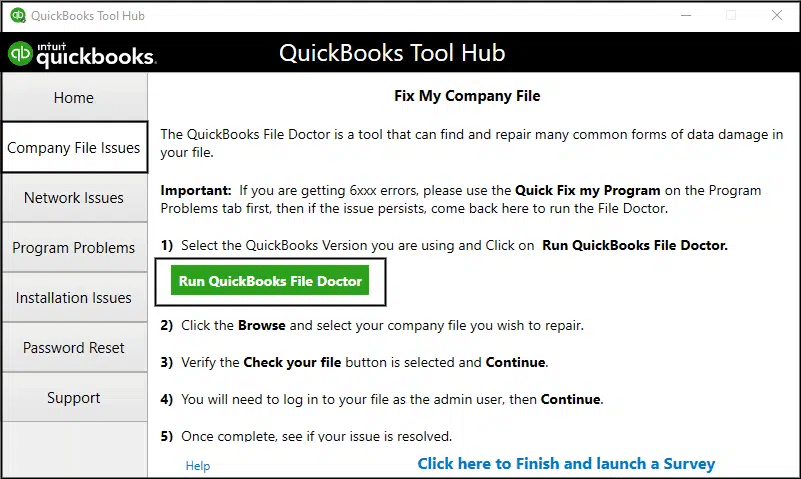
Begin with downloading and installing QuickBooks tool hub program.
Now, head to the program problems and click on quick fix my program.
The process might take some time to complete.
Further, reopen QuickBooks desktop and check if the issue continues.
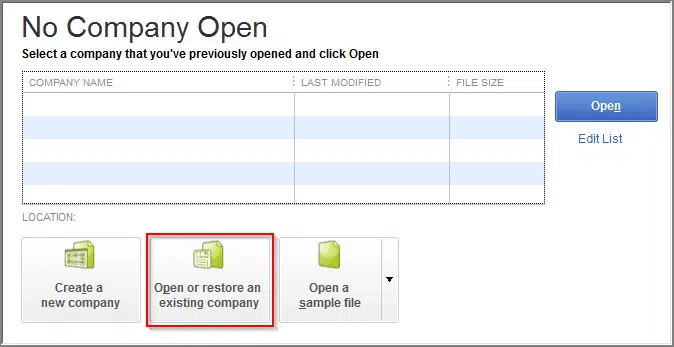
Procedure 7: Copy the company files to desktop
If none of the above procedures helped in eliminating the error from its root cause, try copying the company files to desktop. This can be done as follows:
Right click the desktop and mov to the new tab.
After that, select folder options.
Later on, create a new folder on the desktop.
Once done with that, move to the current company file location.
Furthermore, right click the company file and select copy.
You will then have to open the new folder and right click and click on paste tab.
When you are still unable to access your QuickBooks Company File after following all the step wise instructions mentioned above and you are getting 6155, 0 error messages. Now you surely need to make contact to our certified experts from QuickBooks Error Customer Support Team immediately by dialing our QuickBooks error support phone number+ 1(844)405-0907. Our professionals will technically assist you with utmost dedication to cut the roots of this 6155, 0 error. And in no time, you can get back to your business accounting and financial data from QuickBooks software free from all technical glitches.
Error message 6155 appears when you try to open a company file in the QuickBooks Desktop (QBDT) application. This can be a result of corrupt or incorrect QB installation, opening the company file in old version of QBDT, data damage or corruption in the company file, etc.
What causes QuickBooks error 6155 0?
There are a couple of factors causing this issue: 1. Incomplete installation of QuickBooks 2. Damaged company file 3. Missing company file from the installation directory 4. Company file you are trying to open is a read-only file.
How do I fix QuickBooks error 6155?
To fix this issue, you can update it to the latest release: 1. Open QuickBooks from the help tab and click on update QuickBooks. 2. Select update now tab and wait for the download process 3. Click on exit from the file tab. 4. Open QuickBooks and select yes on the update now tab.
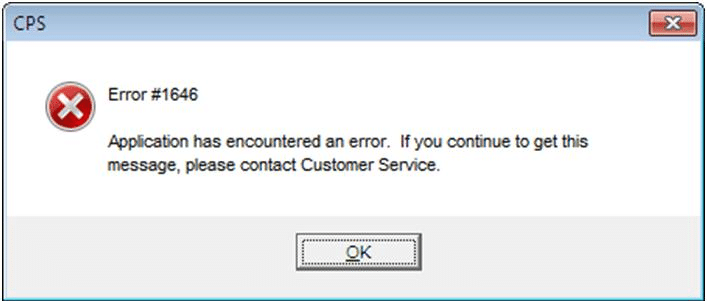
Did you see QuickBooks error code 1646 and can’t find an ideal way to fix it? Well, QuickBooks Error 1646 is the kind of error that usually appears when the user tries to install QuickBooks Premier on a system that already has installed QuickBooks Premier version of the identical year. The prompt message of this error that usually displays on the screen is stated as:
Moreover, there are several other reasons that could create such a blunder. So let us understand more about this error, its causes, and its relevant solutions. Make sure you read this article till the end. You can also connect with our Tech Support team for any sort of further QuickBooks-related guidance, by calling us at +1-888-510-9198.
What is QuickBooks Error 1646?
QuickBooks error 1646 shows up when you try to install the QuickBooks desktop premier version in the PC that already has QBs desktop pro version of that same year or when you try installing QuickBooks on the system, but it has a premier version installed in advance. This error shows up with a warning message that states: “Error 1646 installing quickbooks.msi uninstallation of the update package is not supported”. To understand this error better, make sure to read this segment carefully.
Possible causes of QuickBooks error 1646
The error code 1646 can be extremely irritating for QuickBooks users, as it abruptly ends the tasks. In order to fix this issue, it is essential to identify the causes. There can be a bunch of factors causing this issue, which include:
The temporary folder being used is full
Another reason can be if you are making use of an old version of Operating System
You can further come across this issue if the company file gets locked
Or if the installation procedure isn’t receiving permissions
You have installed Microsoft Net 1.1 SP1 inaccurately
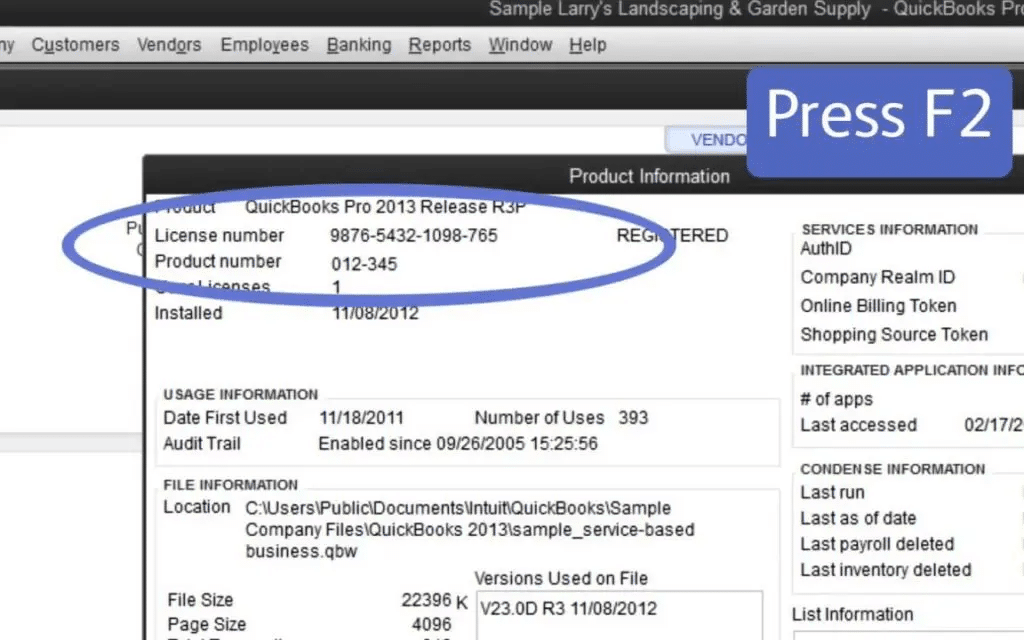
STEP 1: Verify the information of the Product of QuickBooks Desktop software.
Under the process to rectify the error code 1646, you will first have to verify the product information in QuickBooks using the set of steps enumerated below:
At first, launch the QuickBooks Desktop Software.
Then tap on the F2 key on the keyboard. This will display the Product information window in front of you.
In this window you will get all the required information regarding the Product.
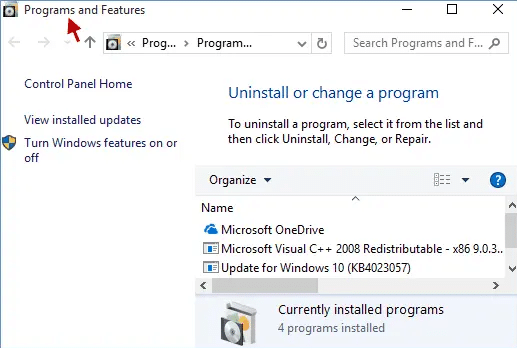
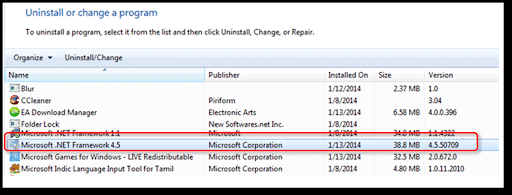
Go to the START menu and then head to Control panel by clicking on it or by typing control in the search box and open the Control panel by double clicking on it.
Next, Select Programs and Features option or you can also select uninstall a program by clicking on it.
STEP 3: Rename the folders of the QuickBooks Desktop installation folders manually.
In this step you have to change the name of the QuickBooks Desktop installation folders which will reflect the hidden files after that change, for this you have to:
Right Click on the folder and add ‘.old’ in the end of the folder name.
This will prevent QuickBooks accessing the folder that is renamed before. As a result of this QuickBooks will make the new folder.
This is the most constructive way to eradicate this QuickBooks Error 1646, in case if it is unsuccessful in rectifying this error, Move on to the Final Step.
STEP 4: Reinstallation of QuickBooks Desktop Software.
When you are done with the above set of steps, try reinstalling QuickBooks software using the set of steps enumerated below:
At first, head to the start menu.
Now, look for the control tab and double click on the control panel.
Heading forward, click on the programs and features tab within the control panel window.
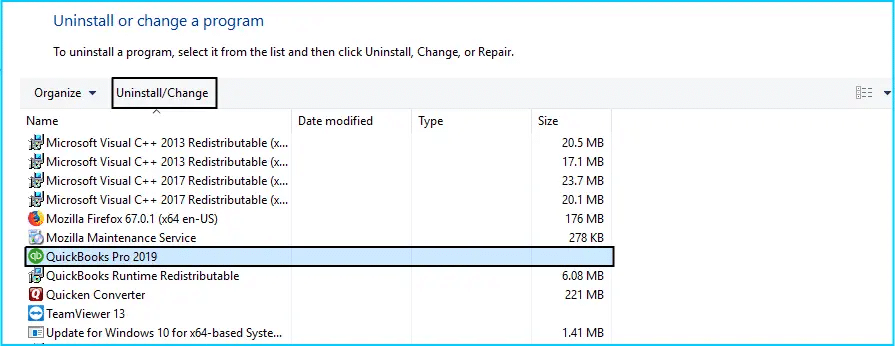
You now have to choose QuickBooks from the list of installed software.
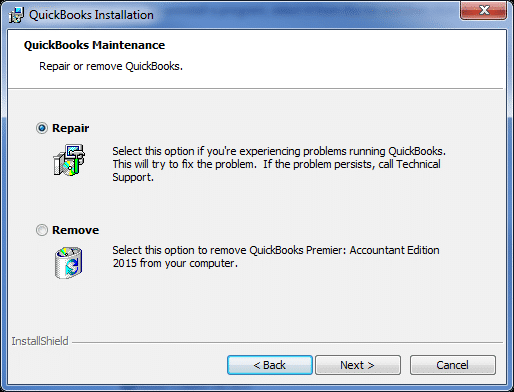
Select Uninstall/change options and also click on uninstall.
Moving ahead, wait for the process to end.
And further reboot the software.
You will then be required to install QuickBooks and ascertain that you have the product and license keys in hand as they will be required at the time of installation.
Now, proceed with the steps ahead for installation and perform the onscreen instructions.
Moreover, launch QuickBooks and check if the issue is rectified.
STEP 5: Uninstall QuickBooks and manually rename the installation folders
Start the process by uninstalling QuickBooks.
Carry out the steps to display the hidden files.
Furthermore, open windows start menu and also look for the file explorer.
Open the same and you can open it by clicking on Windows + E.
You will then have to look for and open the folder that holds QuickBooks company files.
This will be the QuickBooks folder. You can find this in any of the paths enumerated below:
Well, after carrying out all the above-mentioned steps, if the QuickBooks Error Code 1646 still troubles you then without wasting your much time we would highly recommend you to contact our dedicated team of QuickBooks Customer supportNumberat +1-888-510-9198who would provide you the support services in a least possible time to fix this issue.
QuickBooks error code 1646 can often be encountered when you try to install the updates for QuickBooks. This error can be seen with a warning message that states: Error 1646 installing QuickBooks.msi uninstallation of the update package is not supported.
What causes QuickBooks error 1646?
A few common reasons behind the occurrence of such an error are as follows: 1. Damaged QuickBooks company file 2. Windows temporary folder is full 3. Outdated QuickBooks version is being used 4. Microsoft NET 1.1 SP1 installer is installed inappropriately
How do I fix QuickBooks error 1646?
You can try fixing the error using the steps below: 1. Updating QuickBooks and windows to latest release 2. Renaming the installation folders 3. Uninstall and reinstalling QuickBooks
Carrying out a certain task on QuickBooks error=47 with full concentration and suddenly an error message popped up on the screen and disturbed the complete workflow. Did you find this scenario relatable? Well, often while working on QuickBooks, the users come across different errors due to some or the other reason. One such error that we are going to elaborate in today’s segment is QuickBooks error code C=47. Often when the user tries to post the payments to the customers in QuickBooks, this error appears on the screen. At the time of closing and re-opening QuickBooks, this error code=47 can be experienced.
As this is an uncommon error, one might find it a bit problematic to eliminate QuickBooks error=47. However, it can be rectified using some set of steps, which we will be discussing later in this article. To learn more about this issue, make sure to stick around till the end. You can also connect with our tech personnel for any further tech assistance. Give us a call at +1-888-510-9198.and leave the rest on our team of QuickBooks professionals.
Brief into QuickBooks Error code C=47
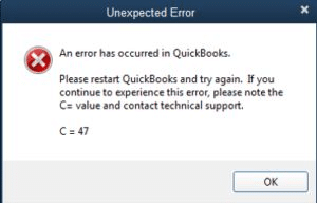
Well, this error can be experienced because of any error in the settings of internet explorer for a few protected websites. The user can also experience a similar issue when carrying out a cleanup of Windows server 2008. This error usually indicates that the software is unable to find the transaction and can’t update it. The reason behind this can be if you try to remove the transaction from a report. You can experience the following error message on the screen stating: Error has occurred in QuickBooks, please restart the computer. Or “An error has occurred in QuickBooks.” Please restart QuickBooks and try again. If you continue to experience this error, please note the C=value and contact technical support. Error: C=47
You can try out the below measures to get rid of the QuickBooks error code C=47.
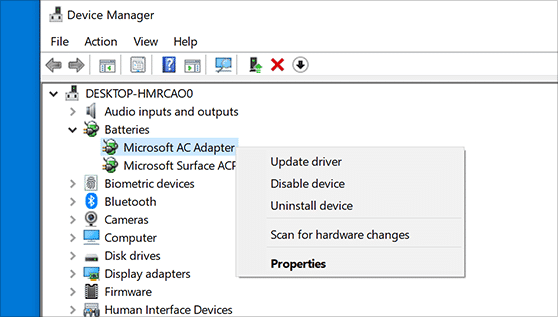
Procedure 1: Updating the Driver Software
Often a mere update for the driver software can help in eliminating the error from its root cause. The user can try to perform the below steps to permanently fix the issue.
Simply start with rebooting the system after the driver is unestablished
Later, configure the driver and let the process end
Now, click on start andon sort device manager.
Once done with that, search for the main seeking outcome and then choose the gadget on which you will employ the driver.
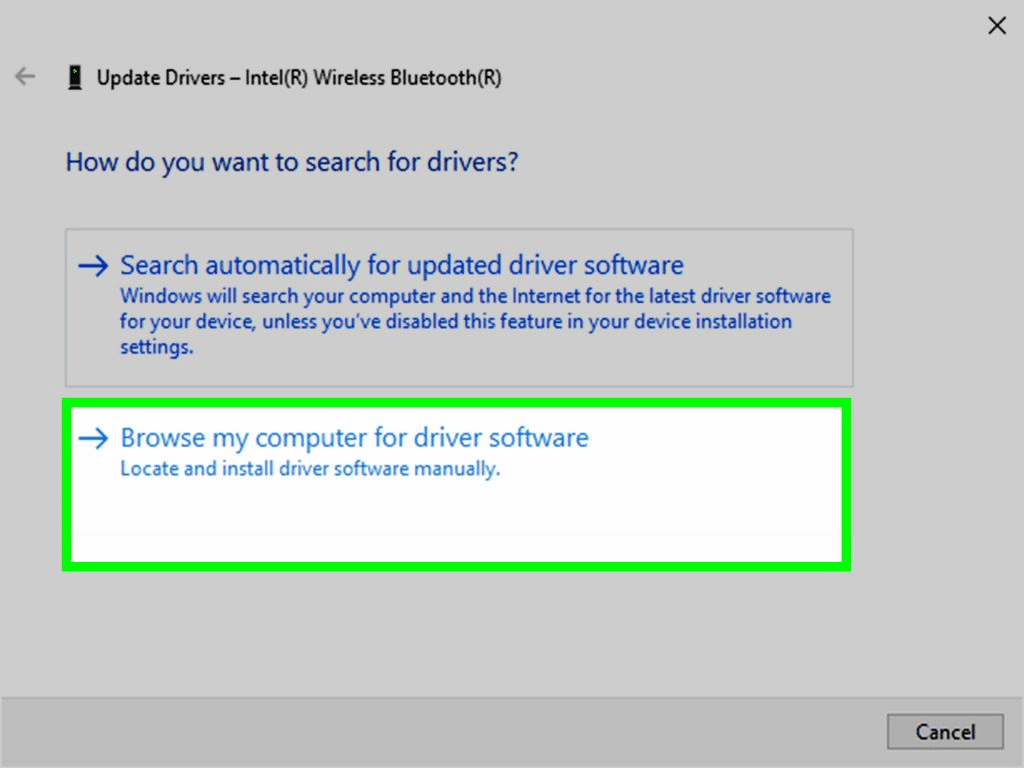
The next step is to update the driver software.
Now, in the new window, browse the system for driver software.
After that, from the list of gadget drivers choose one
Spot the driver that finishes with legacy.
End the process by clicking on next tab
Procedure 2: Scan for viruses to resolve QuickBooks Error Code C=47
At times, viruses and any sort of malware can trigger issues in QuickBooks. Thus, we recommend performing the below set of steps to scan for viruses.
The user needs to scan the system for viruses in case the error message occurs when loading3LXCRtime.dll.
Moreover, perform the onscreen steps and carry out the scan to clean all the junk from the system and fix QuickBooks error C=47
Procedure 5: Work on the Internet Explorer settings in QuickBooks Desktop
If your internet explorer isn’t set as the default browser, then it is probable to land into such an error. Thus, we recommend you work on your internet explorer settings and set it as a default browser.
Eliminating errors in QuickBooks is a tough nut to crack unless you have proper knowledge of the steps involved in fixing them. Towards the end of this segment, we believe that the reader might be able to eliminate the QuickBooks error code c=47 permanently from its root cause. However, if the user is unable to, then contacting our tech geeks at +1-888-510-9198. is suggested. We are a team of technically sound QuickBooks error support. who work round the clock in providing instant support and assistance.
You can face such an error when there are certain misconfigurations in the internet explorer settings. The error code C=47 might further pop-up on the screen when you try to perform a cleanup of windows server 2008.
How do I Fix error C 47 in QuickBooks?
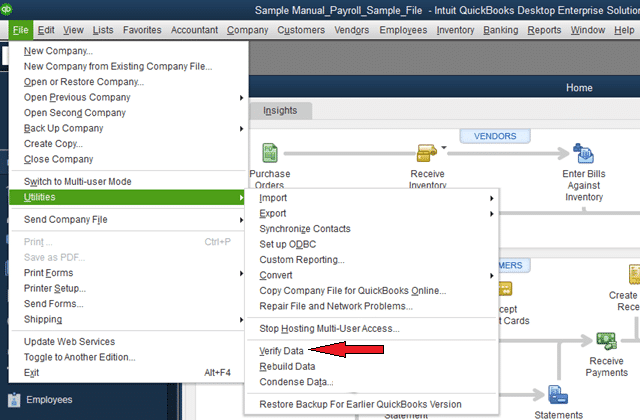
To get rid of such an error in QuickBooks, try performing the steps below: 1. Verify and rebuild data on the company file. 2. Update the driver software. 3. Scan for viruses. 4. Update QuickBooks
How to prevent error C 47 in QuickBooks?
You can prevent this error by keeping a regular backup of your QuickBooks data files, and further update your QuickBooks accounting software on a timely basis. You can also use a reliable antivirus program to protect the system from virus or malware infections.
Bumped into QuickBooks error code C=224 and can’t find an ideal fix for it. Well, need not worry, as we have come up with this segment sharing the complete information to deal with this error in QuickBooks. The QuickBooks error C=224 might be experienced when the user tries to export a report to an excel file. This error is not a common error and can be a bit too technical for the users to eliminate. However, just like other errors code C=224 in QuickBooks, even this error can be fixed using some basic set of steps, which we will be discussing later in this segment. To learn more about this issue, continue reading this article.
For any sort of technical assistance, you can also contact our tech team at +1-888-510-9198 and they will provide you with immediate QuickBooks support and assistance.
As we mentioned earlier, this isn’t a common error. One might come across QuickBooks error code C=224 when trying to back up the company file. Note that the company file in QuickBooks allows the user to store and access the accounting data. However, the file size can at times lead to different technical issues. The user can also experience this error when the software tries to read an incorrect split line for an accounting or memorized transaction. This error basically indicates that there is some kind of corruption in the transaction data.
When Does QuickBooks Error Code C=224 occur?
Often the user can experience the error code C=224 in the following situations:
One of the most common situations can be when taking the backup of the company file
Another situation can be when running a report or opening a company file that is corrupted
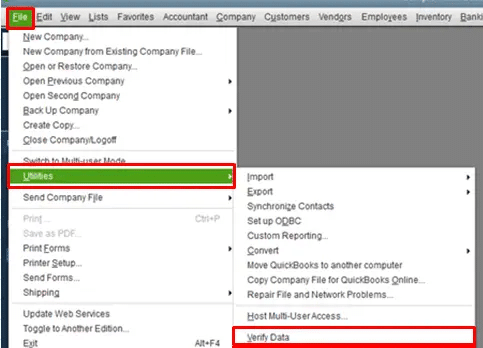
The user can also experience this issue when running the verify data utility or while running the rebuild data utility.
You can also expect similar issue if you are using outdated QuickBooks software
Another reason for the same can be if the transaction log file gets damaged
If you are experiencing any kind of damage in QuickBooks Windows registry files, then it might trigger such an error in QuickBooks
Quick fixes for the Error Code C=224
Now that you know the factors causing the error and other necessary information, it is time to implement a set of steps to rectify the issue permanently. Here are the effective measures that you can take to get rid of this error in QuickBooks:
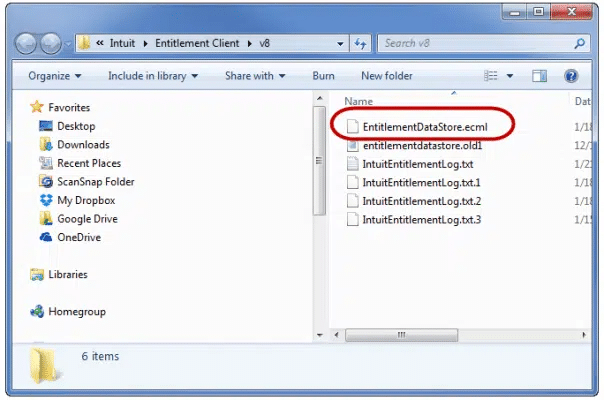
Process 1: Delete the ECML files
At times the ecml files might cause issues in QuickBooks. In such a situation, the user is recommended to perform the below set of steps.
The very first step is to press windows + R tab simultaneously
This will open the run window
Here, the user needs to enter C:\Program Data\Intuit|Entitlment Client\v8
Now, delete theecml file by opting for delete option.
Moreover, close the window when done
Now, close QuickBooks and click on continue tab to register the product again
Towards the end, the user is required to check if the error is resolved or not
After that clear all the previous update downloads by opting for the Reset update.
Pick the Get updates option
And also click on download the new update.
Wait for the download process to finish and then reboot the software.
Perform the onscreen steps and end the process.
This would fix the issue up to certain extent
To conclude!
We end this article right here, with the hope that the information elaborated in this article might help you in fixing the error permanently. However, if you come across an error again or if you are stuck at any point in time, then feel free to contact us at +1-888-510-9198 and our technically sound QuickBooks professionals will help you in eliminating the issue from its root cause.
FAQs related to QuickBooks Error C 224
What is Error C224 in QuickBooks?
QuickBooks error code C=224 is an error related to corrupted company files. It can further be seen when the user is unable to access the file due to various reasons.
How do I fix a reconciliation error in QuickBooks?
To fix reconciliation error in QuickBooks, you can: 1. Backup the company file in QuickBooks 2. Move to banking and then reconcile option 3. Select undo last reconciliation 4. Close reconciliation and open it to perform the process again
What is C and R in QuickBooks?
The C and R under the column on chart of accounts are basically the reconciliation status. C indicates cleared through the bank and checked but not reconciled, whereas R stands for reconciled.