Did you see QuickBooks unexpected error 5 and don’t know what can be done? QuickBooks unexpected error 5 is often seen when the QuickBooks database service user is restricted from accessing the file location. It appears on the screen with a warning message QBW Error: “Got unexpected error 5 in call to NetShareGetInfo for Path“. You can experience such issues due to invalid entries in the Windows registry or if there are system configuration issues. Other warning message associated with this error can be:
Message
Description
Error:
Encountered Unexpected Error 5 in call to NetShareGetInfo for path\\server\file.QBW
This error basically means that the software has experienced a severe application issue, and you can come across this issue when trying to save the company file. There can also be a bunch of factors triggering such errors, to learn what those are, along with the set of steps that can be performed to eliminate them, all you need to read this segment with much care. Or you can also get in touch with our QuickBooks Desktop tech support professionals at +1-888-510-9198 and take their assistance in eliminating the issue from its root cause.
Method 3: Turn off the user account control in Windows
Turning off UAC in windows can help in fixing the issue to a certain extent. Let us go through the steps involved in the process:
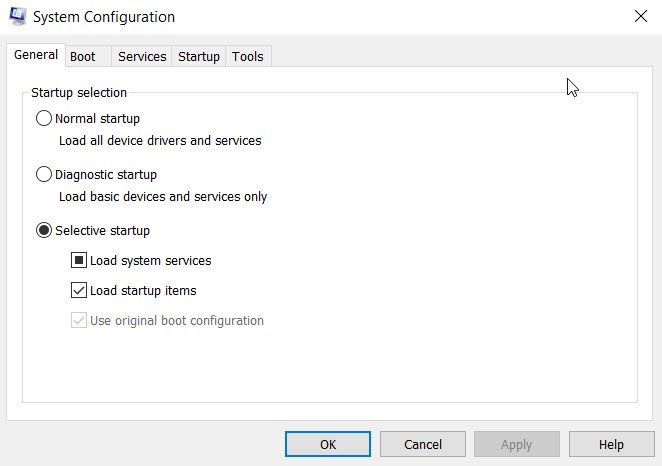
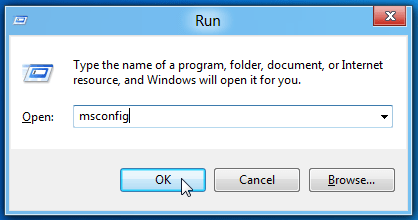
Under this process, press the Windows + R keys to open the run Window.
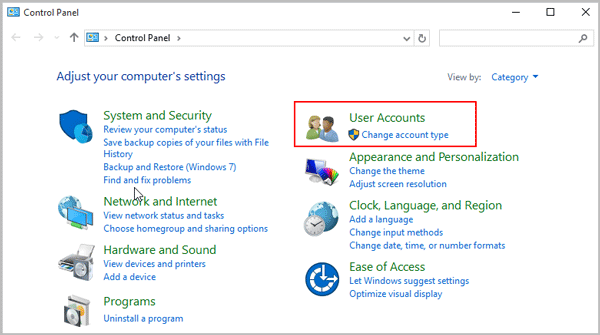
And then, enter the control panel and hit the OK button.
Choose the user accounts and go for user accounts (classic view).
After that choose the change user account control settings.
In case you see any prompts by UAC, choose Yes to continue.
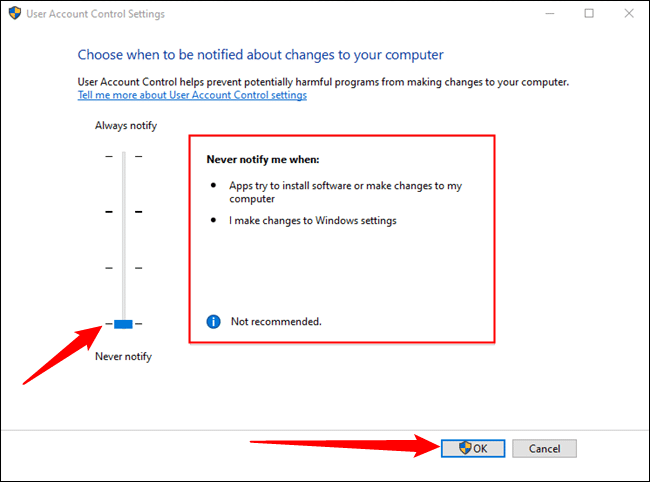
After that, move the slider to set it to never notify.
And click on OK to turn UAC OFF.
You can also set to always notify and go for OK to turn UAC ON (If prompted, select Yes to continue).
The last step is to choose to reboot the system.
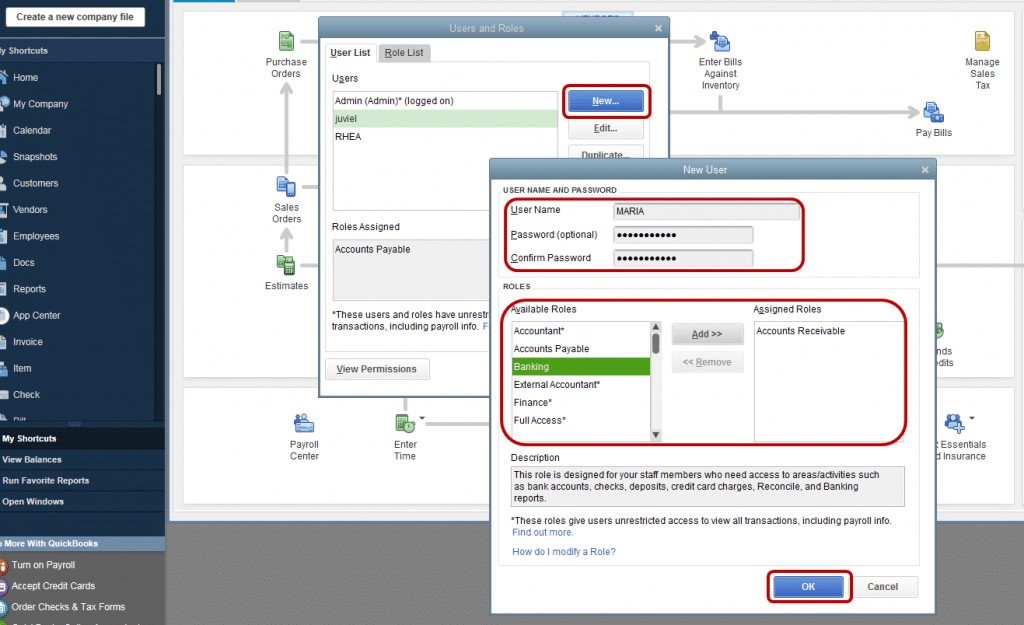
Method 4: Remove the user to fix Unexpected error 5 in call to NetShareGetInfofor path
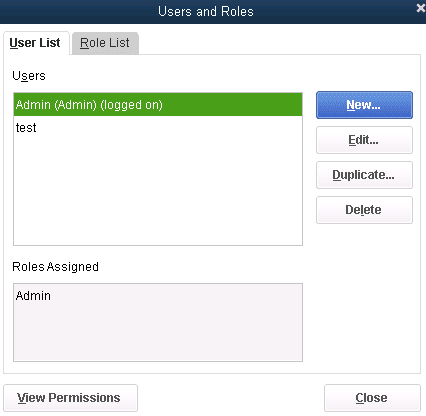
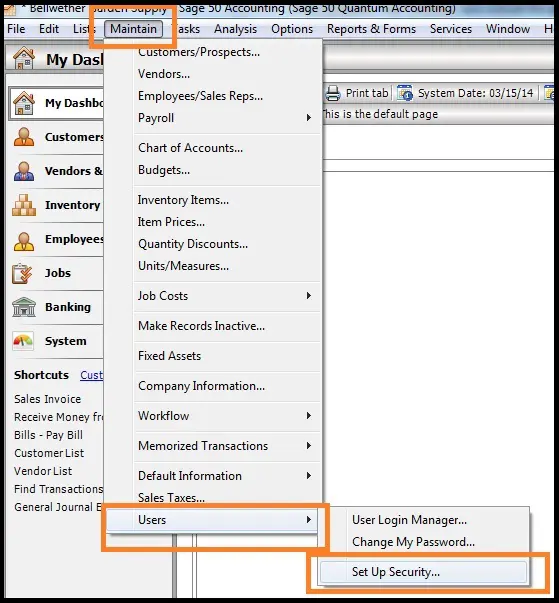
Start with launching the company tab on the QuickBooks desktop and choose the users.
Go for the set-up users and roles.
And select the user in the user list.
The user now needs to select OK for confirmation.
Method 5: Update QuickBooks point of sale (POS)
Updating QuickBooks POS can help you terminate Got unexpected error 5 in call to NetShareGetInfo for path error successfully. The steps you need to perform are:
Here, you need to sign into the point-of-sale system as an admin.
After that, navigate to the help menu and then hover over software update.
Now, choose updater preference.
And go for the general tab.
Also, select automatically download updates.
And hit on notify me to get the notification related to new updates when they are available.
Lastly, choose OK when done.
The software will automatically download and install the latest updates when they’re available.
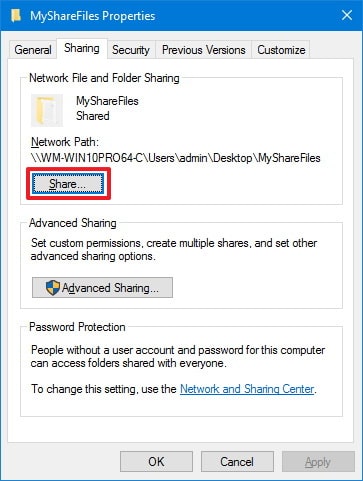
Got unexpected error 5 in call to NetShareGetInfo for path? This is possible, due to disabled file sharing for the company files. The user needs to perform the below steps to fix this issue successfully:
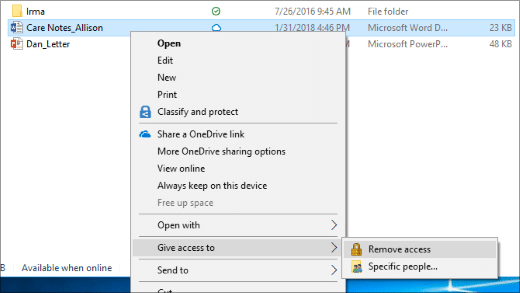
For this process, you need to launch the file explorer and right-click on the folder having the file.
Now, go for the properties and sharing tab.
And, opt for partial or full sharing according to the business requirements.
Lastly, choose to apply and hit the OK button.
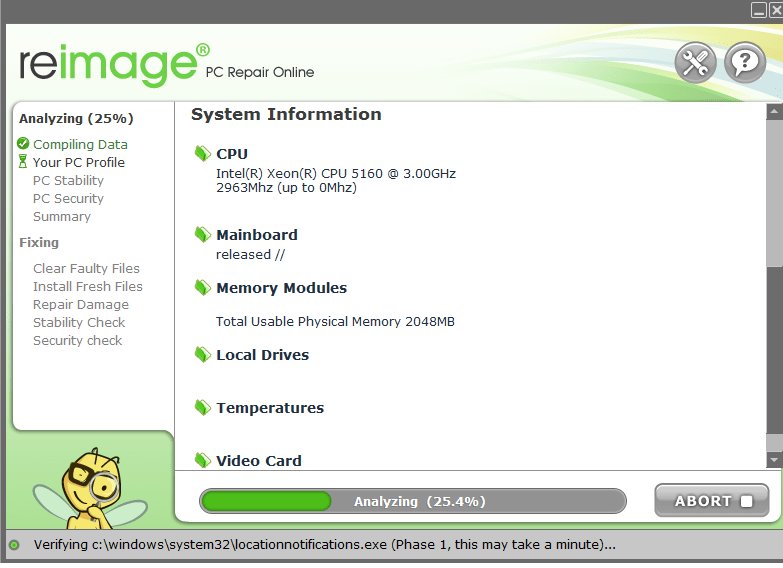
Method 7: Install the Reimage Repair Tool
You can make use of the reimage repair tool to eliminate “got unexpected error 5 in call to NetShareGetInfo” if none of the above steps helped. The procedure to install and use reimage repair tool is as follows:
For this, you need to download the reimage repair tool.
After that save this tool on the desktop.
Head to the file location.
And press yes when the prompt displays on the screen.
Start the automatic scan, and unmark the checkbox.
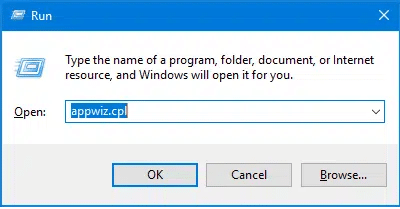
In case an unexpected error has occurred in QuickBooks, you can try fixing it by reinstalling QuickBooks. The steps involved in the reinstallation process are as follows:
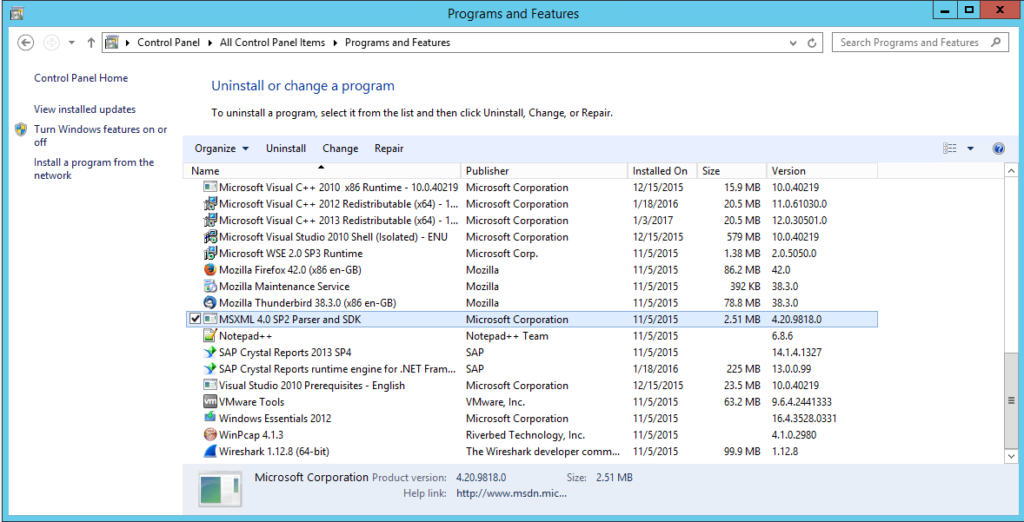
The below process requires you to press the Windows tab and R tab to open run box and look for appwiz.cpl
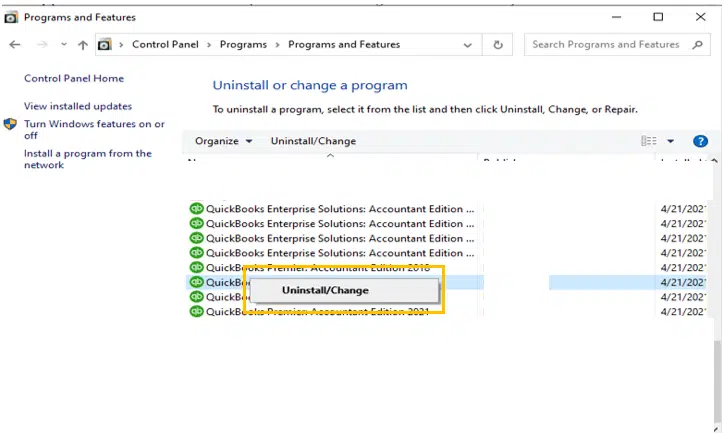
And then, locate and double-click on QuickBooks to remove it and all of its features from the device.
After that, return to the QuickBooks website to download the desktop application again.
Make sure you are downloading the correct version of the application and perform the steps to reinstall the application.
Towards the end of this segment, we believe that the information shared in above might be of great assistance in eliminating the Status code 5 or system error 5 access denied from its root cause. However, if you continue to face the unexpected error, then in that scenario consulting our QuickBooks tech support team at +1-888-510-9198 is recommended. We are a team of certified QuickBooks professionals who work round the clock in providing immediate support and assistance. Feel free to share your queries and requirements with our team.
FAQs Related to QuickBooks got unexpected error 5 in call to NetShareGetInfo for path
Got unexpected error 5 in call to NetShareGetInfo for path. What to do?
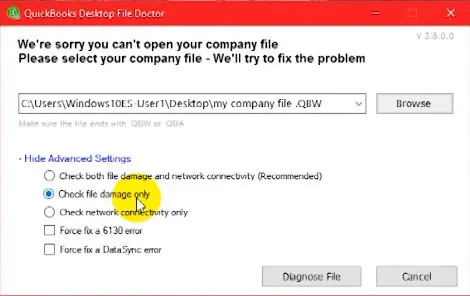
System error 5 occur if the installation of QuickBooks is incorrect. Or the system shuts down forcibly. You can fix it using the steps below: 1. Recreating user file. 2. Also, creating new user. 3. Using QuickBooks file doctor tool. 4. Further, giving file share access
What is error code 5 in NetShareGetInfo?
This error is basically an unexpected error that can be seen when the installation of QuickBooks itself is incorrect. Or if there are invalid entries in Windows registry.
How do I fix QuickBooks Unexpected error 5?
You can try fixing QuickBooks got unexpected error 5 in call to NetShareGetInfo for path by updating QuickBooks point of sale to the latest release or turning off User account control in windows. Moreover, another fixation for the same can be to run QuickBooks file doctor tool.
Converting from any accounting software to QuickBooks requires a conversion tool. Intuit, the developer of QuickBooks offers a conversion tool that helps in converting the company file from another program. This tool usually permits the users to convert the company from a plethora of different programs. Conversion of QuickBooks 2017 to QuickBooks Desktop Premier to QuickBooks Desktop Premier 2018 or Pro 2018 or QuickBooks Desktop Enterprise Solutions 18.0 is possible using this tool. The tool can help you in completing the process without any sort of data security compromise.
To learn more about the conversion tool and the process of using it, make sure to scroll through this segment carefully. For more details, you can also connect with our QuickBooks tech support team at +1-888-510-9198 and they will help you with any further assistance.
As we mentioned earlier, Intuit provides certain tools to users to make the work process easier. One such tool is the QuickBooks data conversion tool. This tool allows you to convert the company file from a variety of different programs. Using this tool, you can do things like conversion QuickBooks 2017 to QuickBooks Desktop Premier 2018 or Pro 2018 or QuickBooks desktop enterprise solutions 18.0.
What it can convert?
You can also conversion a bunch of other information like:
Account, Employee, Item, Customer, and vendor lists
Individual employee wage or deduction information.
Closed or partially closed Sales orders, Purchase orders, and Estimates.
System Requirements for the QuickBooks conversion tool
Keeping your system ready for the tool is essential to ensure that your tool works smoothly with your system. Here are a few system requirements, you need to check upon.
Operating system: Windows 10, Windows 8.1, Windows 8
Processor: 500 MHz Intel Pentium II
Memory: 512 MB
Hard drive: 2.5 GB free space.
Microsoft .NET Framework: Version 2.0 is the least.
QuickBooks Desktop: Pro, Premier, or Enterprise 2018.
Sage 50: Version 2013 and above.
OS should be either Windows 7, 8, or 10, or windows vista, or windows XP.
Make sure to install .NET 2.0 framework.
QuickBooks desktop should be registered and installed properly.
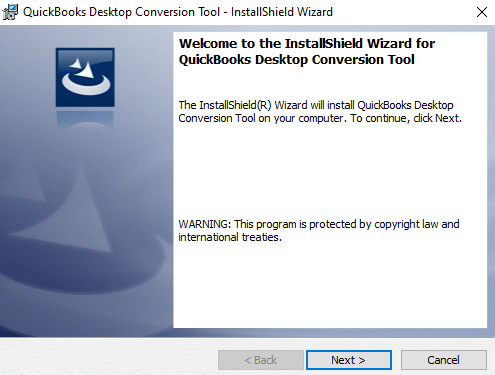
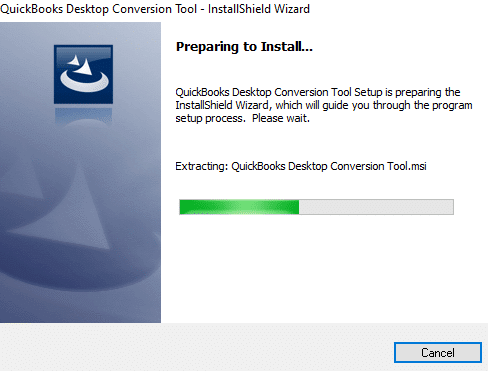
Search for and open the folder having the downloaded file.
After that, right-click on the QuickBooks conversion tool icon and choose properties.
Under the compatibility mode, choose the checkbox for run this program compatibility, and then choose from the dropdown the window operating system being used.
Click on ok tab.
The last step is to right-click the file i.e. QuickBooks ConversionToolSetup.exe and also select run as admin.
What are the limitations of the QuickBooks conversion tool?
Even though the tool is full of features, there are certain limitations as well that you must be well versed with. These limitations are associated with importing data, transactions, and account balances from other financial software into QuickBooks. This would help in converting employee list information which includes the social security number, as well as payroll general ledger account balance information. Note that, there is certain payroll information that can’t be transferred using the tool. This includes paycheck, employee year-to-date information, payroll item, individual employee wage, etc. Along with that, job costing, fixed asset items work tickets, and then close or partially closed sales orders, estimates, and purchase orders might not be converted with the help of a conversion tool.
Now, look for the folder, where the QuickBooks file is to be kept.
After that, click on next.
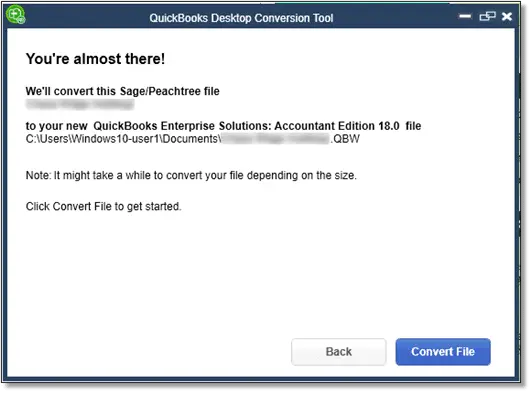
In the new window, verify the accuracy of the information.
After that, click on the convert file option.
The process might take some time.
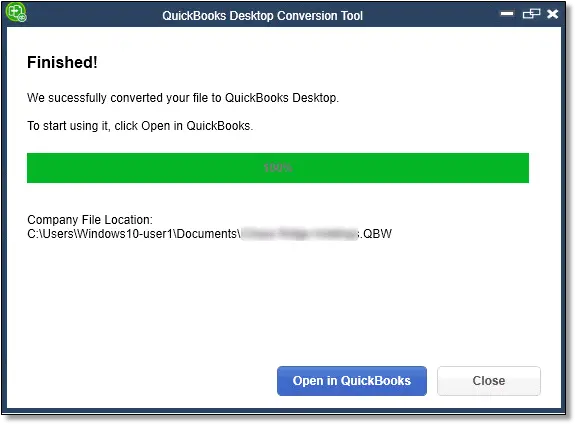
Thus, wait for the message to appear prompting done.
Now, open the QuickBooks file and check for the process completion.
Step 4: Review the conversion
Once the tool performs the necessary steps, it is important to review the data and check if the transfer was a success. We can do this using the steps below:
At first, open the windows start menu.
Search for and open the file explorer.
You are now required to head to the C:\USERS[Your Windows User Name]\My Documents\Intuit\QuickBooks.
The last step here is to review the failed transaction log in the folder and check if the data is transferred or not.
Note that, you can only convert the versions of Sage 50 and QuickBooks desktop from the same region.
Steps to Convert from Quicken to QuickBooks Desktop
We can use the Conversion tool to convert from Quicken to QuickBooks easily. You can convert the Quicken 2011 or the earlier versions to QuickBooks using the steps below:
The very first step is to download the QuickBooks conversion tool using the steps listed above.
In case you are converting to QuickBooks of the same year from Quicken of the same year, then the tool is not needed.
Now, launch the Quicken converter and then click on next tab.
The User than needs to accept the terms in the license agreement.
Also, click on next and install options.
Choose launch quicken converter and click on finish tab.
The user is now recommended to choose I am transferring data from Quicken to windows option and then go for the get started option.
After that, click on open a data file located on this system option.
Followed by, browsing the file by clicking on the select file tab.
Click on the convert and OK tabs.
And now, click on save to save the updated quicken file and also select the exit option.
The Quicken file will not upgrade.
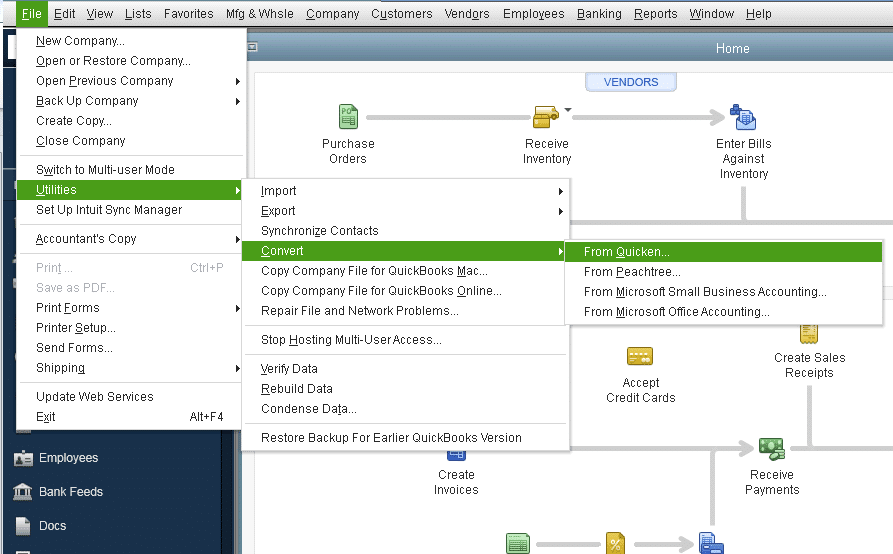
The user will then have to launch the QuickBooks desktop.
And move to the file and utilities tab. You will also have to opt for the convert and from Quicken. option.
Perform the onscreen steps to conclude the process.
To Conclude!
We end this segment right here with the hope that the information shared in above might be of some assistance in making the most of the conversion tool. However, if you still have some queries unanswered, or if you require any sort of technical assistance, then in that scenario, consulting with our tech personnel at +1-888-510-9198 is suggested. We are a team of certified professionals, who work round the clock in providing assistance for all sorts of the software-related queries. Thus, feel free to connect with and share your queries and requirements.
FAQs Related to QuickBooks Conversion Tool
How do I convert QuickBooks to Excel?
You can convert to Excel using the steps below: 1. Go to Reports 2. Search for and choose the report you want to export 3. At the top of the report, choose the export icon. 4. Select export to Excel
What is QuickBooks conversion tool?
QuickBooks conversion tool lets you convert the company file from other programs. This further allows you to use QuickBooks files with software like Excel, word, and other third-party programs.
Why can’t I export from QuickBooks to Excel?
You might face issues in exporting from QuickBooks to Excel if there is a compatibility issue with the version of QuickBooks and Excel.
What format does Excel import to QuickBooks?
You can use a CSV (Comma Separated Values) file, Google Sheets, or an XLS/XLSX file to import information to QuickBooks Online.
Ever came across an error when installing the ABS PDF driver? Well, this error might freeze your process when installing QuickBooks desktop. Or it might stop responding when installing QuickBooks desktop. This error can be experienced if there is any system issue or a slow internet connection. The QuickBooks accounting software uses the ABS PDF to print transactions, which makes it important for the component to be installed. Though the error isn’t a common one, can be fixed using some basic set of steps. To understand how to install ABS PDF driver in QuickBooks, make sure to read this segment carefully. Or you also have the option to consult our technically sound QuickBooks professionals who might help you with the fixation of the error permanently. Get on a call with our team at +1-888-510-9198, and we will help you with the process further.
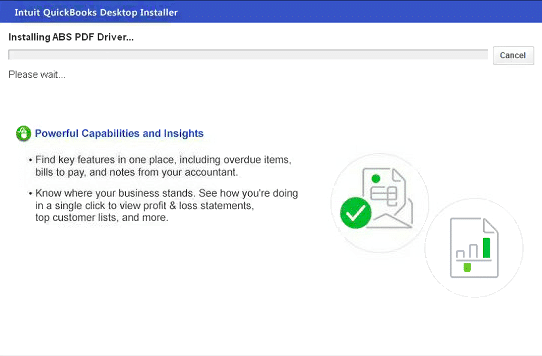
What causes QuickBooks installation stuck on installing ABS PDF drive?
Well, there are certain factors triggering the QuickBooks freezing while Installing ABS PDF driver message or the installer being frozen. Let us have a look: One of the basic factors can be a slow internet connection. Another trigger can be if there is any problem with the device itself.
Steps to fix Error: Stuck on “Installing ABS PDF driver issue…” while installing QuickBooks Desktop
As the error isn’t a common one, there are only a few defined steps that can be followed to install ABS PDF Driver in QuickBooks. In case of any queries, it is suggested to consult a QuickBooks professional. Let us check out the steps involved one by one:
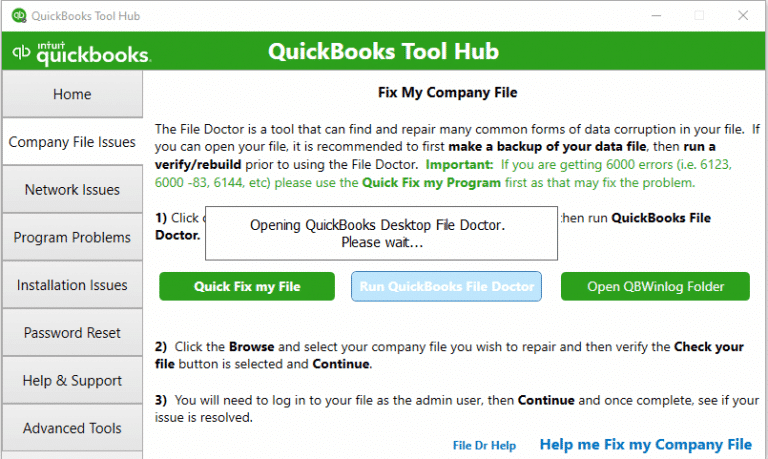
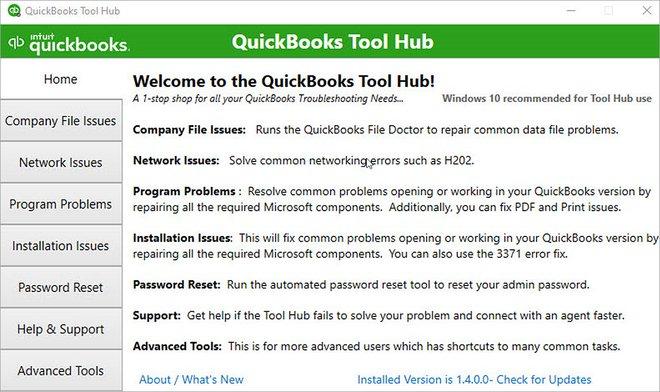
Step 1: Download and install the QuickBooks tool hub
Tool hub can fix some of the major issues in QuickBooks and can be used in this case as well. You are recommended to perform the steps below to download and install QuickBooks tool hub. Let us check it out:
The very first step is to close QuickBooks.
Once done with that, you need to download the QuickBooks tool hub latest version.
Now, save the file where you can spot it easily.
After that, open the file that was downloaded earlier.
The file should look like QuickBooksToolHub.exe
Now, perform the onscreen steps to install the tool hub.
Also, make sure to agree to the terms and conditions.
Once the install process ends, double click the Icon on the windows desktop for opening the QuickBooks tool hub.
Note that, in you are unable to spot the icon, then make sure to search for the same in windows for QuickBooks tool hub and go for the Program.
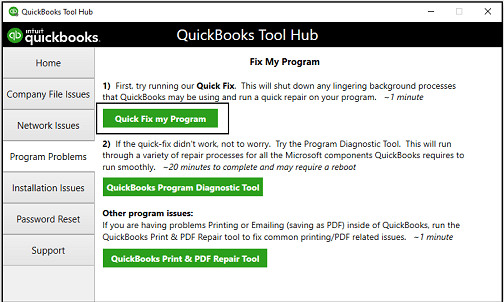
Step 2: Run Quick fix my program from the QuickBooks tool hub
The very first step here is to go for the Program problems in tool hub downloaded earlier.
And then, pick the Quick fix my program.
Now, open the Run command.
And then press Windows + R keys.
The user will now have to enter %TEMP% and hit Enter key.
Select the TEMP Folder
Search for the Prx_usXXrX or Enterprise_usXXrX folder Note: that the X’s on this folder indicates the version, year, and release of the QuickBooks.
Moving ahead, open the Third-party folder and also go for ABS.
The user is now required to double-click ABSPDF412Setup for running the file.
Once you are done with the install process, make sure to open and register QuickBooks.
If the ABS PDF installer continues to freeze or stops responding, then make sure to connect with an IT expert and let the professionals check for the issue in your system.
Now that you know what steps can be performed in fixing the stuck ABS PDF driver error when installing QuickBooks, it is the right time to perform those steps and get rid of the issue permanently. On the contrary, if you are unable to deal with the issue even after performing the set of steps discussed above, then connecting with a bunch of professionals is the only key to success. You can simply get in touch with QuickBooks support professionals at +1-888-510-9198 and ask them to perform the necessary steps for you in eliminating the issue. We are a team of certified QuickBooks professionals who work round the clock in providing instant QuickBooks Support Services.
Some FAQs on How to Install ABS PDF Driver issue in QuickBooks
What is ABS PDF Driver and how to install it?
ABS PDF Driver is a software component that helps in creating and managing PDF files. It is important because it enables users to convert any document or image into a portable document format (PDF), which is widely used for its universal compatibility and security features.
What are some common ABS PDF Driver issues and how can I resolve them?
Some common ABS PDF Driver issues include compatibility problems with newer operating systems, outdated software, and conflicts with other PDF software. To resolve these issues, you can try updating the ABS PDF Driver software to the latest version or uninstalling and reinstalling it.
What if I still face ABS PDF Driver issues even after trying to resolve them?
If you are still confused about how to install ABS PDF Driver issues even after trying to resolve them, you can contact our toll-free support number +1-888-510-9198 for assistance. Our expert technicians will be happy to help you resolve the issue.
How do I update ABS PDF Driver to the latest version?
To update ABS PDF Driver to the latest version, you can go to the software’s official website and download the latest version. Alternatively, you can also contact our toll-free support number +1-888-510-9198 for assistance in updating the software.
Can ABS PDF Driver issues affect the performance of my computer or the security of my data?
ABS PDF Driver issues can sometimes affect the performance of your computer, but they generally do not pose a threat to the security of your data. However, it’s always a good idea to keep your software updated to ensure optimal performance and security. If you have any concerns about the security of your data, you can contact our toll-free support number +1-888-510-9198 for assistance.
QuickBooks error code 12029 is basically a network time-out error that indicates that the accounting software is not able to get an IP address. Furthermore, experiencing this issue is probable when you try to update your QuickBooks desktop or payroll. In order to help you fix this issue immediately, we have come up with this segment sharing the complete set of steps that can be performed to get rid of QuickBooks error 12029, along with the reasons triggering it.
If you are interested in finding out the factors causing this issue along with the fixes for the same, then make sure to go through this segment right away, or connect with our team at +1-888-510-9198 and our experts will surely be able to resolve your queries immediately. Having said that, let us get a better insight into what QuickBooks error code 12029 is all about.
What is QuickBooks Error Code 12029?
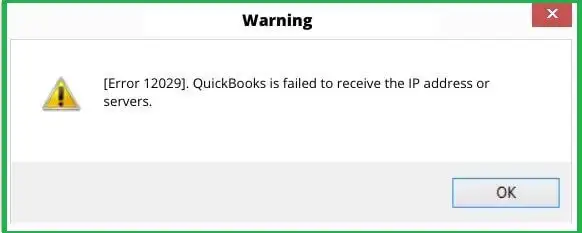
QuickBooks error code 12029 is a network timeout error that can often be seen when you try to update QuickBooks desktop or payroll. It is an update error that indicates that the software is unable to get an IP address and servers are connected through a weak connection. It appears on the screen stating a warning message i.e., QuickBooks has failed to receive the IP address or servers. Such an error usually occurs when the backend servers are unable to revert QuickBooks within the allotted time interval. There are a few factors causing this issue, which we will be elaborating on later in this segment.
What instigates QuickBooks error code 12029?
As we mentioned earlier, one can come across this issue in QuickBooks due to a handful of reasons, which we have listed below. Note that, there are both internal and external factors causing this issue. Let us understand one by one:
External causes
One of the basic external causes can be downloading the QuickBooks payroll update.
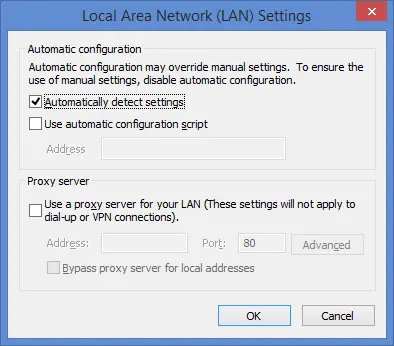
Moreover, if the firewall or internet security obstructs QuickBooks from accessing the server.
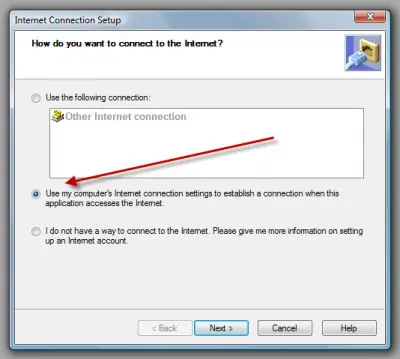
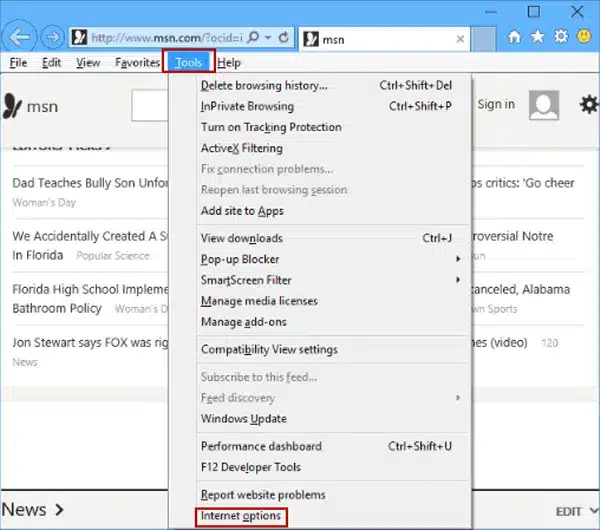
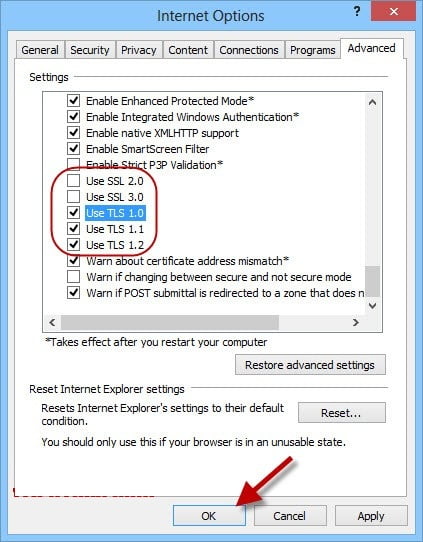
You can also experience a similar issue if the default browser is not Internet Explorer.
Or if the internet plan expires.
Another possible cause can be incorrect SSL settings.
Internal causes
For internal causes, when QuickBooks software itself fails to connect to the internet, such an error might trigger.
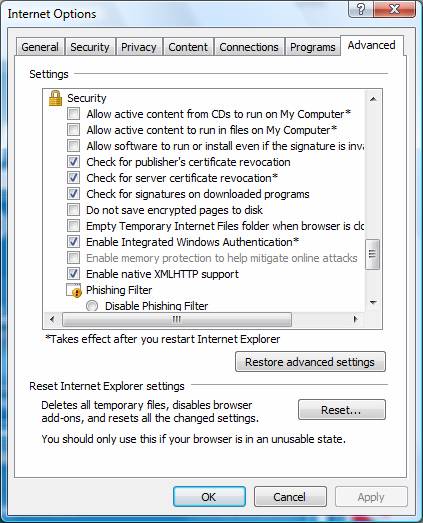
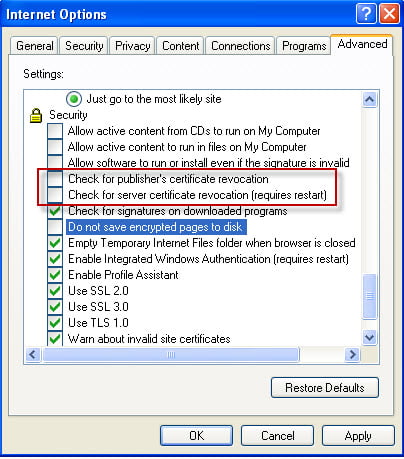
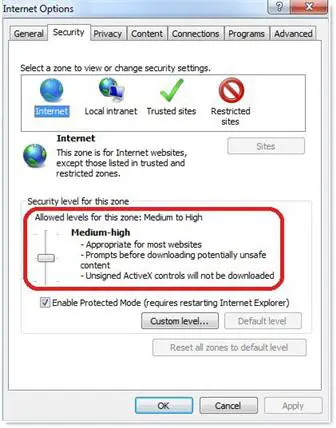
Method 8: Check the security settings of the Antivirus and Firewall
In case none of the above steps helped, try to determine whether some security software is preventing the download process. This issue might occur due to the antivirus or the firewall settings. Check out the below steps to fix this issue:
The QuickBooks file doctor tool will automatically configure the firewall and open the ports.
Check whether the QuickBooks error code 12029 continues.
Get in touch with experts!
Experiencing errors is pretty normal when it comes to software that is loaded with features and functionalities. However, what matters is to eliminate the error before it creates further trouble. Thus, we believe that the user might be able to deal with the error code after performing the steps listed above. If in case the user is unable to do so, or if the user requires our assistance at some point in time, then, in that case, consulting our tech support team at +1-888-510-9198 is recommended. We have a team of certified QuickBooks professionals who work round the clock in providing assistance related to QuickBooks accounting software. Our experts will help you in eliminating the issue from its root cause. Thus, feel free to connect with our professionals.
QuickBooks error code 1903 is often experienced when you are trying to install QuickBooks desktop or when opening it after the installation of the software on the system. This error is a technical error can be considered as a runtime error. You can also experience this issue as a result of .Net framework. Moreover, it interrupts in opening the program and also freezes the software.
There can be a bunch of other factors triggering such an error in QuickBooks. To learn what those factors are, along with the steps to eliminate them, make sure to read this segment right away. Or you can also speak to our technical support professionals at our toll-free +1-888-510-9198 and ask our team to eliminate the issue of QuickBooks error on your behalf.
What instigates QuickBooks error code 1903?
In order to eliminate the error from its root cause, it is essential to understand what factors trigger such an error. Let us have a look:
A basic factor causing this issue can be improper QuickBooks installation
Or if the windows aren’t working properly
Another trigger can be if there is any issue with the Microsoft .Net framework
The user can also experience this issue if the components are damaged, which includes the Microsoft MSXML and C++ files
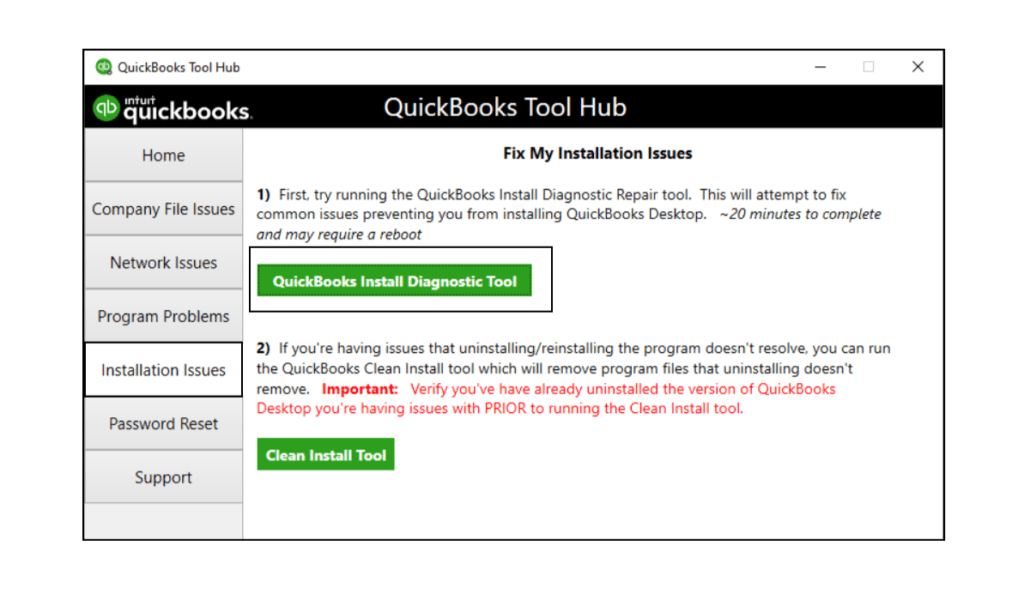
Solution 3: Use the QuickBooks install diagnostic tool
Often the errors can be resolved using the tools provided by the QuickBooks software itself. One can try eliminating this error by using the install diagnostic tool from the tool hub.
Step 1:Download and install QuickBooks tool hub
Start the process by downloading the QuickBooks tool hub
Once done with that download folder by pressing ctrl + J
Now that you know the steps that are to be performed to eliminate the issue from its root cause, it is the right time to implement the steps to get rid of the issue. However, if you are stuck at any point in time or if you require any further assistance in fixing the issue, then feel free to connect with our QuickBooks tech support professionals at our toll-free +1-888-510-9198 and they will help you in getting rid of the issue permanently. We are a team of experienced QuickBooks professionals who provide immediate support and assistance for all sort of QuickBooks-related issue.
FAQs related to QuickBooks error code 1903
How do I fix a QuickBooks error code?
For this, you need to: 1. Close your QuickBooks. 2. Download our QuickBooks Tool Hub. 3. Open the file you downloaded (QuickBooksToolHub.exe). 4. Follow the on-screen steps to install. 5. When the install finishes, open the tool hub on your Windows desktop. 6. Select Program Problems. 7. Click Quick Fix my Program.
How do I fix QuickBooks desktop installation errors?
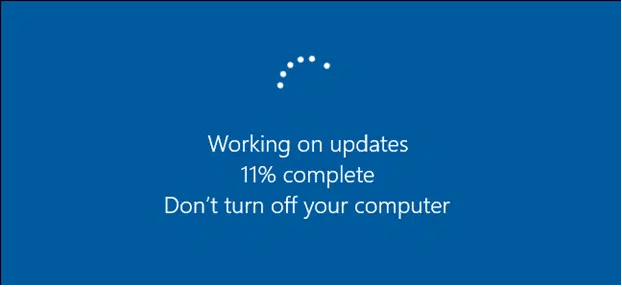
Go to the tools hub and select installation issues. Click on QuickBooks Installation Hub and make sure not to close the window while the process is going on. It will take 20 minutes or less. You can ‘Restart your computer’ once the process mentioned above is ‘Complete’.
How do I uninstall and reinstall QuickBooks Desktop?
1. Remove QuickBooks a. Open Windows start menu b. Open control panel c. Choose programs and features or uninstall a program d. Choose uninstall or change and hit next. 2. Install QuickBooks Desktop again
How do I reinstall QuickBooks without CD?
You can also install QuickBooks on a new computer without disk installation. To do so, visit https://downloads.quickbooks.com/app/qbdt/products and download your QuickBooks version. Save the download file where you can easily find it to run and install.